Thanks for stopping by today!
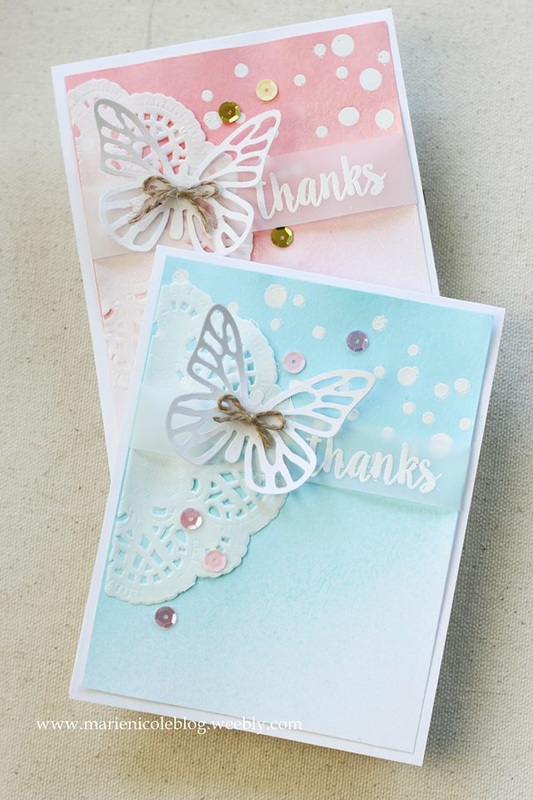
I made a few cards recently using Tattered Angels' Glimmer Mists. These mists are so fun to play with and you can get so many different styles and looks out of them! I made a few cards that are more on the Clean and Simple side. First, I took my Heidi Swapp Confetti stencil and stenciled in some circles at the top of the card using Ranger's Perfect Medium Pen. It puts down a clear, sticky ink similar to VersaMark that you can use to so some embossing with. Then I sprinkled some white embossing powder over the circles and heat embossed them. Next I took my mists and misted the top of the cardstock. I wanted a heavier concentration of the color at the top and have it gradually lighten towards the bottom. The colors I used were Wedding Pink and Patina. Since I embossed first, it created a resist. I just wiped off the mist on top of the embossed circles. Next, I cut a paper doily in half and adhered it to the side. For the sentiment I stamped the word "thanks" on a piece of vellum and wrapped it around the cardstock and adhered it in the back. I cut two butterflies with my Sizzix and placed them next to my "thanks" sentiment. Lastly, I took some coordinating sequins and added them around the butterfly and doily. 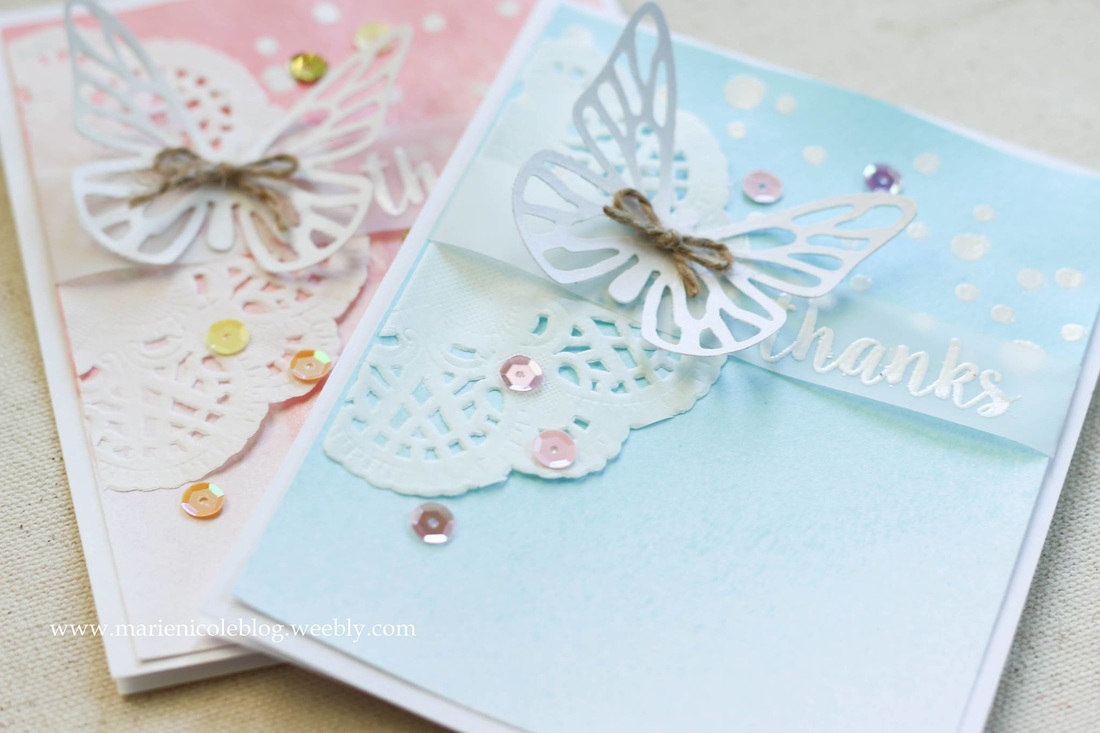
Hope you enjoy today's cards!
Happy Crafting! Here's a few of the products I used:
2 Comments
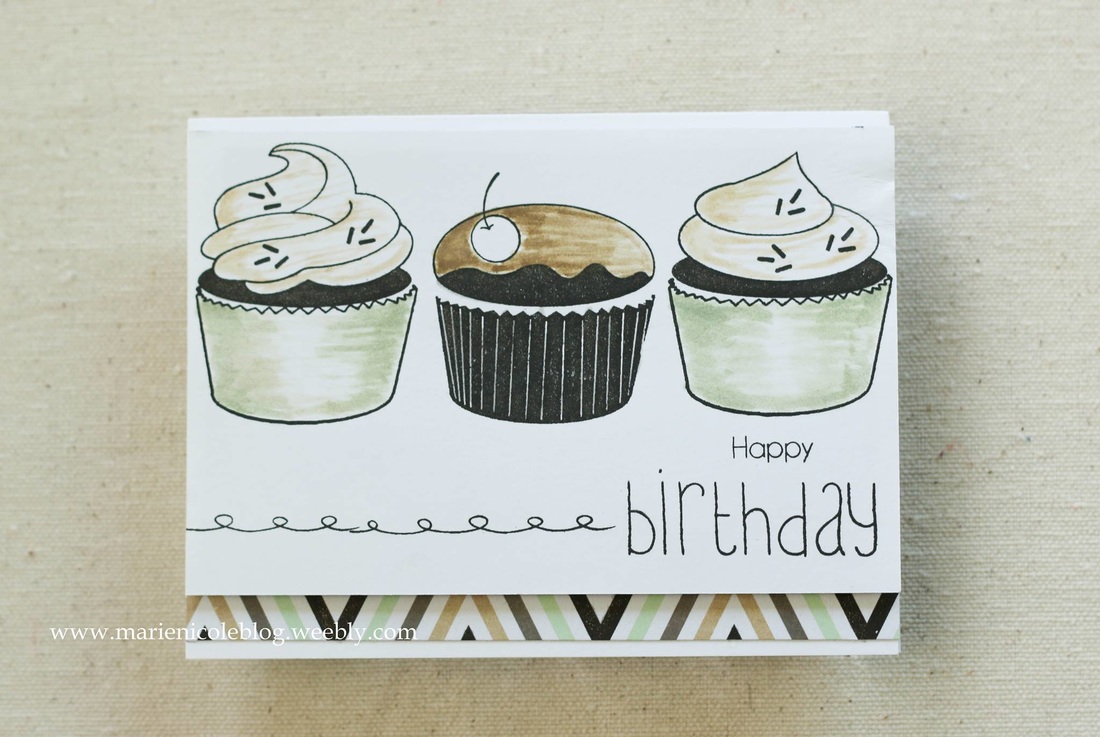
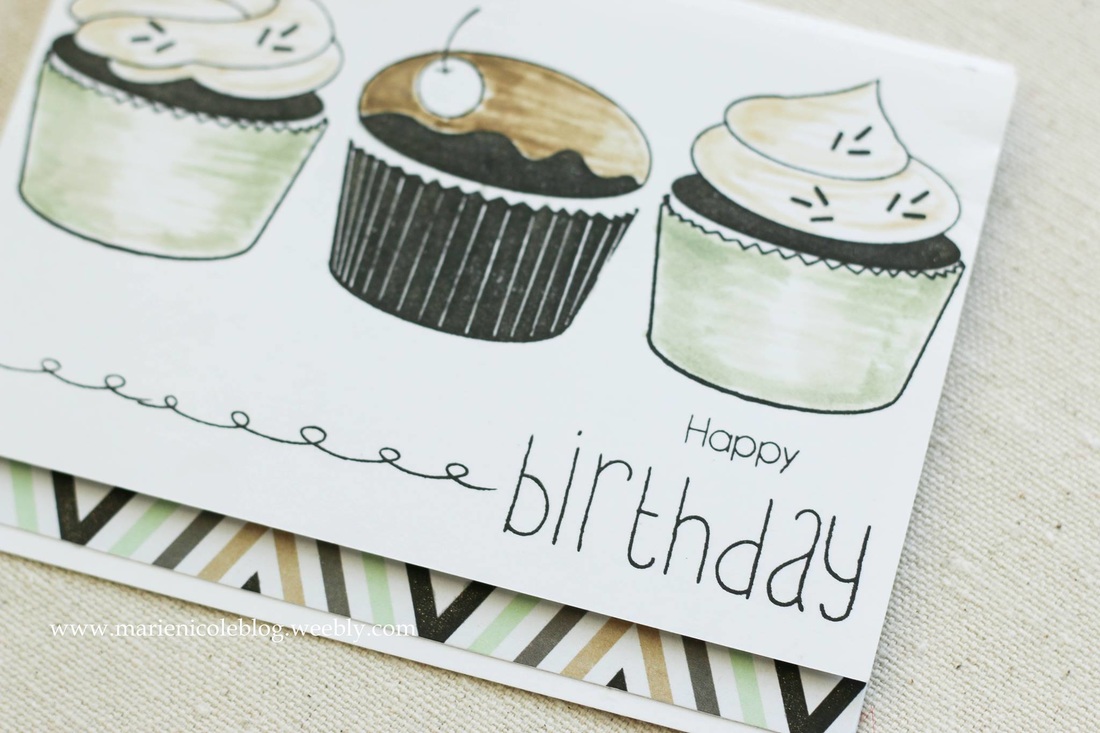
This is a quick easy card I created a while ago. I just used Avery Elle's Cupcake stamp set and stamped three cupcakes using Versafine Black Onyx Ink.
I colored them in with Distress Inks. I picked the colors to coordinate with the strip of patterned paper along the bottom. I used Gathered Twigs, Peeled Paint, and Antique Linen. I used a different stamp set to stamp out the "happy birthday" along the bottom. The cardstock layer that the cupcakes are stamped on is popped up on some craft foam. Lastly, I added some Wink of Stella to the cupcakes for some extra shimmer. 
Thanks for stopping by and Happy Crafting!
Im linking this project up with: Simon Says Stamp's Wednesday Challenge Check out a few products I used!
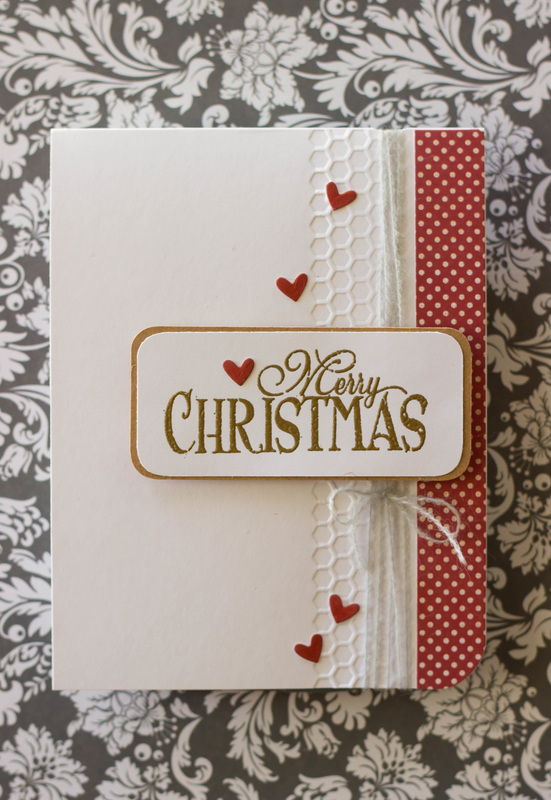 I have a very simple card to share with you today. Sometimes you just don't have a lot of time to whip something together, but that doesn't mean it can't look nice! I always try to get a head start on my Christmas cards because I definitely am not the kind of person who likes being in a rush last minute. For this card I just took a white card base, and adhered some red polka dot paper on one side. Then, I rounded that bottom right corner. I thought it needed a little bit more, but didn't want it to be too overdone, so I just ran it through my Sizzix with a small honeycomb embossing folder. Then, I added some string for a little more texture. The sentiment is stamped and embossed in gold, and matted on some kraft cardstock. The edges of that is rounded, as well. I then adhered the sentiment over the string with some foam adhesive. For a finishing touch and to tie the red together, I added some Sizzix cut hearts that I colored with some Distress Ink. Again, its simple, but it would be an easy one to make multiples of!   These days my little guy keeps me pretty busy. I'm not complaining at all, but it definitely leaves me with less time for crafting! This sweet little card looks simple, but I made it over the course of several days.
My craft room is also my laundry room, so once in a while when Im in there throwing in a load of laundry I'll do a little stamping or inking. Multi-tasking, right? Well, at least it makes doing laundry a little more fun, if anything! I started out by stamping the scrolling design in Peacock Feathers Distress Ink. Then, I also inked up the large heart that I die cut with my Sizzix. I also die cut the tiny hearts and the scalloped borders, and inked them up too. I played around with several different sentiments but decided a simple "thank you" on a banner looked best. I always like to have some nice Thank You cards on hand. After all the pieces were assembled it was just a matter of arranging them on the card front. Once I was happy with the arrangement, I adhered them in place. I also added a touch of stickles to the tiny hearts, just for some extra sparkle. Who doesn't love sparkle? Happy Crafting! I am also linking this card to Simon Says Stamp's Wednesday Challenge! 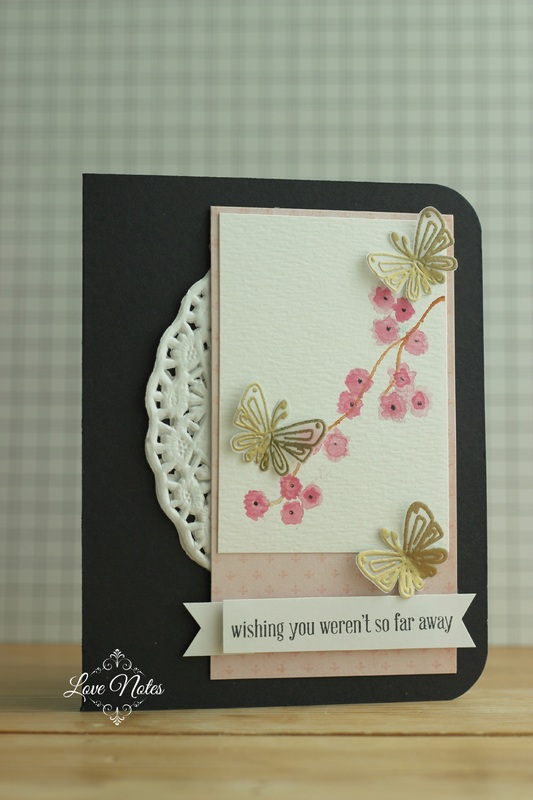 There is one street in the neighborhood where we live that had some beautiful flowering trees all along the street. I'm not quite sure what kind of trees they are, but the blossoms are in full bloom right now and they are absolutely gorgeous! I love taking a walk down the street and taking in their beauty. The blossoms were somewhat my inspiration for the watercolor on this first card. After painting the flowers, I adhered them down to some light pink patterned paper. Then, I stamped the little butterflies on vellum and embossed them in gold. I'm linking this card to Simon Says Stamp's Wednesday Challenge blog. 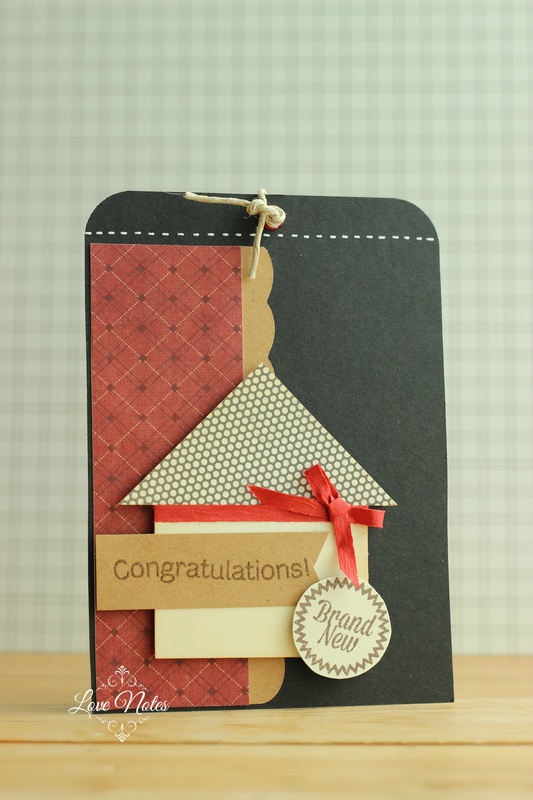 This next project I made using the sketch from Mojo Monday. I know its not a card, but hopefully it still counts? I thought it would be a perfect tag to put on a housewarming gift of some kind. Its pretty simple, but it would be cute to put a lining on the back to write a special note on. Well, that's my projects for today. Happy Monday! Some products I used:
 I had good intentions on making a few cards for various Wednesday challenges, but since I ran out of tape adhesive last night (while making this card), I might have to take a break for a few days. Or at least until I can run out and get some more.
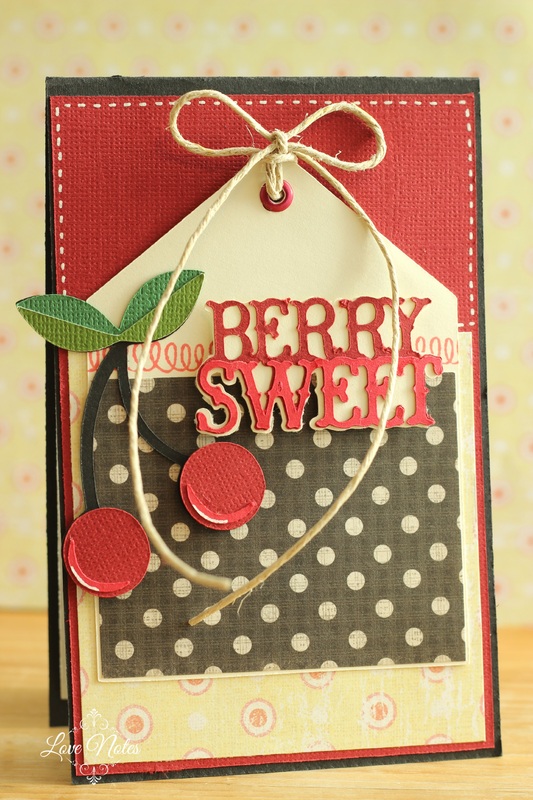
I was inspired once again to try a tall and skinny card, like the one I made for Mojo Monday. This card is 3.5"x5.5" and will fit in a regular A2 envelope. The cherry, sentiment, and tag were all cut with my Cricut. The only stamping I did was the little loopy border behind the sentiment. I used my white gel pen to add just a bit of detail to the cherries and to add a dash line around the top. I used my Crop-A-Dile to add a red eyelet to the top of the tag, and ran some twine through for a bow. The cherries are getting me thinking of all the fresh cherries that we will hopefully be able to enjoy this summer, as long as we don't move before they are in season! 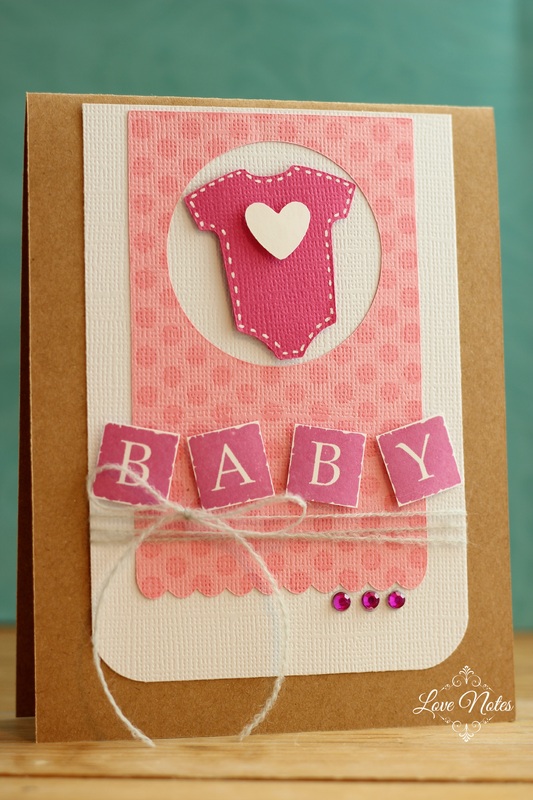 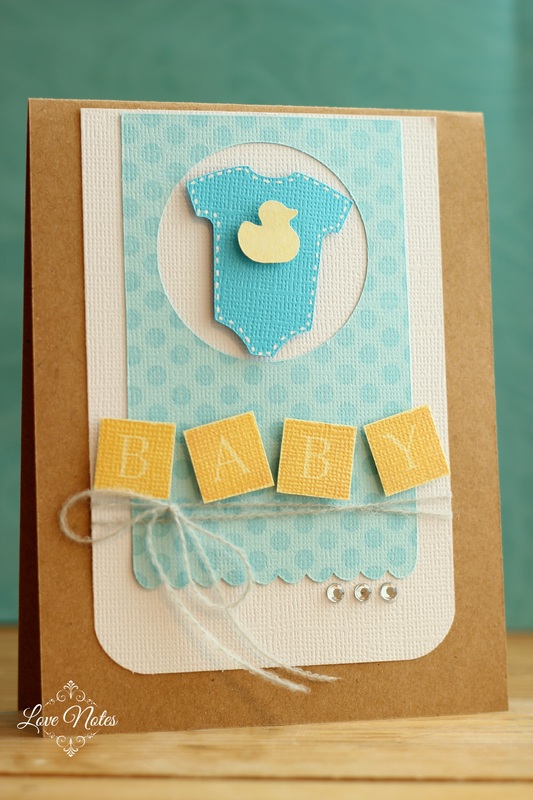 I'll just answer everyone's question off the bat to start out... NO, I do not have any particular person in mind for these cards. I get excited when someone announces a pregnancy, too, but that's not the case here. I just found some cute little onesie images on my Cricut machine and decided to put them to good use.
I cut out the onesies and also the little hearts and duckies that I adhered to them. I added some white dash lines around the onesies to help them stand out. The polka dot backgrounds were also cut with my Cricut. I stamped the polka dots with VersaMark ink. I just wanted a subtle pattern- nothing too bold that would overwhelm the overall card. I then added a string and bow before taping all the layers together and onto the background. The word "baby" was stamped and cut out, and added with foam squares. The last thing I did was to add a few tiny rhinestones to offset the bow. 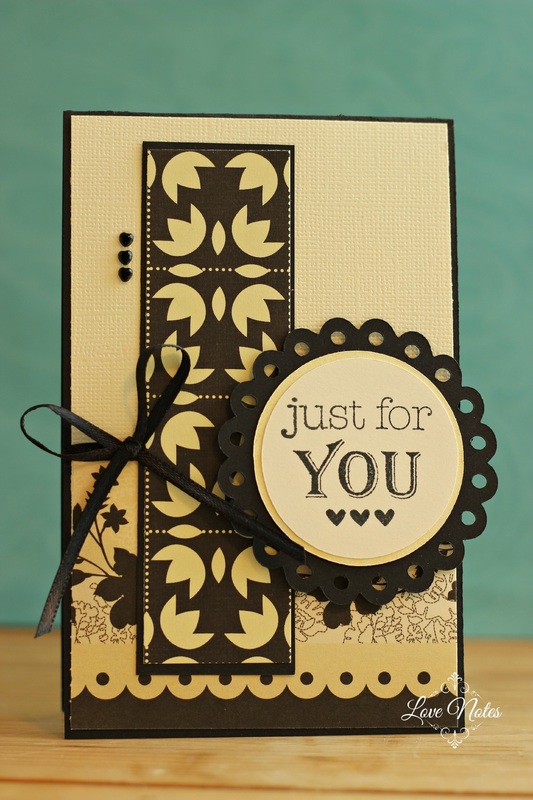 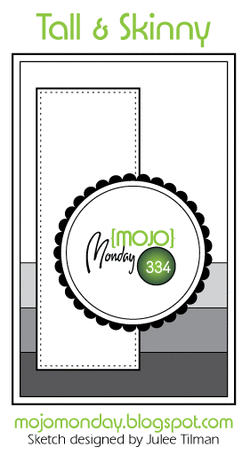 Here's my take on today's Mojo Monday sketch. Go me for actually following the sketch this time, right?
I've never attempted a tall and skinny card before so this was fun! My card is 3.5"x5.5", and it fits in the standard size A2 evelope, even with the sentiment a little off the edge. I really just used some scraps on this one. I found all coordinating papers in my scrap bin and sized them to where they needed to be. The circles were cut with my cricut. The sentiment is stamped and I added three tiny heart embellishments at the top left corner of the long rectangle strip. I'll admit the patterns on the papers were never my favorite, but seeing them on this card- I love it! I'm really enjoying my "just for you" sentiment as well. Its so versatile as a card stamp. It would work for a number of different occasions. Happy Monday! 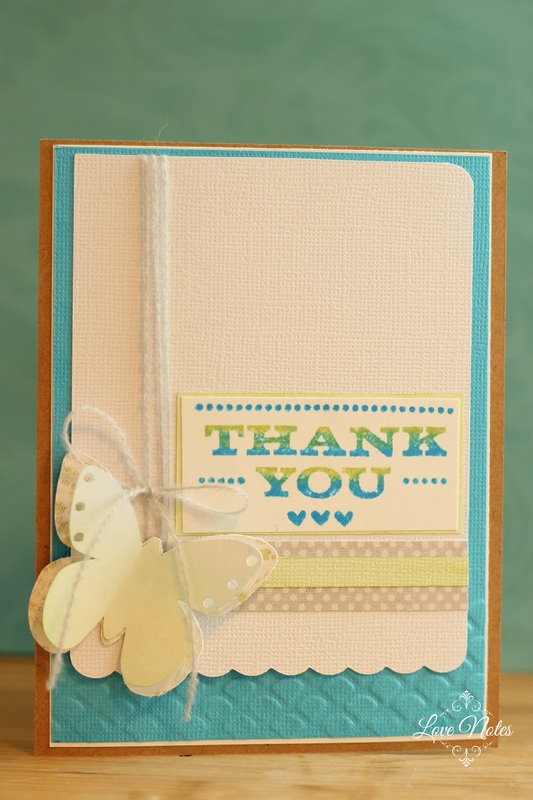  I love the sketch challenges they offer at Operation Write Home. Basing a card layout on a sketch always helps me get out of my ruts of repeating the same type cards. I have learned though that I have a slight problem strictly adhering to a sketch. I start out with good intentions to follow it as-is, and then it usually turns into something totally different.
This card follows the sketch's vertical and horizontal lines with an embellishment in the corner, but that's about it. I dry embossed the bottom part of the background paper just a bit to give it some texture. Then, the white background was cut with my cricut, and I rounded the top right corner. I also cut the butterfly with my cricut. I cut two butterflies and glued them together, then bent the top one just a bit to give it some dimension. I hope it's not too much dimension for OWH, though. I then added the string and bits of paper, and stamped the sentiment. 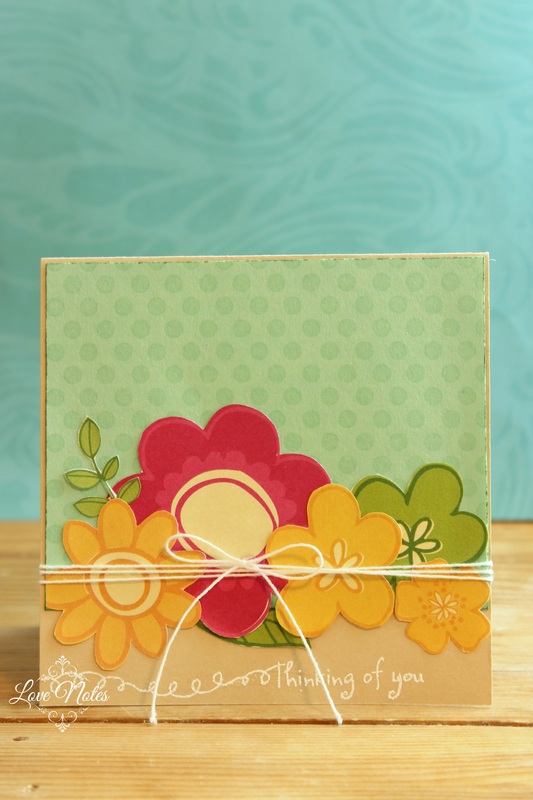 The Card Concept website has a challenge theme this week of using florals on your card. How perfect in anticipation for spring! I tried to keep this card CAS (clean and simple), with a light brown cardstock for the base. I stamped the green background with VersaMark ink and my polka dot background stamp. I had some pretty floral paper that I cut the flowers from, and arranged them along the border of the background. The sentiment is stamped and heat embossed. Check out the challenge page here! http://thecardconcept.blogspot.ca/  |

Pin it!

AuthorSo glad you found me! This blog is my little space where I can share bits about my life and my latest crafting projects (mostly handmade cards). My goal is to share, inspire, and to be a positive presence in the creative community. 

Find me on Instagram!Archives
January 2018
Categories
All
Link Love
 

|


 RSS Feed
