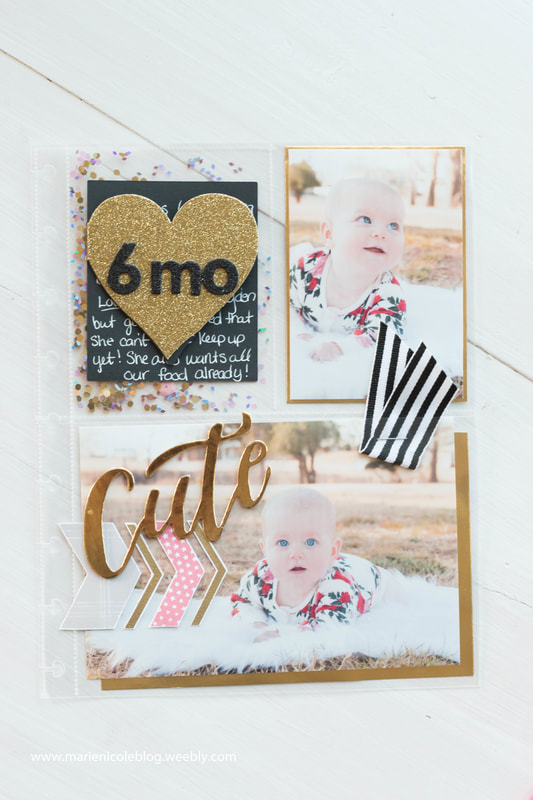
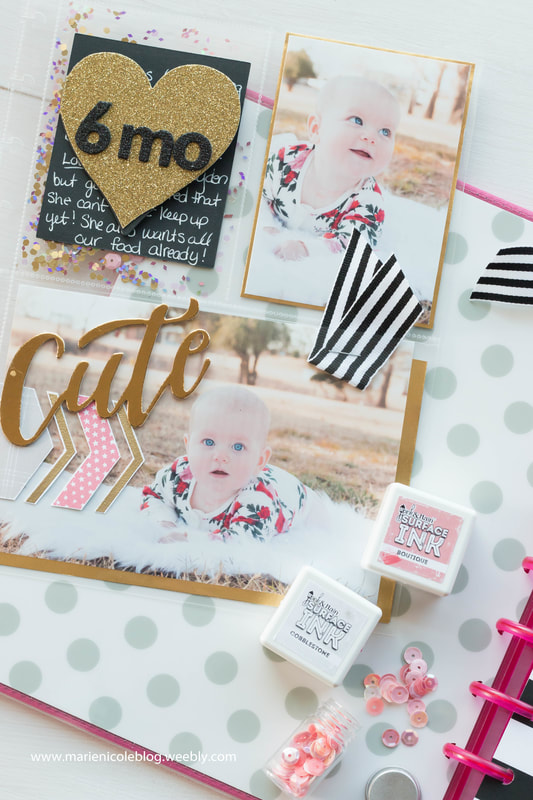
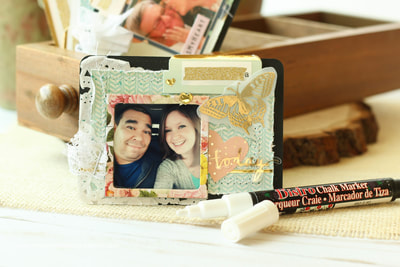
 My baby girl just turned 6 mo! I did a quick 5 minute momtographer photo shoot with her and loved how the photos turned out, so I decided to dedicate a photo page to her cute, chubby face. I kept it simple by just using several colors and only a few photos. Sometimes, less is more!
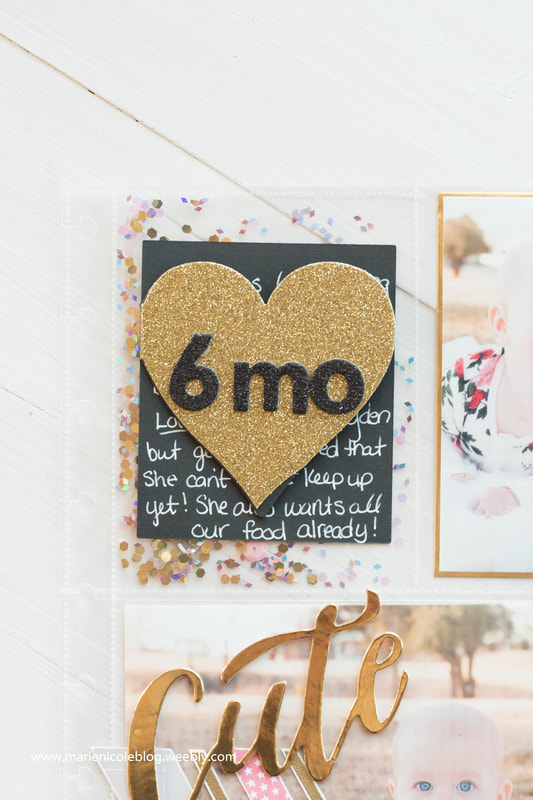
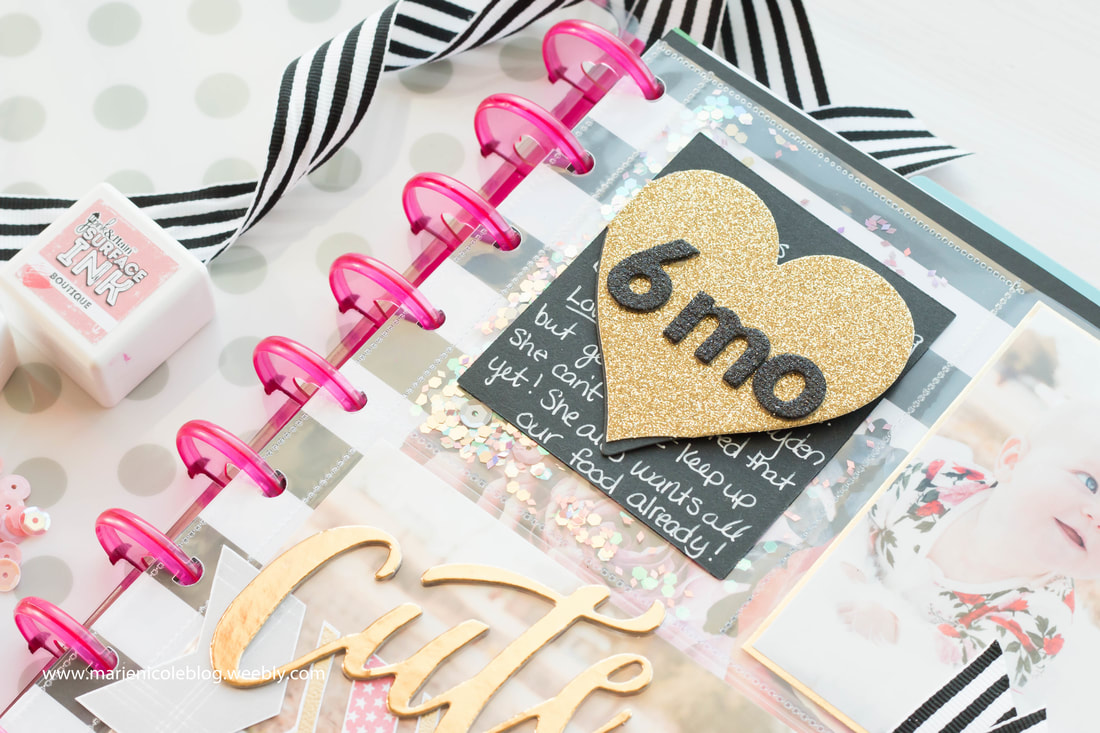
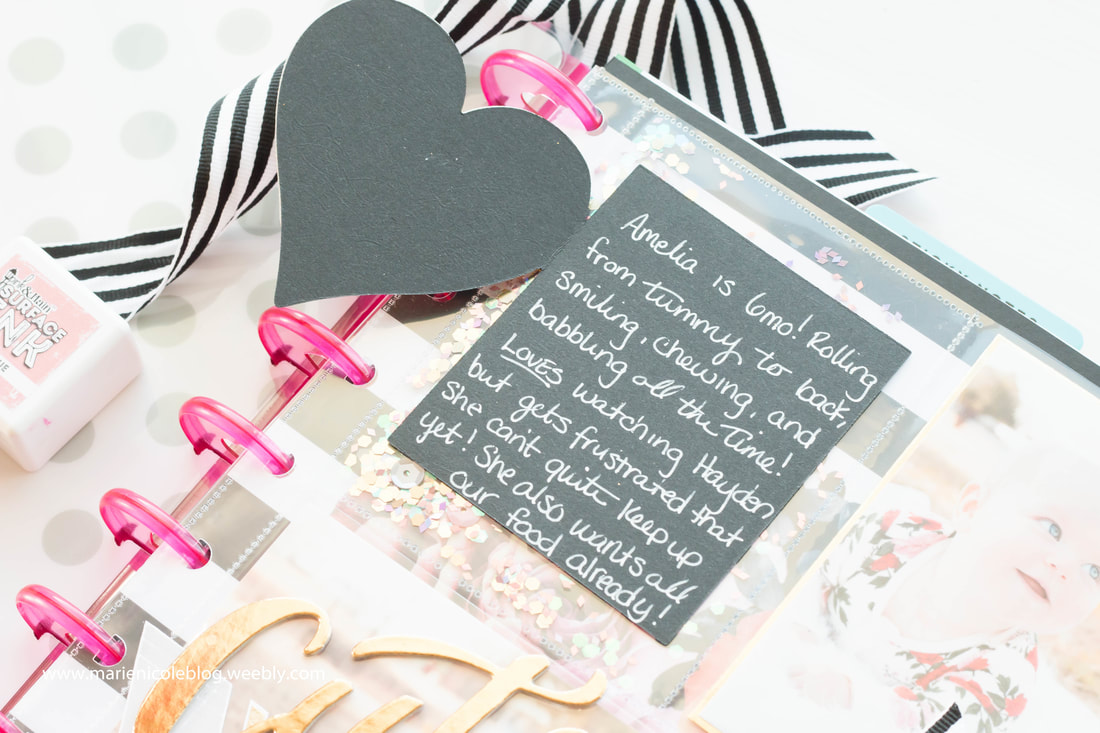
I also wanted to use the new inks and stamp set that I received from PINK AND MAIN. These inks are the same formulation as BRUTUS MONROE SURFACE INKS, but in Pink and Main colors! The colors are so vibrant and I LOVE the hues! I stamped out some of the arrows and then fussy cut them out. I also stamped the skinny arrows in some EMBOSSING INK and GILDED EMBOSSING POWDER to add a little shine. I adhered these arrows to the outside of the plastic pocket page, while the photo is safely tucked inside. This way, I don't actually have to glue anything onto my photo! 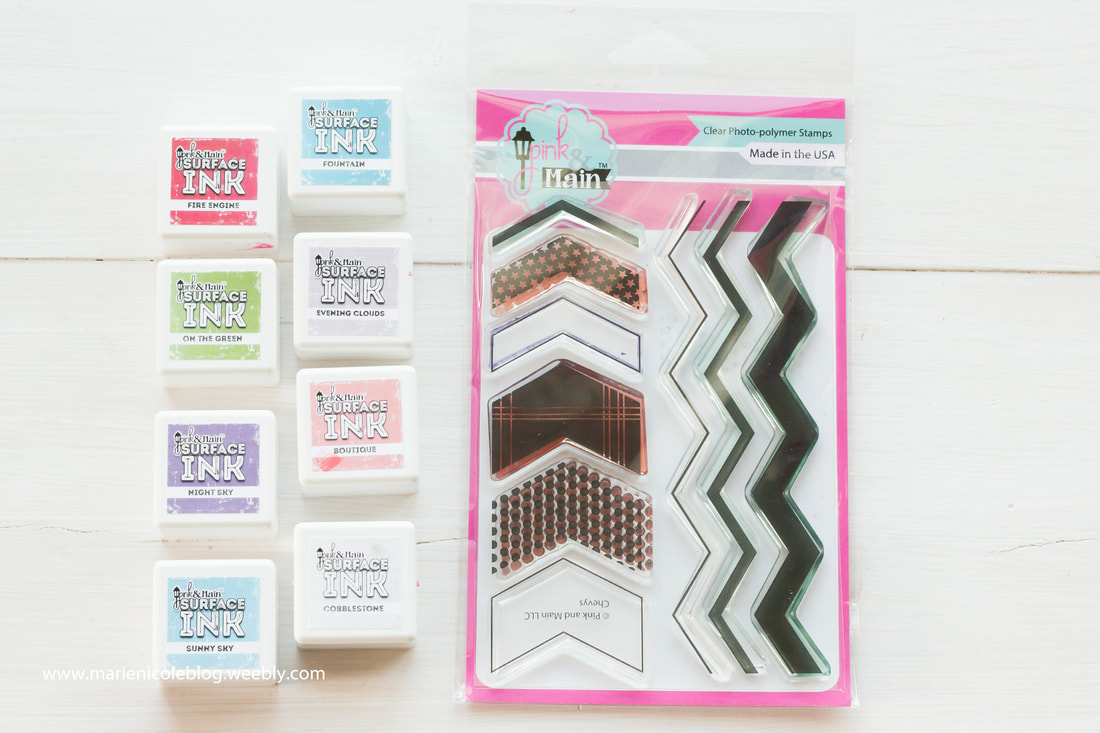 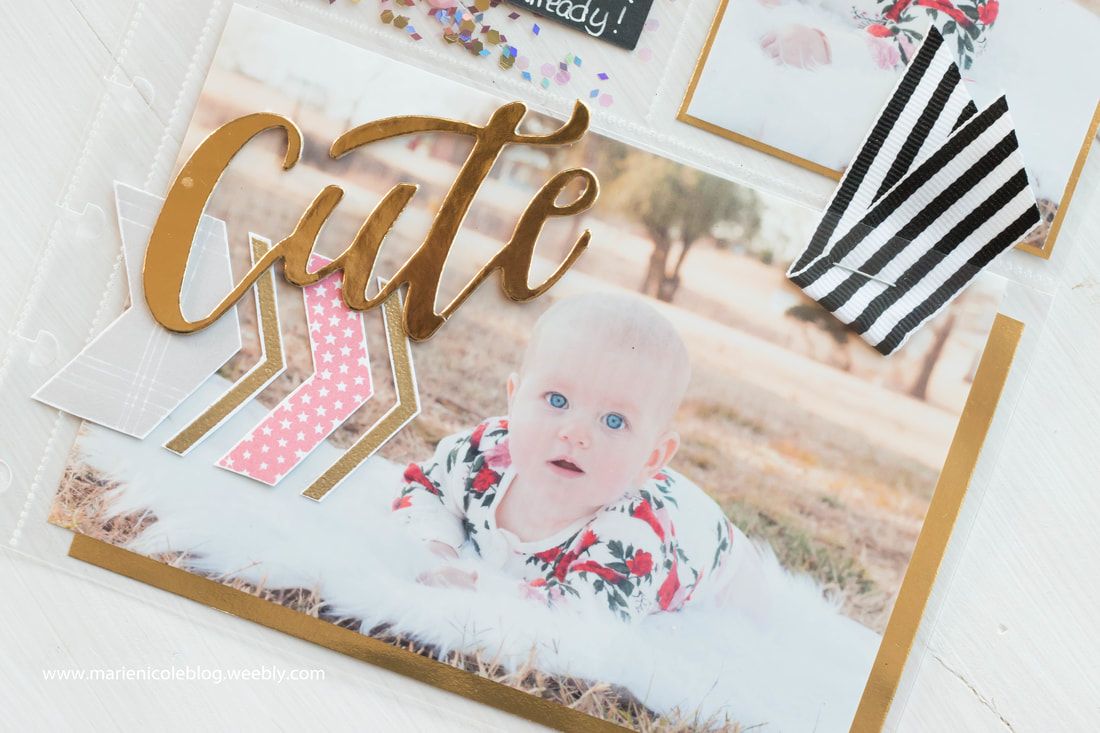 I also made the top left pocket a shaker pocket by filling it with sequins and glitter, and then sealing it up using my FUSE tool. I have LOVED my fuse tool for creating pocket pages and shakers. As long as you give it enough time to warm up before using it, sealing up your pockets is quick and easy! Also, I adhered a little note card that you can flip open to the outside of the shaker pocket. I wrote in a few memories on the card about my chunk-a-muffin's current milestones.
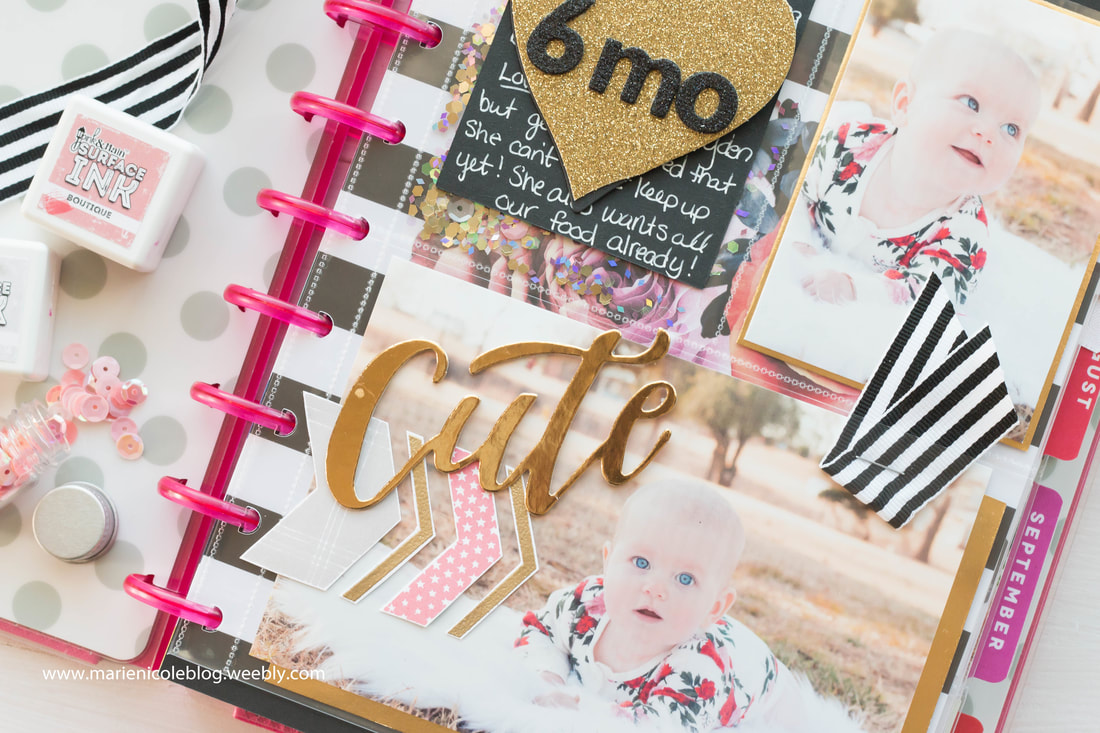 I also matted my photos using a little GILDED RINEA FOIL from Brutus Monroe. It worked beautifully with my color choices and just tied the whole page together! This foil is beautiful as-is, but can also be die cut and stamped on. I added some last touches with some ribbon and cardstock stickers and then placed this page into my planner! 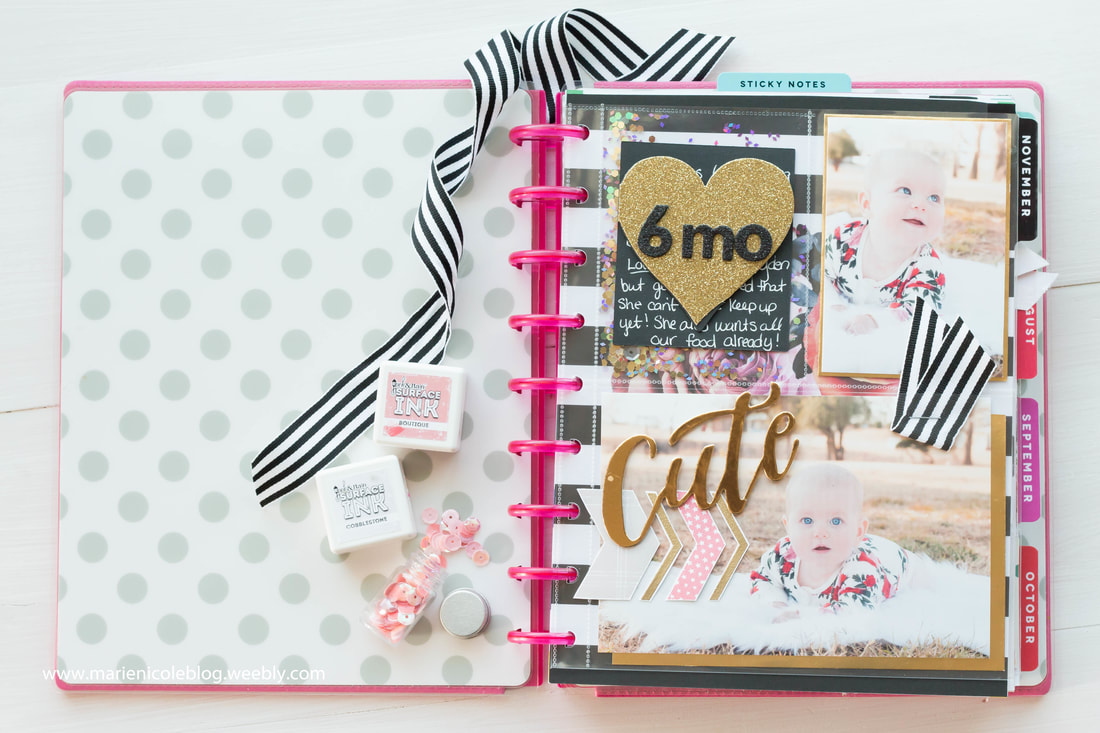 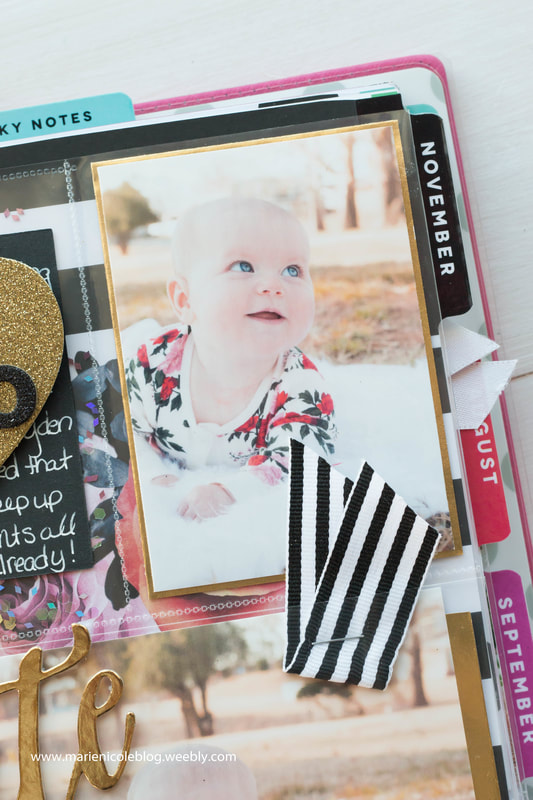 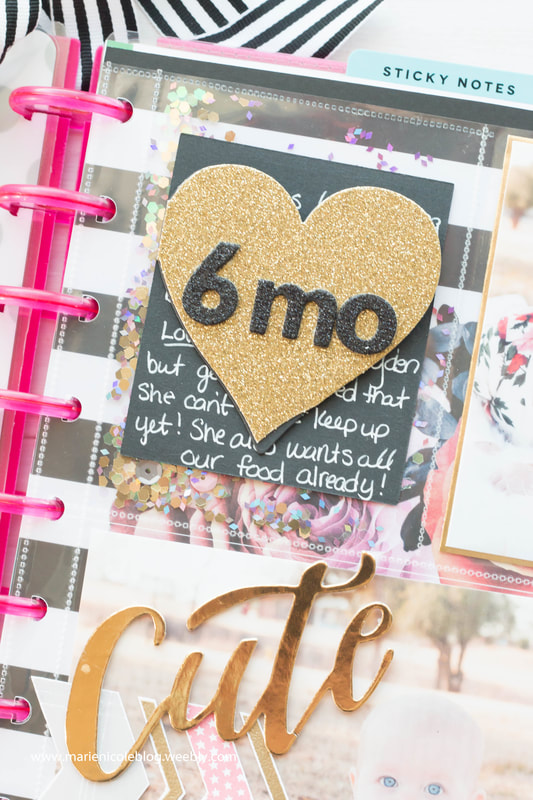  Thanks for stopping by today! I hope you've been inspired in your own crafting. Until next time, Marie Nicole More from Marie Nicole...
0 Comments
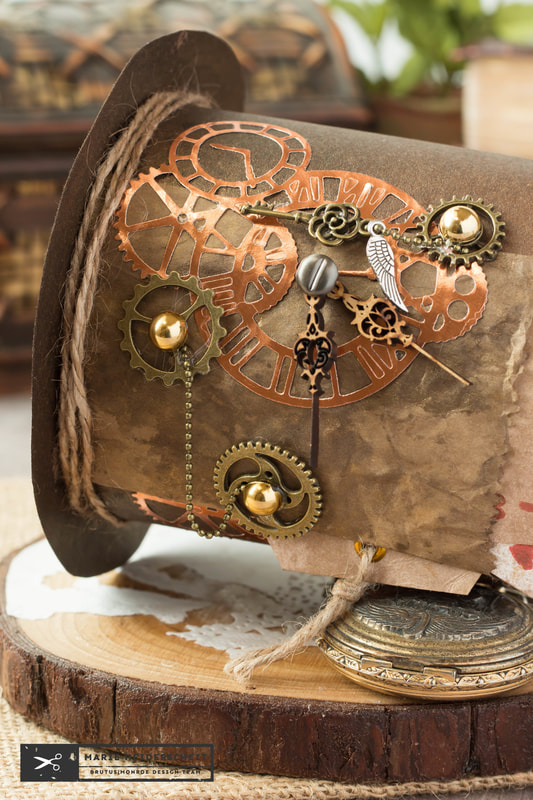
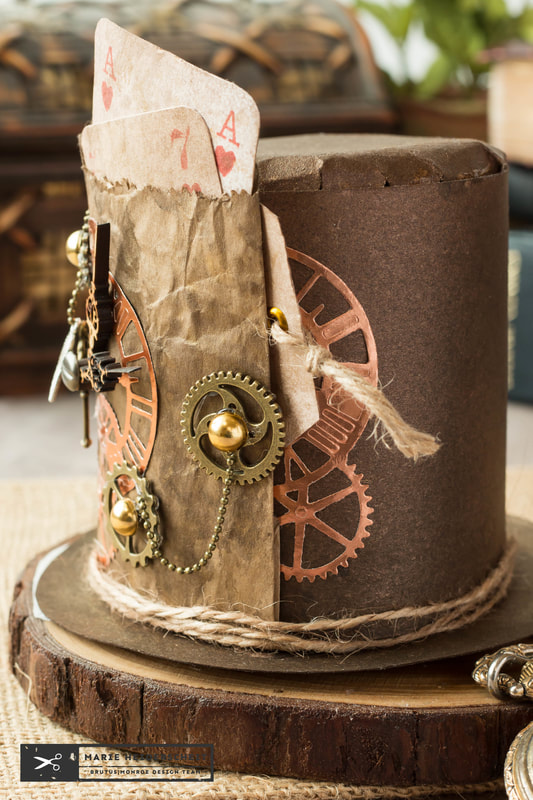
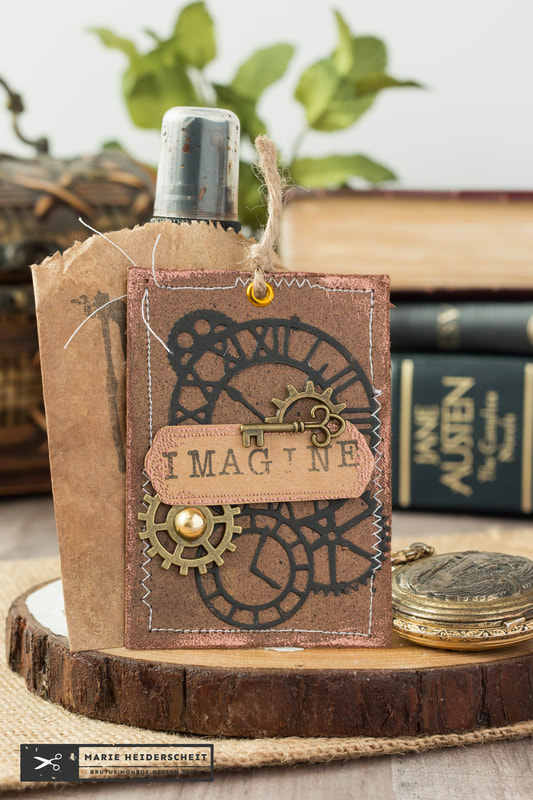
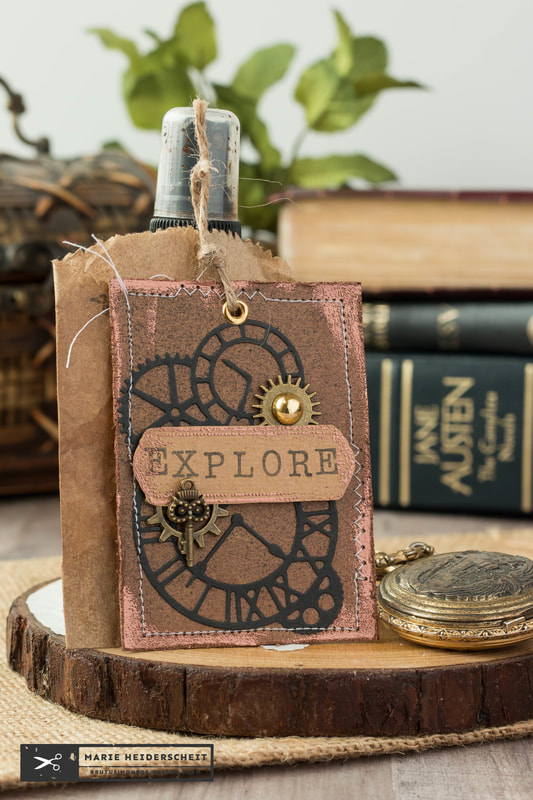
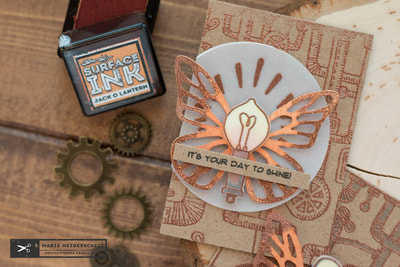
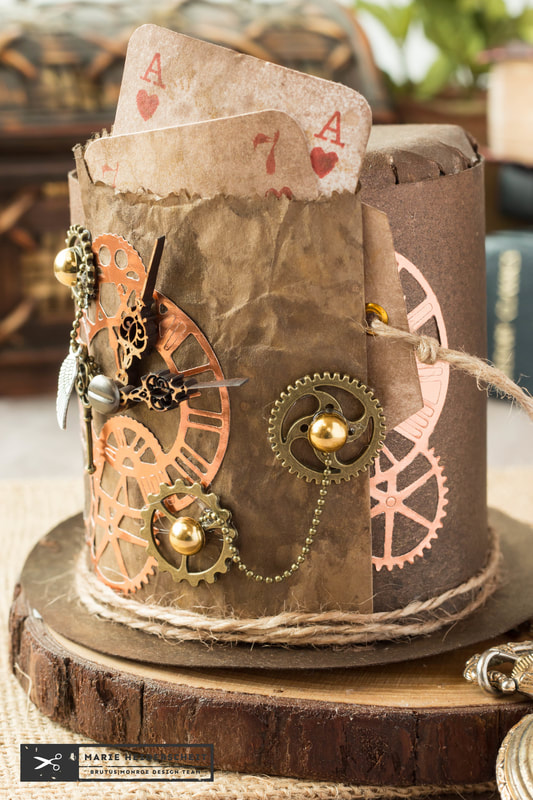 BRUTUS MONROE has a monthly INSPIRATION BOX SUBSCRIPTION and this month's box is a Steampunk themed box! I have always loved the look of Steampunk, so I was very excited to get my hands on this box! I just knew I wanted to punk out a little paper top hat! I started by browsing the web for a template for a top hat. I found THIS ONE from Craftaholics Anonymous. They have a FREE PDF download or SVG. I grabbed the PDF, printed it, and used the template to build the hat out of some CANVAS CORP KRAFT PAPER. After the hat was assembled, I spritzed it with some GLIMMER MIST to give it a vintage, worn look. I used the colors, VINTAGE BRASS, TATTERED LEATHER, and BLACK.
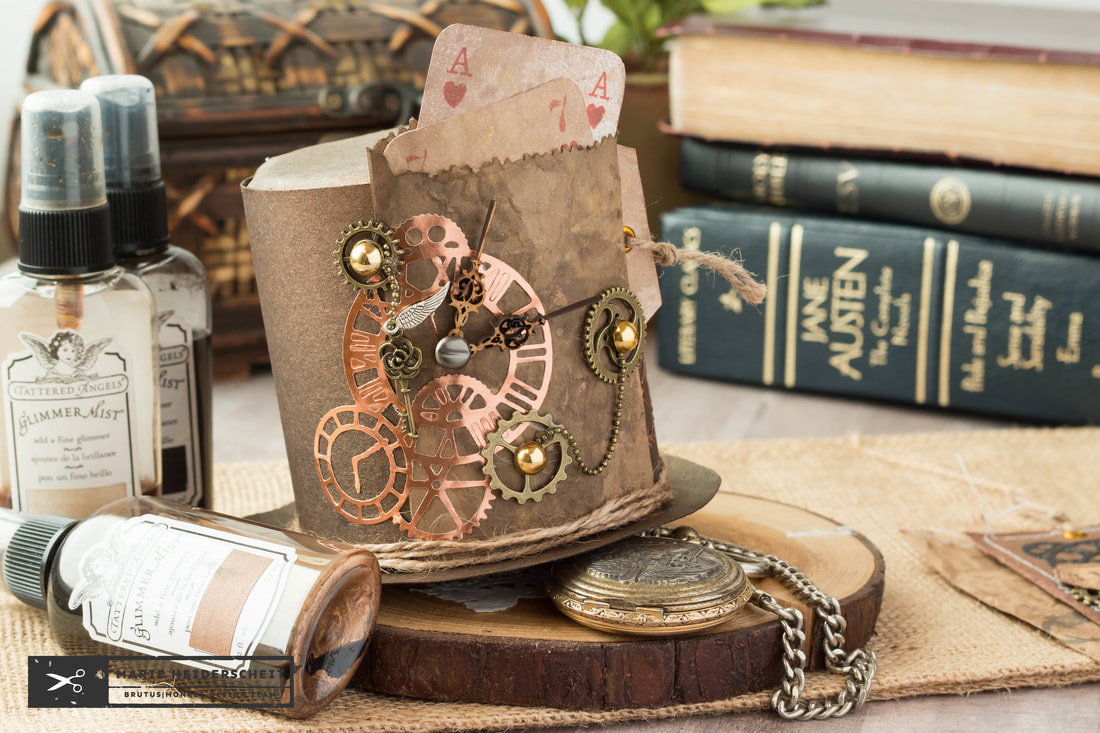 Then, I grabbed all the lovely embellishments from the Brutus Monroe Inspiration Box. They included some brass gears, chain, flat back pearls, paper bags, and a fun gears die. I used the die with some PENNY RINEA FOIL to cut out some shiny gears. I ran the foil gears through my Xyron sticker maker so I could adhere the detailed die cut easily. Then, I added the metal gears and different bits here and there. I also added some twine and a few hanadcrafted playing cards for some finishing touches. This turned out to be a super fun project that is way out of the norm for me! I usually do simple and pretty cards, but after making a load of Christmas cards, I needed to change it up a bit! Even after I finished this project, I had a good amount of supplies left from the Inspiration Box, so I went ahead and created a few ATCs, as well!  I used the same colors of Glimmer Mists on some of the paper in the box. Then, I ran some EMBOSSING INK and PENNY EMBOSSING POWDER around the edges to add some metallic shine. After adding more die cut gears, I also sewed around the edges. I love how it almost looks like a scrap of leather!
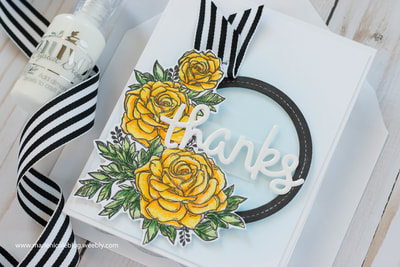
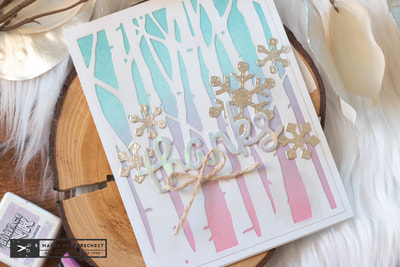
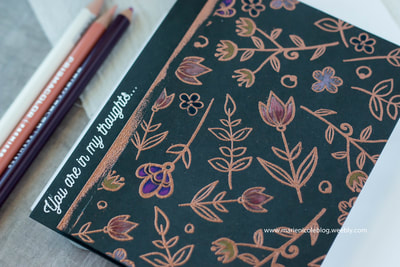
Since the little paper bags in the box were just the right size for ATCs, I wanted to decorate them to match so I could tuck the ATCs inside. I sprayed them with Glimmer Mist as well, and then stamped on them with a new, not-yet-released stamp set from Brutus Monroe! This set will be available December 30th, so keep an eye out for it! 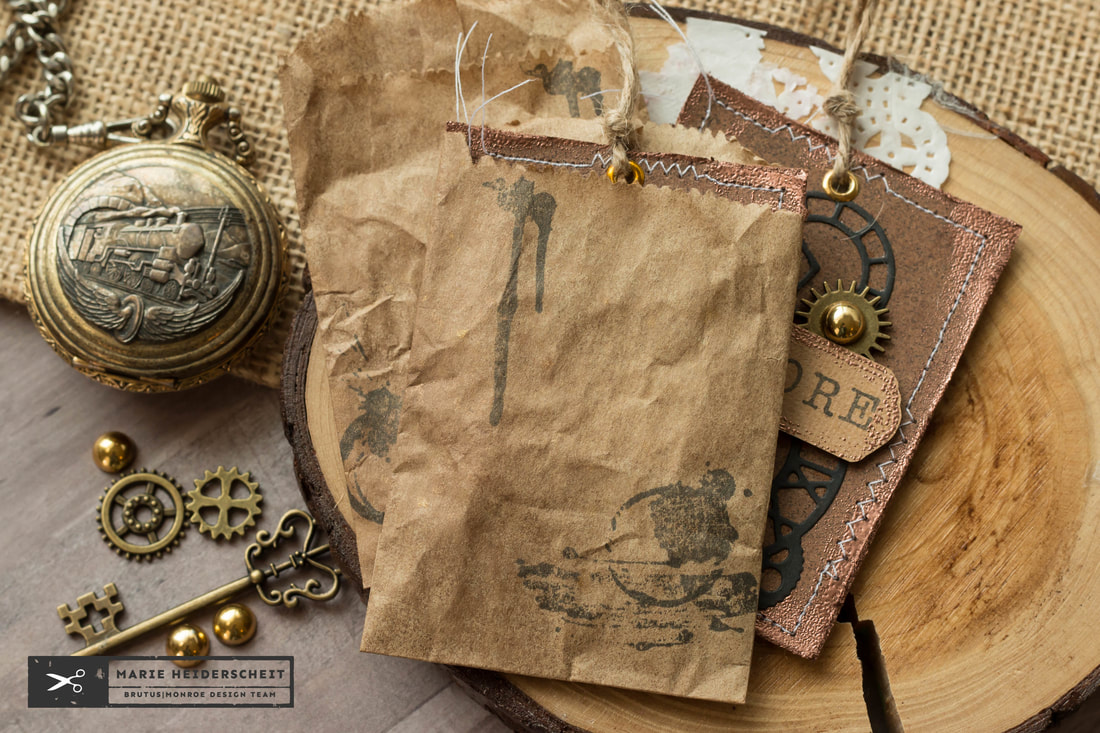 A few eyelets on top and some scraps of twine, and these ATCs were finished! I also have a handful of embellishments left from the INSPIRATION BOX, as well as papers, layering pieces, and of course, the 6x8 stamp set that is full of fun gears images and a full steampunk style alphabet! This box was such a fantastic value! Please check out the INSPIRATION BOX SUBSCRIPTION over at Brutus Monroe if you are interested in getting future boxes! Thanks for stopping by, and happy crafting! More from Marie Nicole...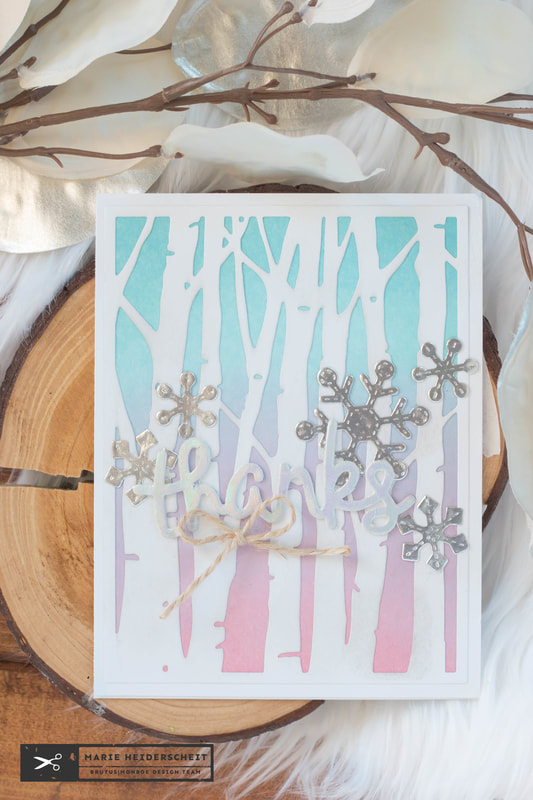 I recently opened up my mailbox and discovered a fun pink mailing envelope from PINK AND MAIN! I was so excited to open it up and see what was in there. They sent me these GORGEOUS colors of ink that are the same formulation as the BRUTUS MONROE SURFACE INKS, but in Pink and Main colors. How cool is that? Just take a look at these fabulous hues! 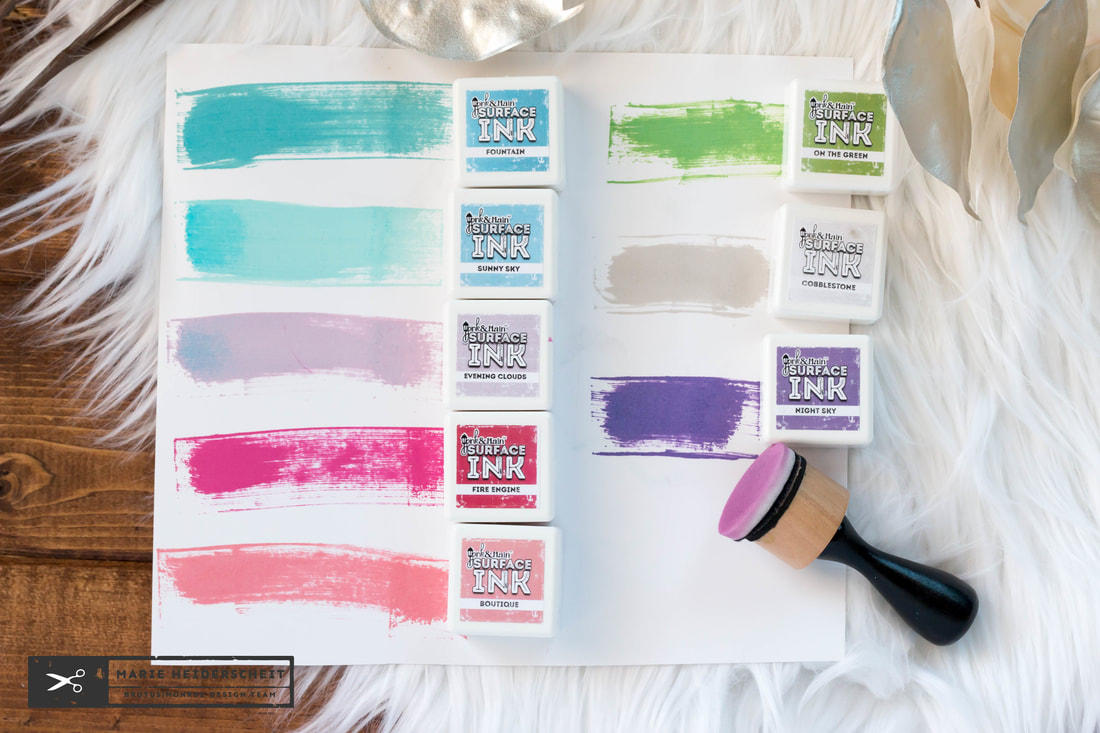 Definitely a color palatte right up my alley. So I decided to do a little ink blending with these colors and see what happens. They blend like butter, people! Just like Brutus Monroe inks do! I created a frosty sky background and layered a birch tree die over the top.  To add the snowflakes, I die cut some RINEA FOIL and glued them on over the trees. Then, I die cut some Thermoweb foam adhesive with the word, "thanks", and foiled that to layer over the snowflakes. I finished off the card with a bit of twine tied into a bow. It is a pretty simple card, but the colors in the background just makes it pop, don't you think? I opted for a thank you card because usually after the holidays we try to send thank yous to all who were generous and gave us Christmas gifts. Thanks for stopping by! Please check out a few of the items I used.
|

Pin it!

AuthorSo glad you found me! This blog is my little space where I can share bits about my life and my latest crafting projects (mostly handmade cards). My goal is to share, inspire, and to be a positive presence in the creative community. 

Find me on Instagram!Archives
January 2018
Categories
All
Link Love
 

|

 RSS Feed
