|
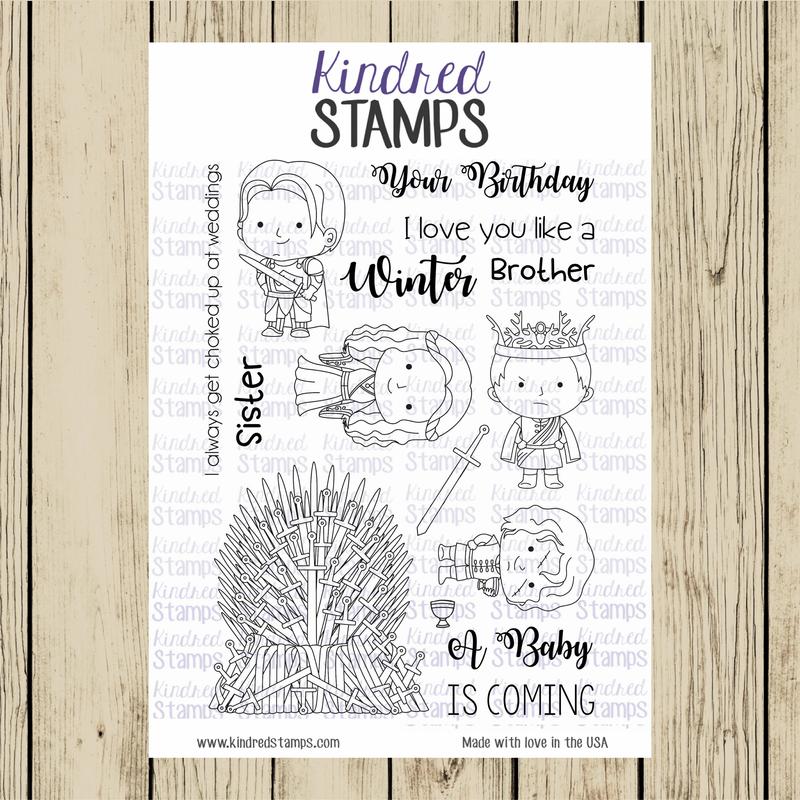
Have you guys checked out KINDRED STAMPS yet? If not, you are missing out! This company has some amazing and unique stamp sets that your SciFi and Pop Culture lover will adore! I am so excited that I am able to participate in the new release from Kindred Stamps! If you are following along on the hop, welcome! If you aren't following the hop and would like to jump in, just follow the links at the end of the post. KINDRED STAMPS is releasing a number of stamp sets, and I got to work with two of them- ROYAL THRONE and HEIRS TO THE THRONE Take a look! Now that you've seen the images, you can see why I was so excited to work with them! I made a number of projects with this release. I'll show you what I've been working on!
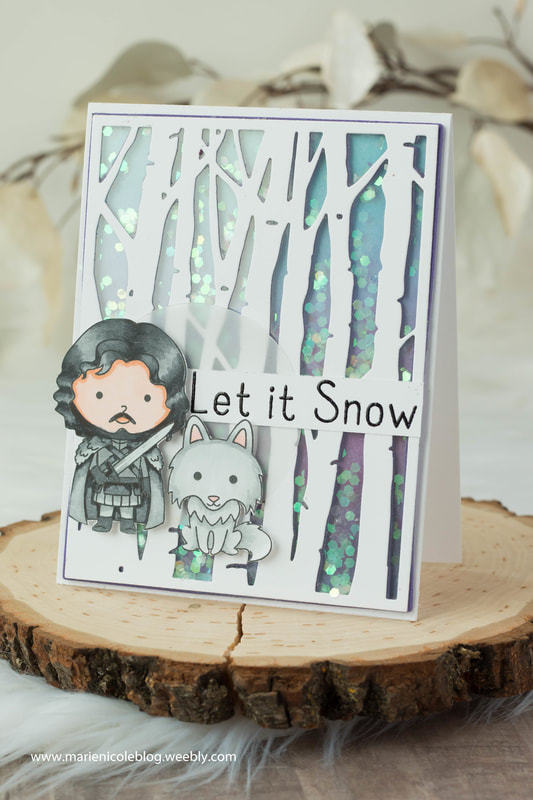
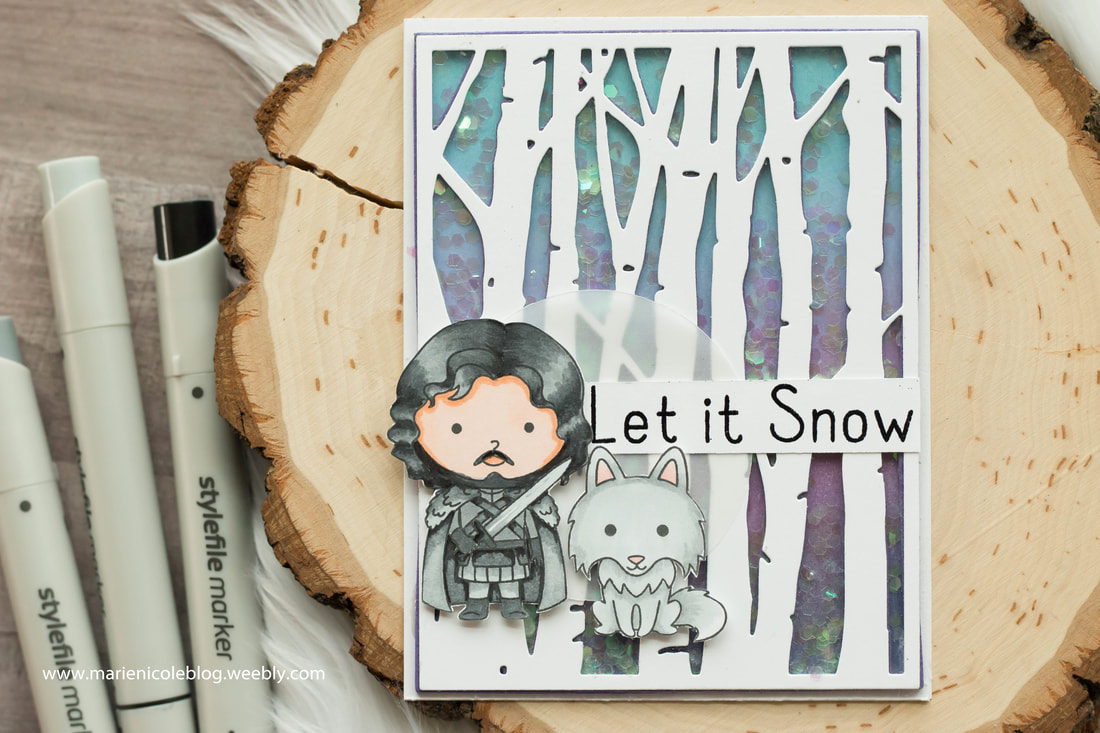
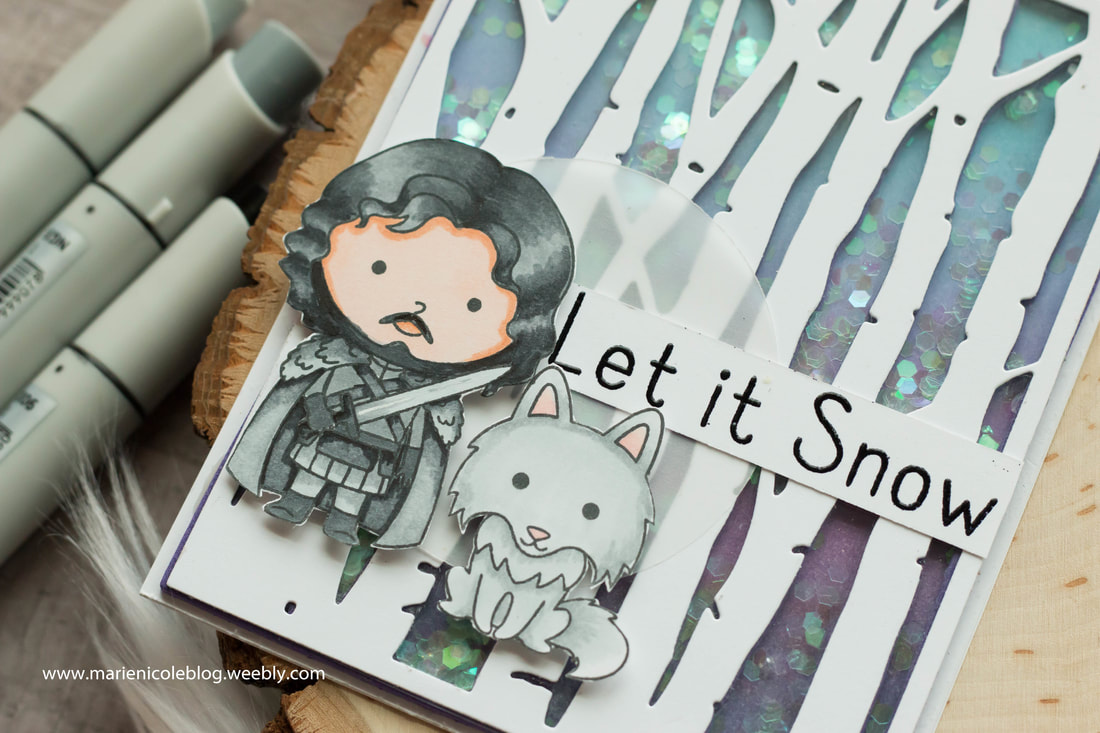
First up is this fun shaker card I created by first coloring in the images with my STYLEFILE alcohol markers. Then, I fussy cut them out. To create the background I used a birch tree die that I cut out with white cardstock. I again cut the die out of some craft foam so I could pop it up perfectly and then fill in the gaps with some glitter. The purpley-blue sky in the background is Distress Ink that I blended together to make it look like a cold, SNOW-y day. Get it? ;) 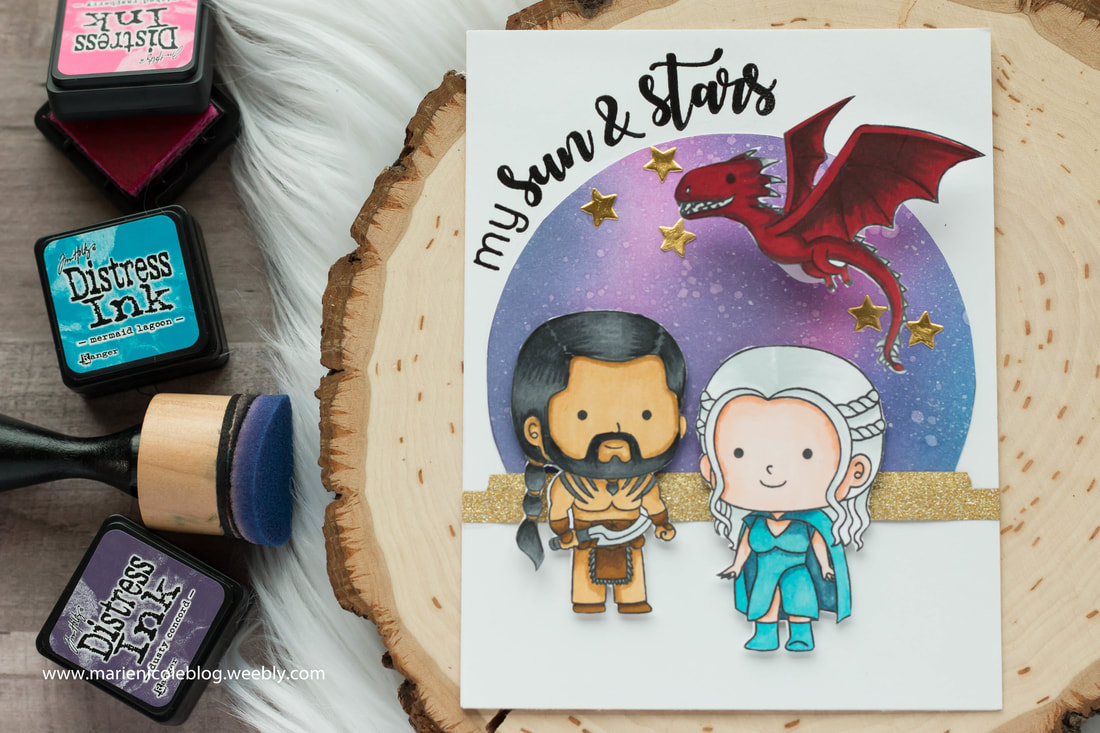
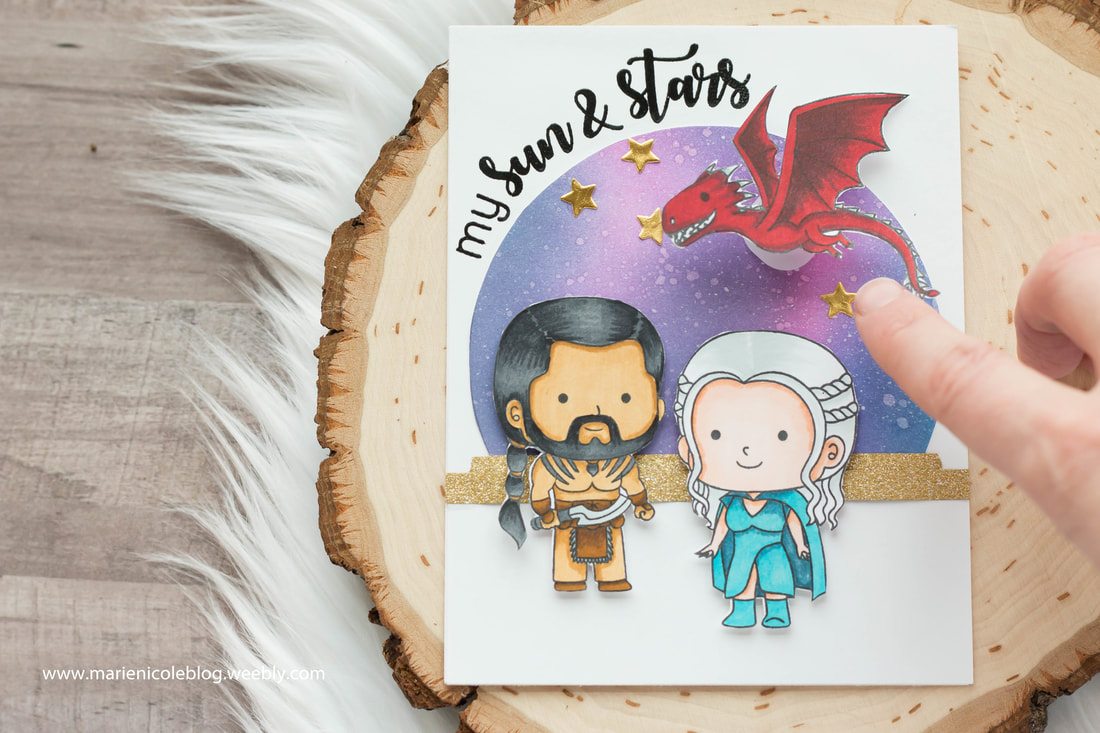
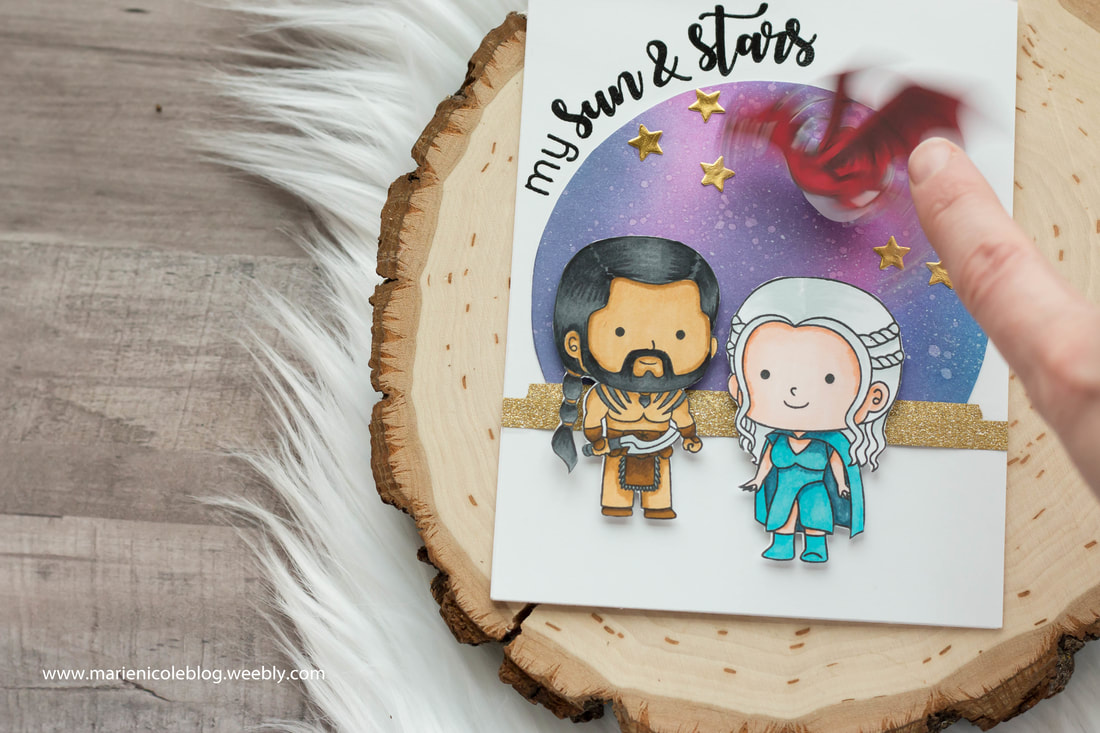
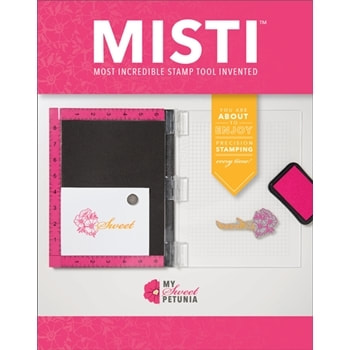
This next card I wanted to look a little more cutesy. It would be a great Valentine's card for a guy OR gal! I ink blended a galaxy sky behind our characters, and then popped them up on foam adhesive in front of it. For the sentiment, I curved the stamps around the sky using my MISTI and then stamped them in RAVEN BLACK ink and embossed them with clear embossing powder. Lastly, I added the dragon on an action wobbler. I think its so fun to see him flying above our characters!
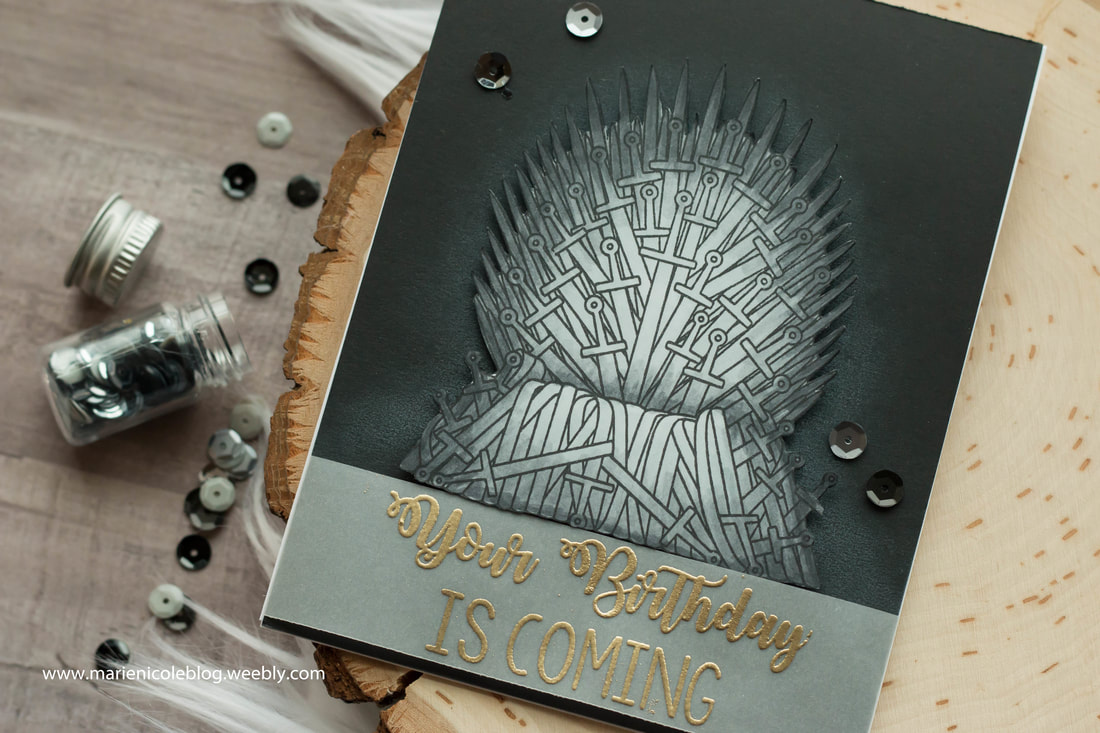
This next card is such an epic birthday card! Wouldn't you or someone you know just love to receive this in the mail? I stamped out the throne and again colored it in with my STYLEFILE MARKERS. Then, I fussy cut it out. I took a piece of black cardstock, cut it down to size, and then blended on some WHITE PIGMENT INK behind where the throne would be adhered. That just gave it the look of fog behind and also made the throne stand out a bit from the background. Lastly, I stamped and embossed the sentiment and added a few sequins. Pretty simple, but I could totally seeing this being the perfect masculine birthday card! 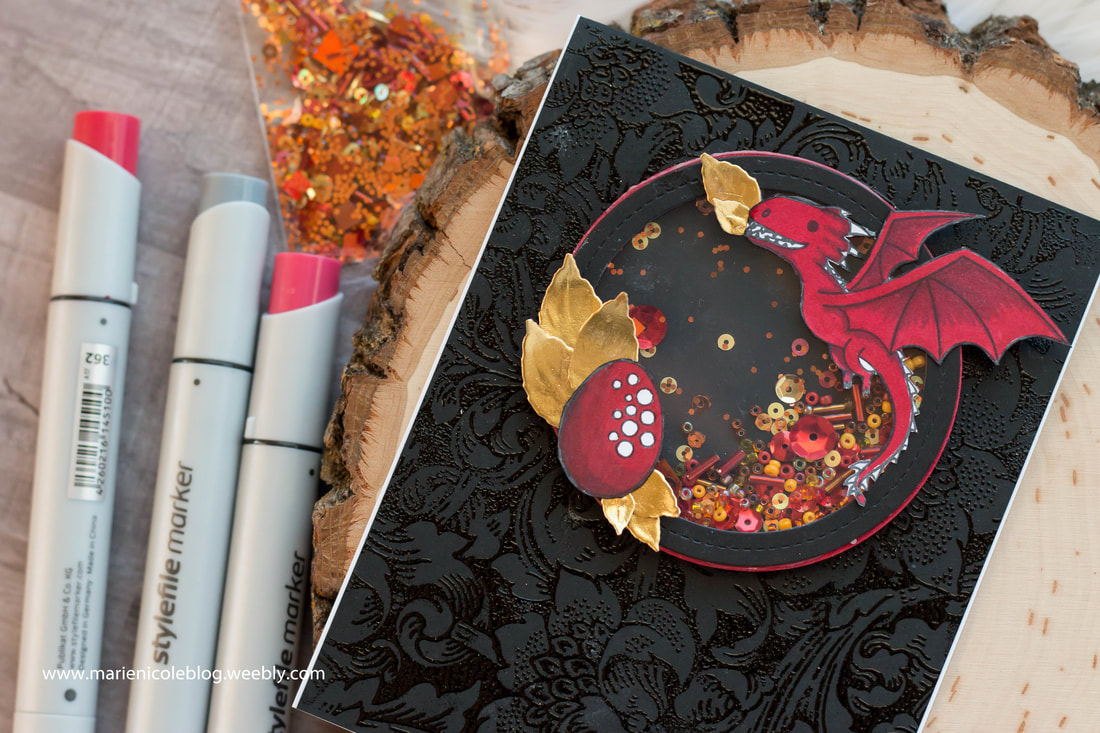
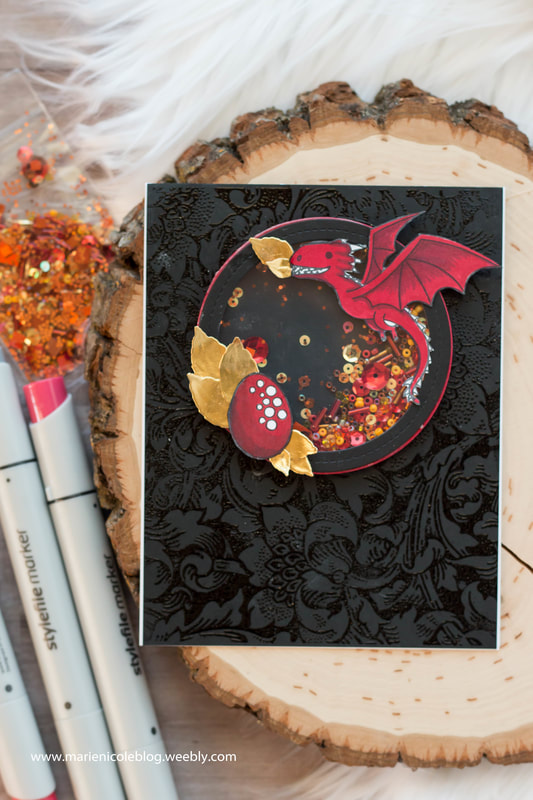
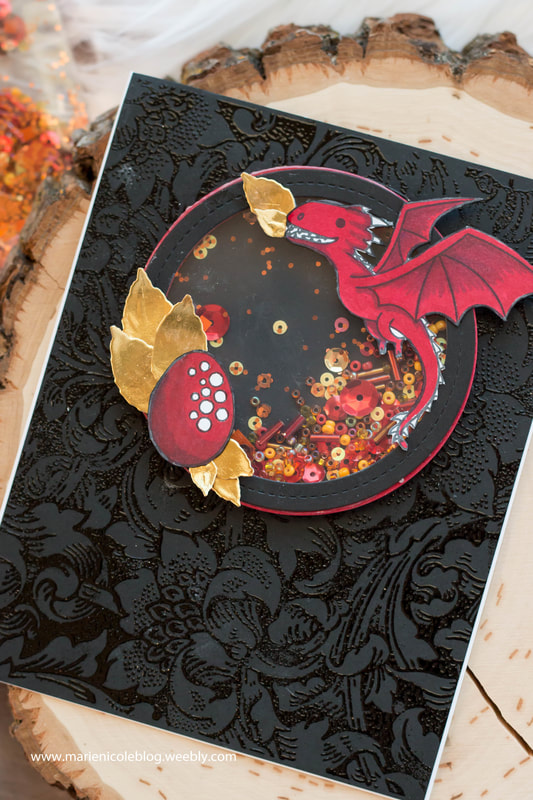
This last card for today is another shaker and perhaps my favorite of the bunch! I knew I just HAD to do a fire-y dragon with this gorgeous shaker mix, so I cut out a circle frame from my dies, and then cut out two more frames with some red craft foam. I stacked and glued them over the background that I created using a background stamp from Brutus Monroe and some RAVEN EMBOSSING POWDER. I love the tone-on-tone texture going on! I then filled the foam circle with the shaker bits and sealed it up with some acetate. In the front, I added the dragon, an egg, and some gold leaves that are meant to look like fire. I left a sentiment off since I'm not sure if I want to use it as a birthday card, a thank you card, or something else yet. Sometimes I just love to create, and then I add a sentiment right before I send it out. This way, it gives me a little more freedom when choosing a card to mail. There you have it! Several cards using the new stamps from KINDRED STAMPS. NOW FOR MORE INFO ON OUR BLOG HOP, AND A WORD FROM KINDRED STAMPS: Thank you for joining us in celebrating this month's release! We know a lot of you have been hoping for sets inspired from times when dragons wandered the earth freely and dire wolves once again moved amongst this land. We brought that to you, and then some. We brought spooky things from the deepest depths of the oceans, and we captured the night sky for you. All you need to do now is to let your inspiration reign! Where will these stories take your crafting? Before your craft table takes you to the many planets of our solar system, let us take you to the blogs for our Creative Team Members and that of our Guest Designer. Everyone is excited to provide you with a sample of their work and to talk about some of the products they used as well as their thought process. On your journey, if you comment on each person's blog post, you will be eligible to win store credit for a future purchase! You must comment on each person's blog, as well as the blog post for Kindred Stamps. The winner will be chosen Friday night, 1-12-18, around 9 pm EST. We thank you so much for your enthusiasm! We can't wait to see what you're inspired by, but remember, if you are inspired by something pop culture related, please refer to our stamp set names on social media and avoid using the actual show or character names. It is very important that we do not step on copyright toes! Thank you ever so much! Now, for the hop! Follow these links! Kindred Stamps Marie Nicole Designs (YOU ARE HERE) R. Winn Creates Dagg Designs Blog Fanciful Spaces The Frolicking Fairy
39 Comments
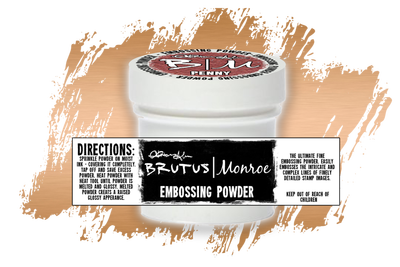
 I have been trying to re-visit some of my favorite supplies that haven't gotten enough love from me. This card is made with a fabulous background stamp by BRUTUS MONROE. I just love the pattern on this stamp, so I wanted to really let it shine on its own. I grabbed some black cardstock from CANVAS CORP, embossed the image in PENNY EMBOSSING POWDER, and then colored it in with Prismacolor pencils. 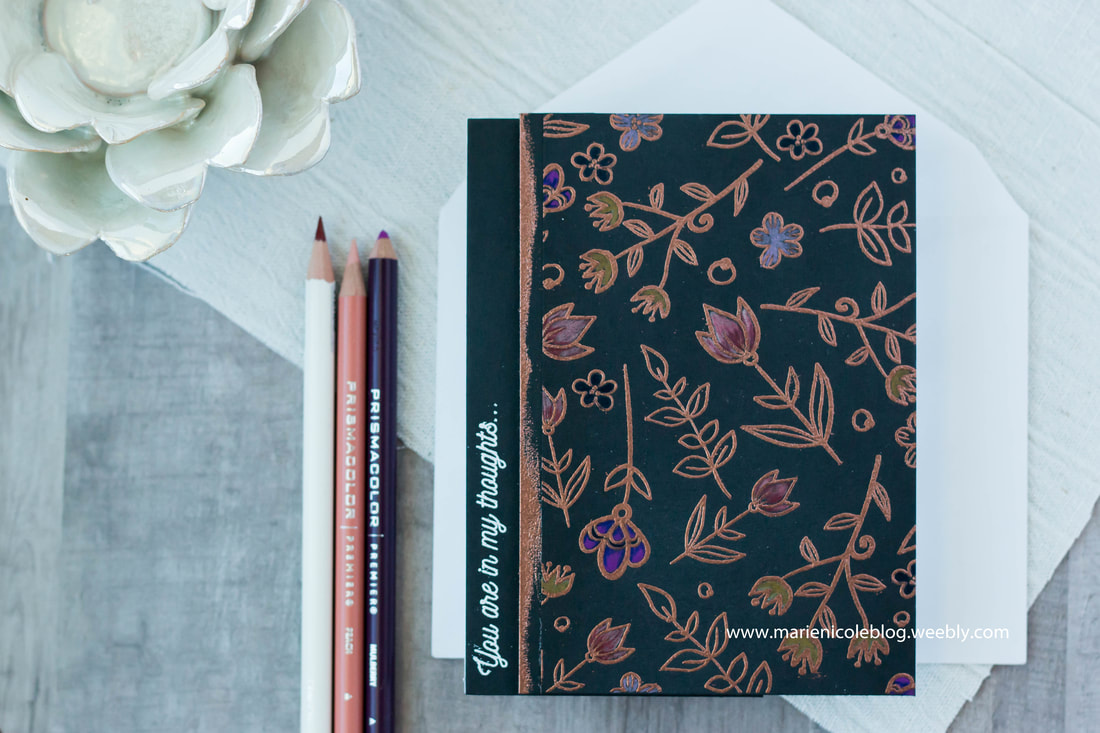 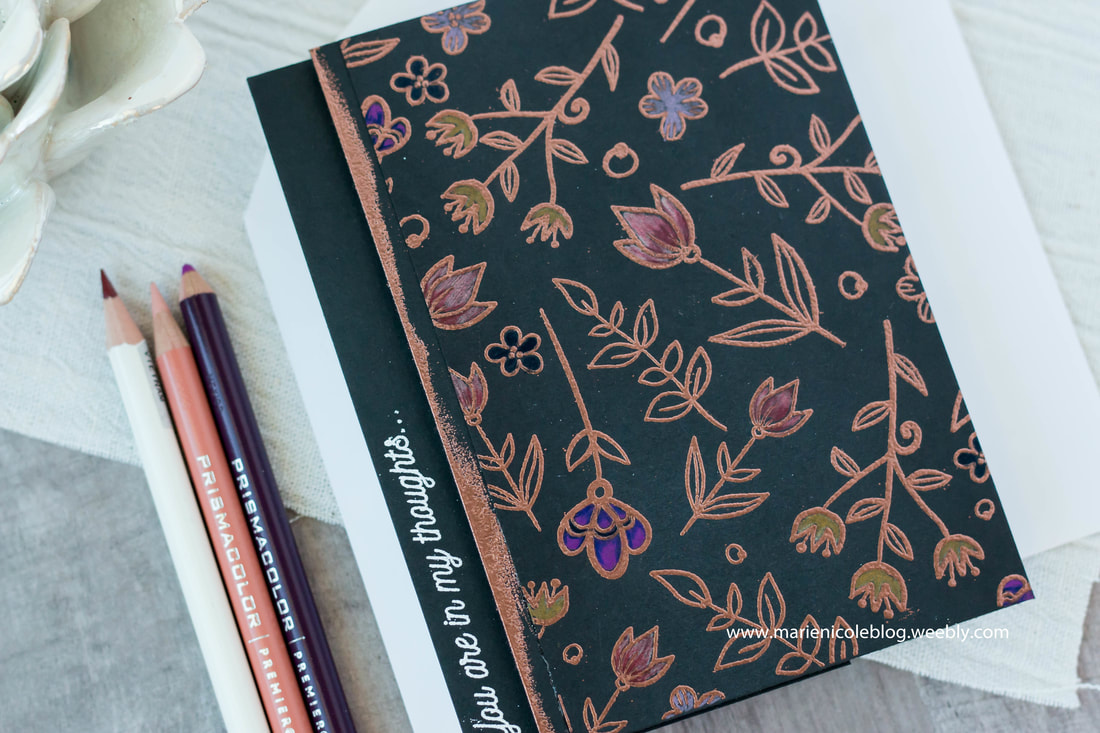 After I had my coloring done, most of the card was already finished. I did add another strip of the same black cardstock to the left side, which I ran my EMBOSSING INK along the side and embossed again. This just gave a little more of a defined edge to the stamped pattern. I then stamped and embossed a sentiment on the side. The floral panel is popped up on some kids craft foam, as well. 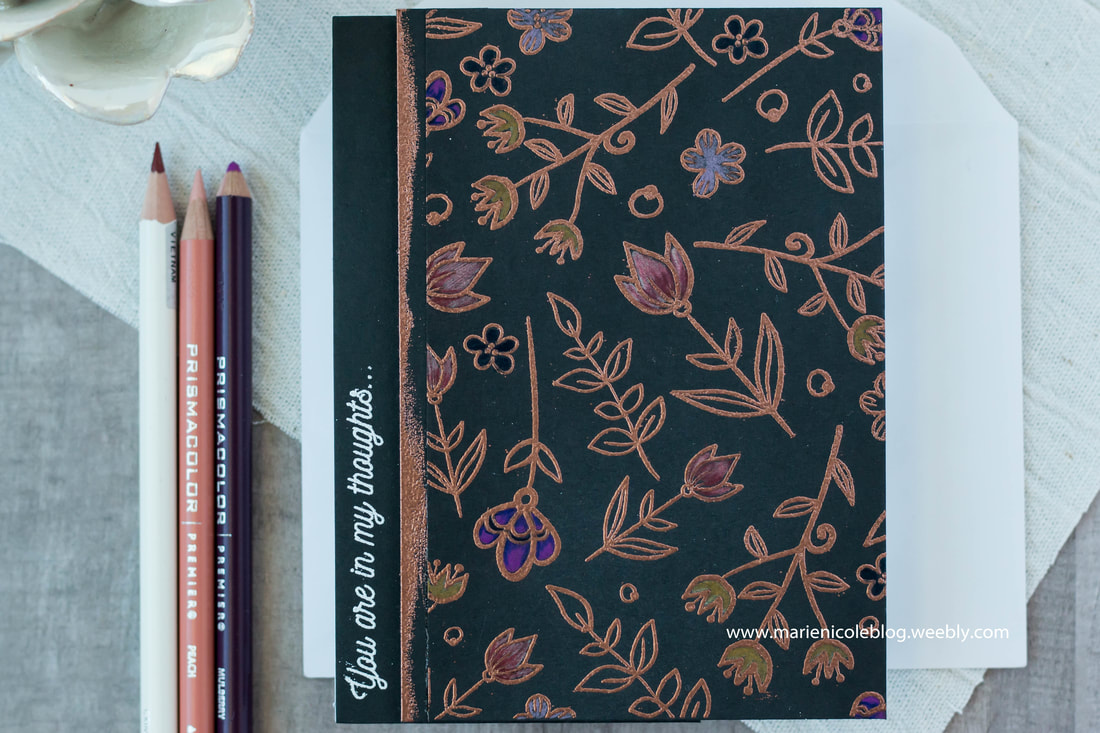 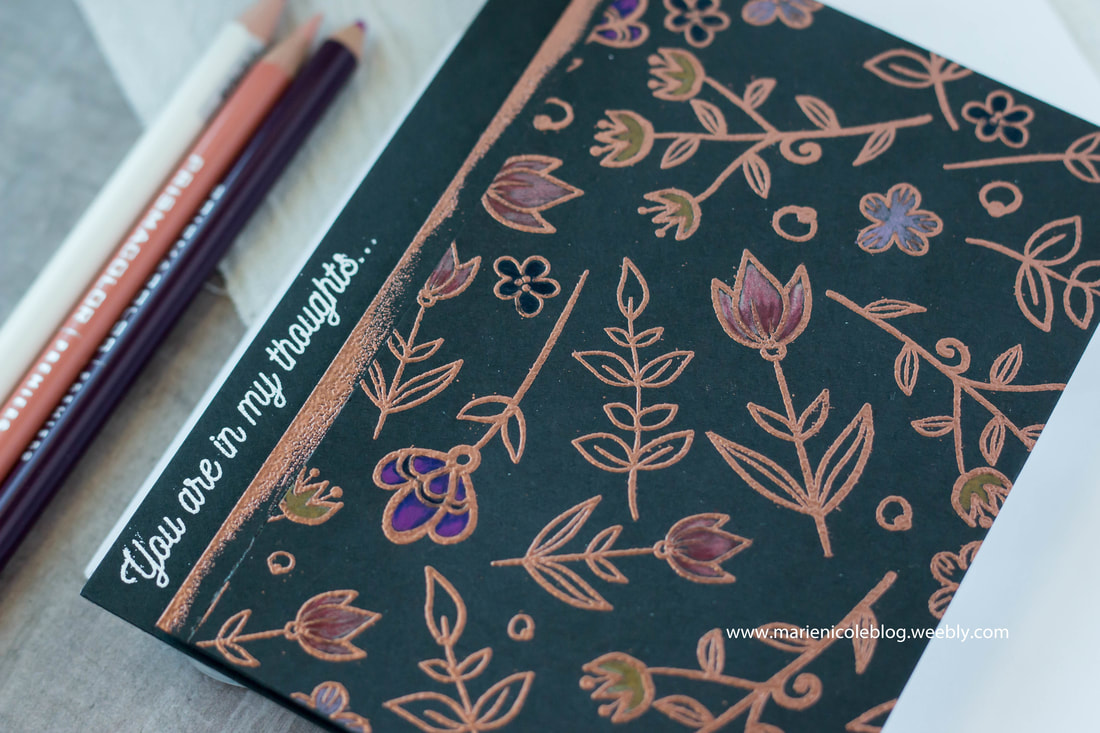 Brutus Monroe's embossing powders have quickly become my absolute favorites. They have no wax fillers, so they shine so nicely! Of course, the black background really makes it stand out, too! Thank you for stopping by today! I hope you love the card and will take the time to check out a few of the products I used! Happy Crafting!
|


|
|
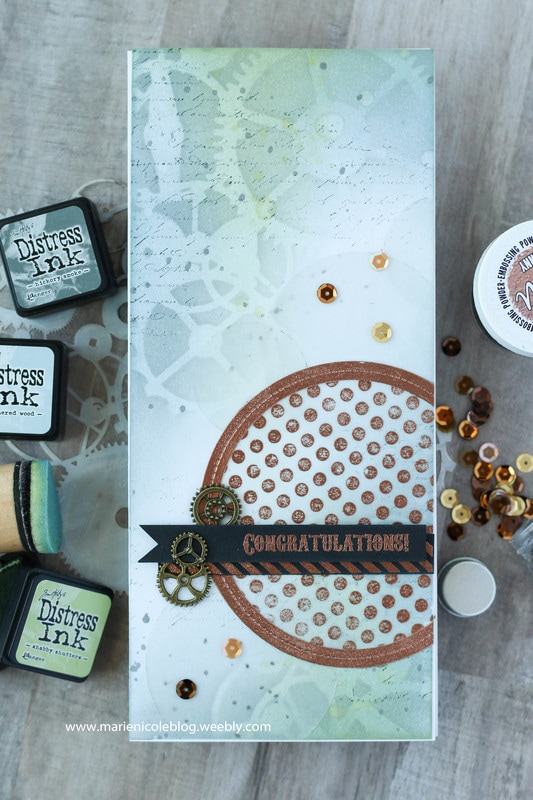
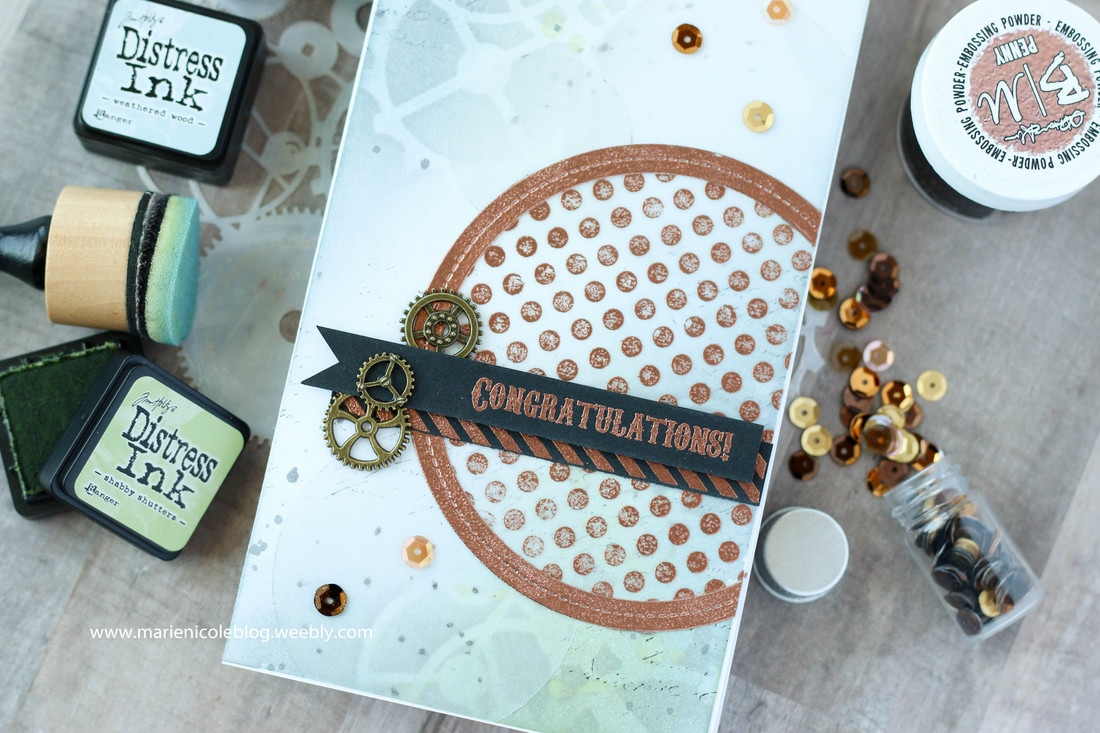
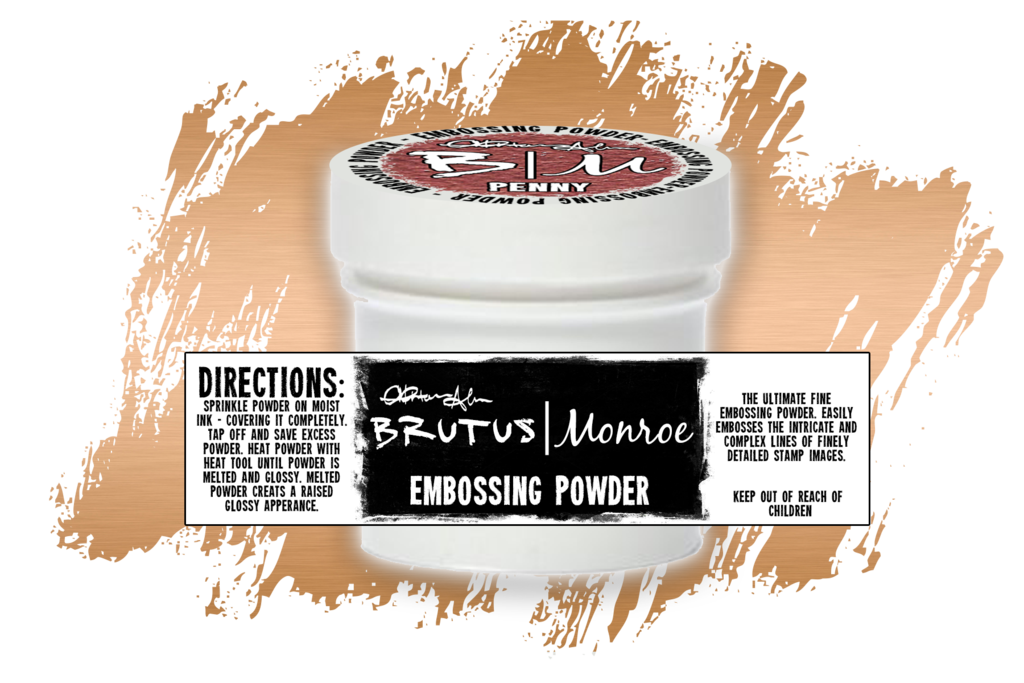
Next, using some Lawn Fawn Circle Frame Dies, I cut out several different sizes of circles from vellum. The big circle was stamped with a polka dot stamp and embossed with some Brutus Monroe Penny Embossing Powder. I love this copper powder- it shines just like the metal!
I also embossed one of the frames to adhere around the circle so that it would make the big one stand out. The other circles where adhered in the background. They are very subtle, but the add some interest without taking away from the background.
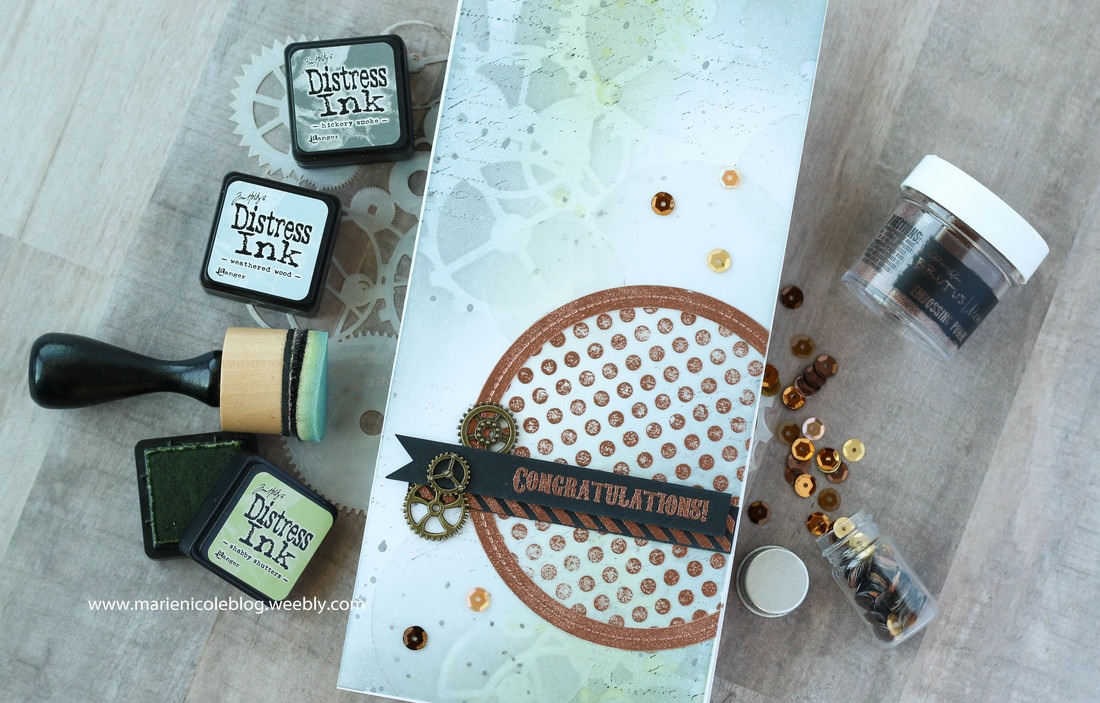
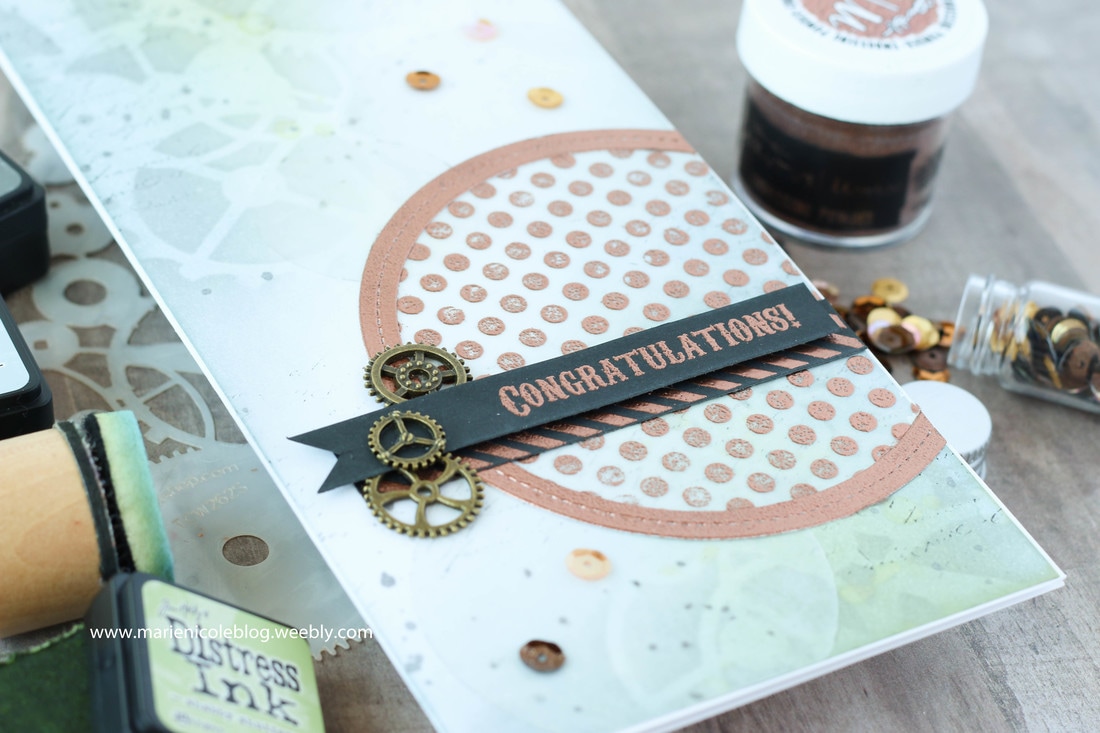
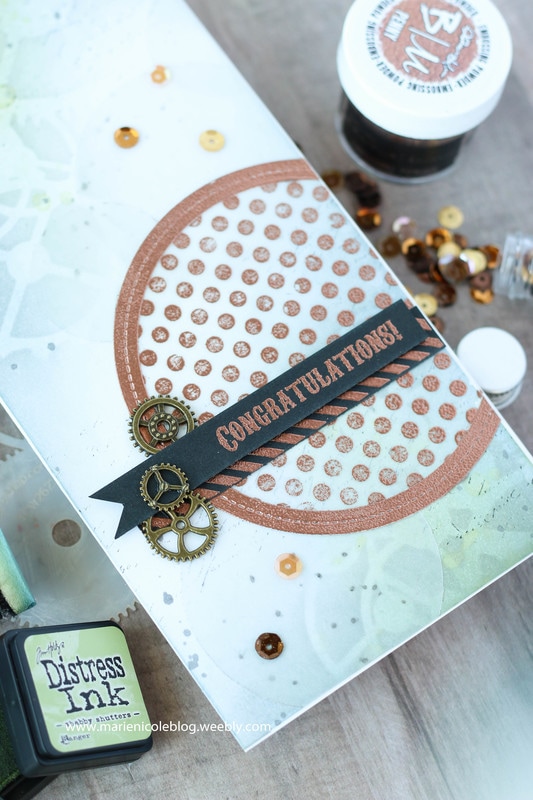
The sentiment was also stamped and embossed in Penny, as well as a strip of black cardstock that was stamped with a striped pattern. To embellish, just a few bronze gears were added, and then a few gold sequins.
Like I had mentioned, its a different style than my normal girly cards, but I like it! It would be a great card to give to guys to celebrate and achievement.
Thanks for stopping by today! If you are interested in any of these items, please check out the links below!
 |
 |
 |
 |
 |
 |

More from Marie Nicole...
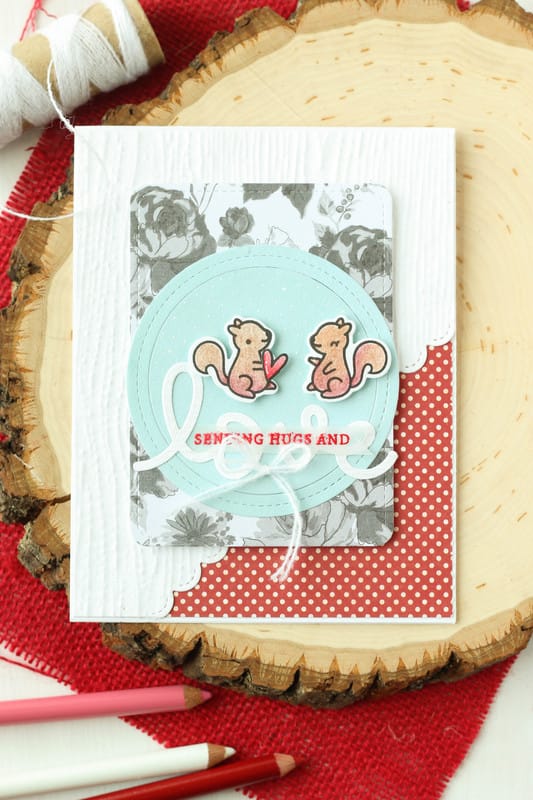
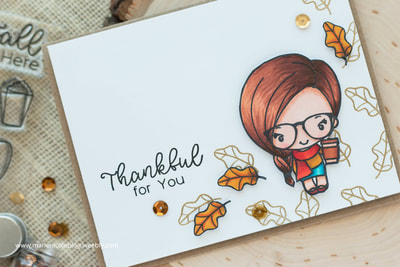
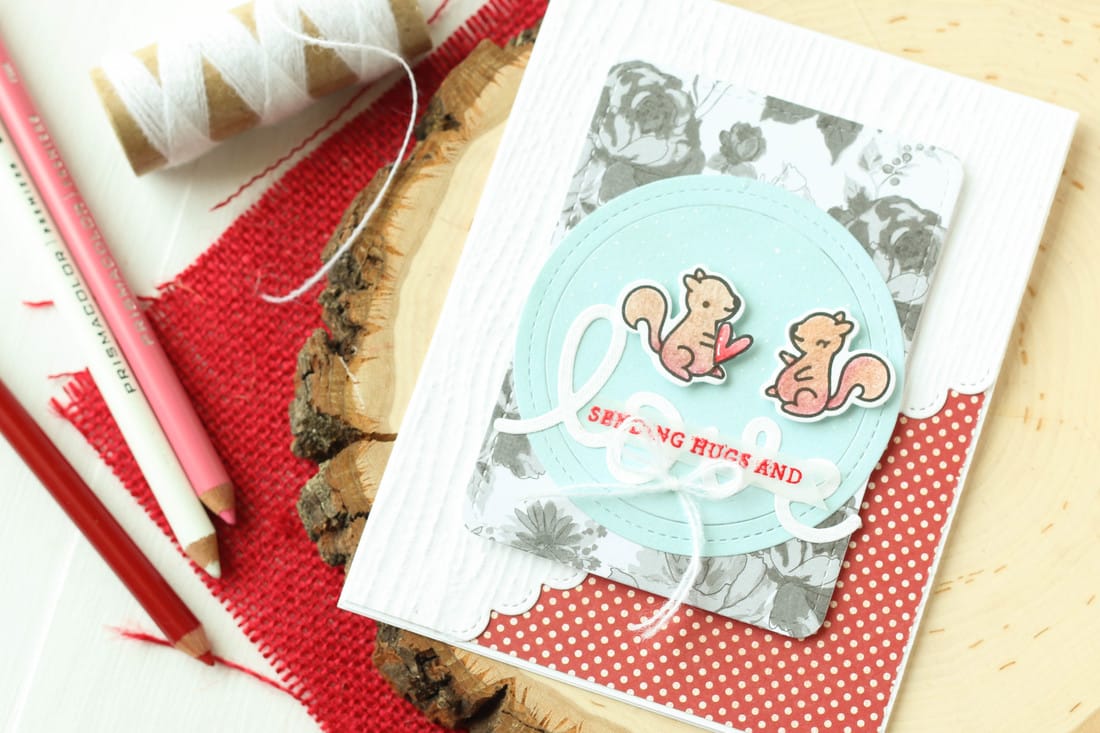
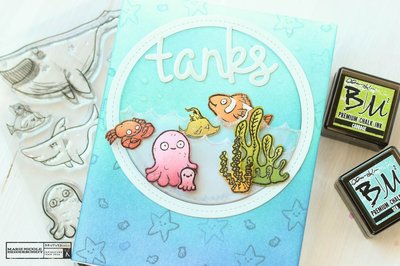
Did you get any fun crafting supplies for Christmas? I received a few items this year. The cute little squirrels on this card are from Lawn Fawn's Cheery Christmas stamp set. I stamped them out with Versafine Black ink and then colored them in with my new Prismacolor pencils. I have to say, I am LOVING these new pencils for coloring my stamped images. I am not that great at watercoloring, especially on regular cardstock. I dont like when the paper warps when you add water to it. These pencils blend great and work on my cheap cardstock.
I used the coordinating dies from the stamp set to die cut the squirrels and the little heart. Then, I used Lawn Fawn's Stitched Circle Frame Dies to cut out the circle from some blue paper. I adhered that down to some floral paper that I also die cut, using the Stitched Journaling Card die from Lawn Fawn, as well.
All my papers I pulled from my scrap bin. I am trying my best to use up scraps! I then cut the background white paper on an angle with the Stitched Border dies, and ahdered it over some red polka dot paper that peeks out on the bottom right corner.
I then added the sentiment, the squirrels, and some white twine to the front, and placed the whole stitched journal die cut piece to the front of the card with foam adhesive.
Cute, easy card that has a Valentine's Day feel to it, without being too overly red and white.
Thanks for checking out my card today! I have been slacking on making YouTube videos lately with the business of the holidays, but I hope to get back into it soon!
If you are interested in some of the items I used on this card, I've included some links below.
Happy Crafting!!


 |
 |
 |
 |
 |
 |
 |
 |
Check out these other fun posts!
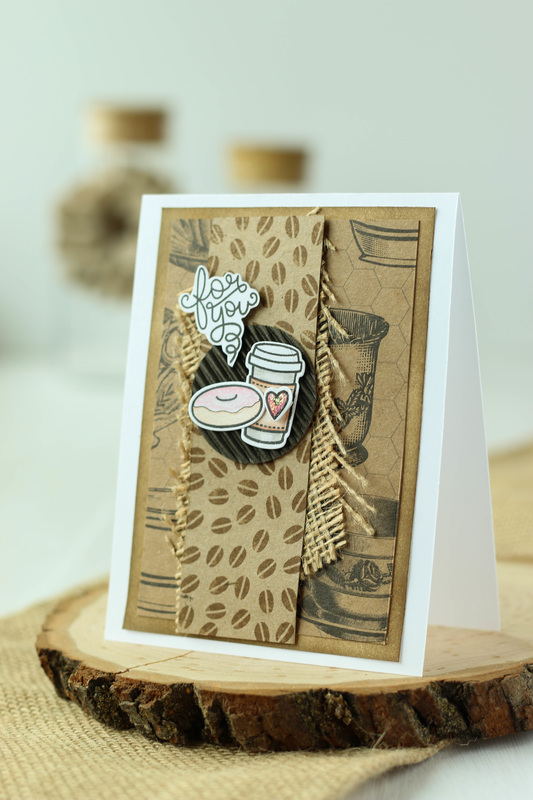
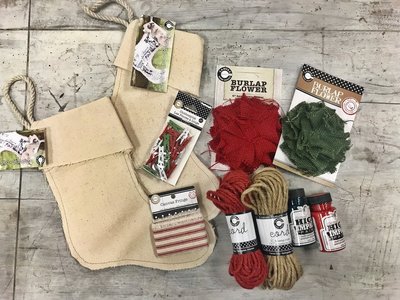
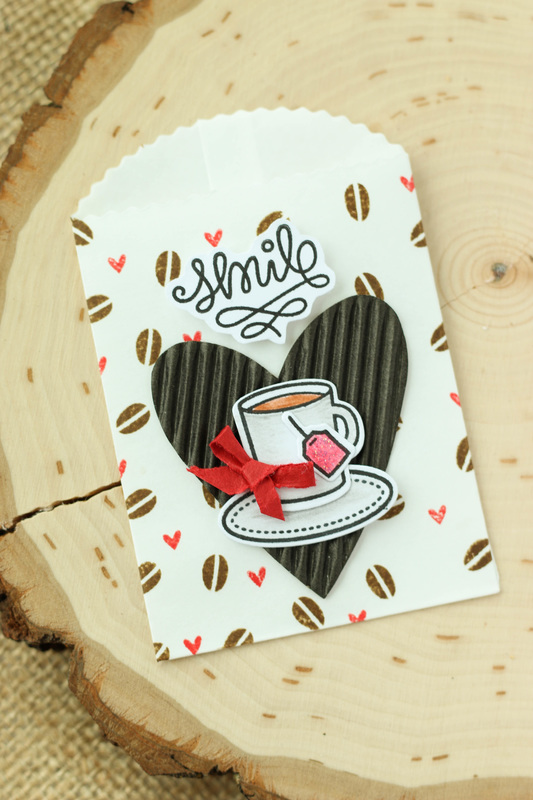
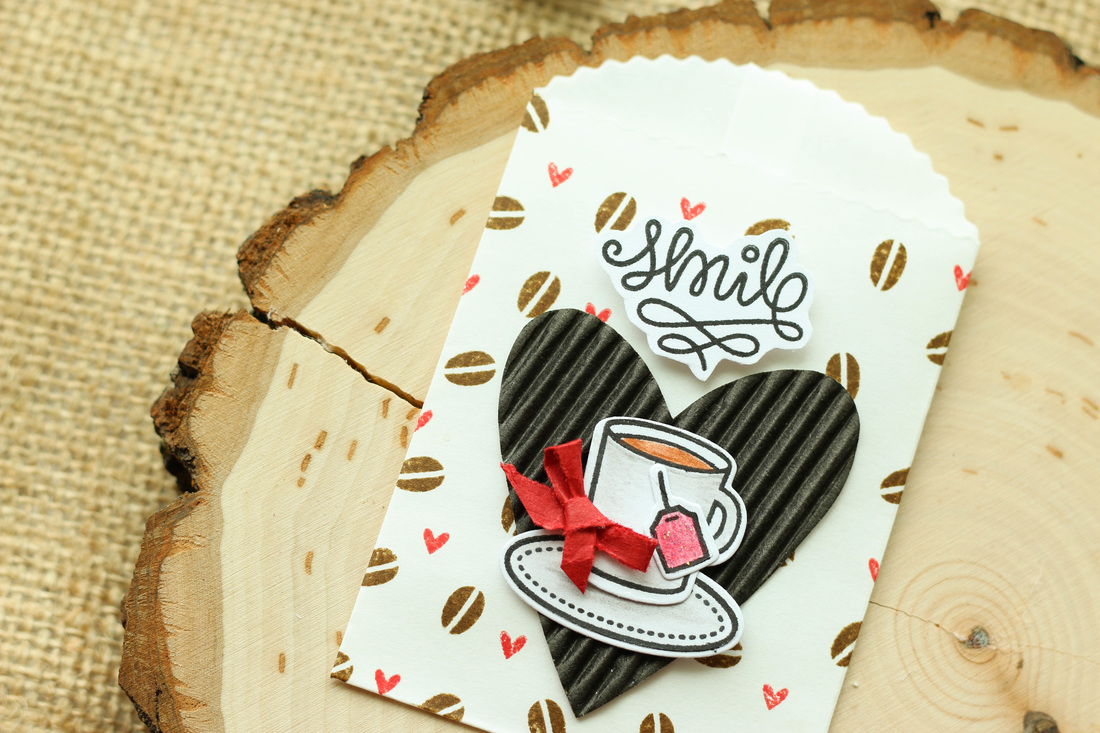
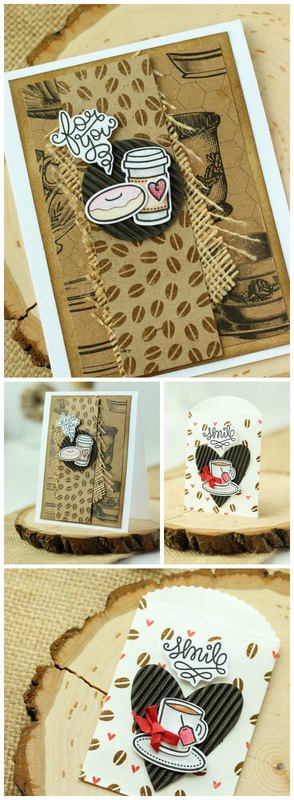
I built the background using a scrap of Beans and Bags papers. I also added a few other layers, including a piece that I Distress Inked to match, and a kraft piece that I stamped some little coffee beans on. I also added a scrap of burlap for some texture.
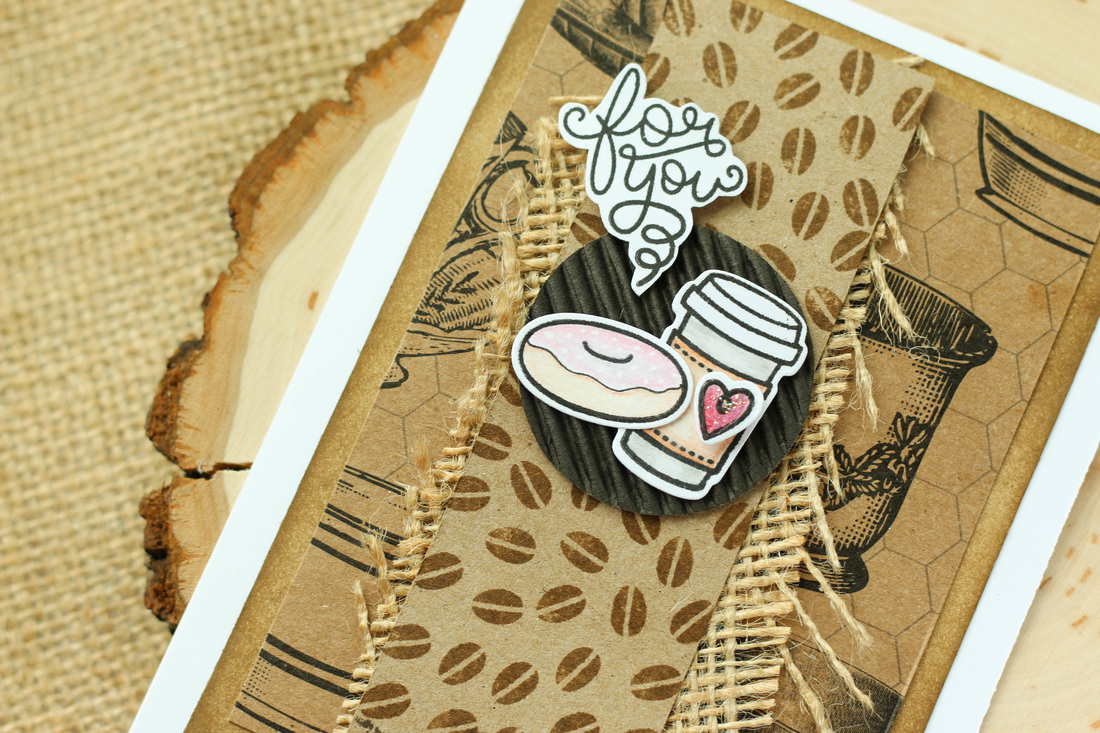
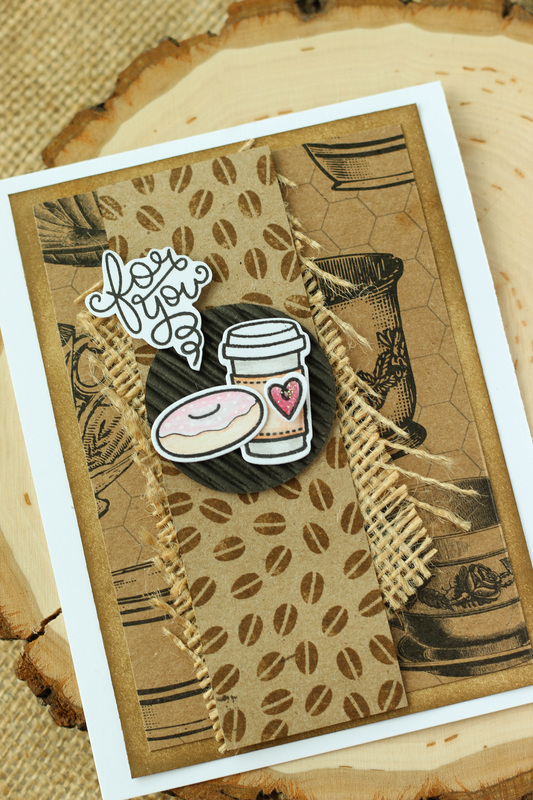
I had some of the die cuts leftover that I wanted to use, so I went ahead and created a gift card holder out of Canvas Corp's mini bags, as well!
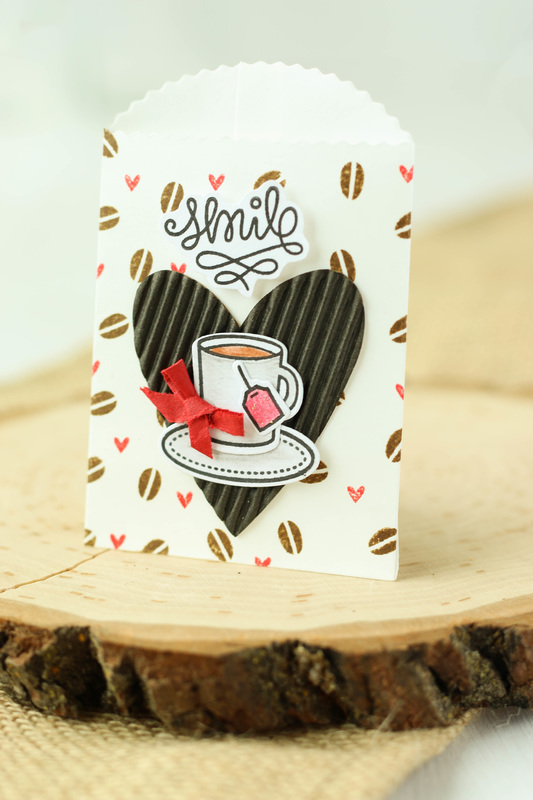
I then just adhered the die cuts on top of the heart. It's so cute! I could see giving someone a gift card to their favorite coffee place in this bag.
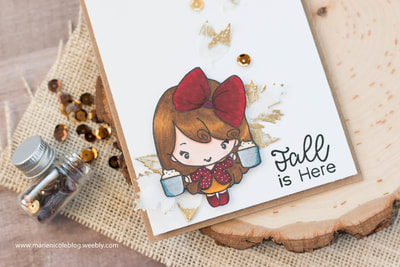
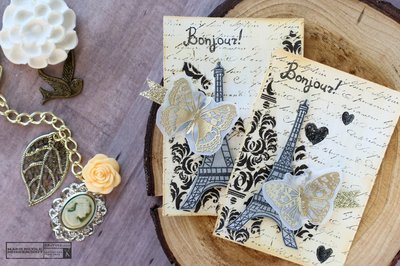
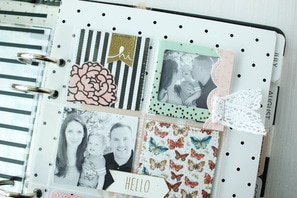
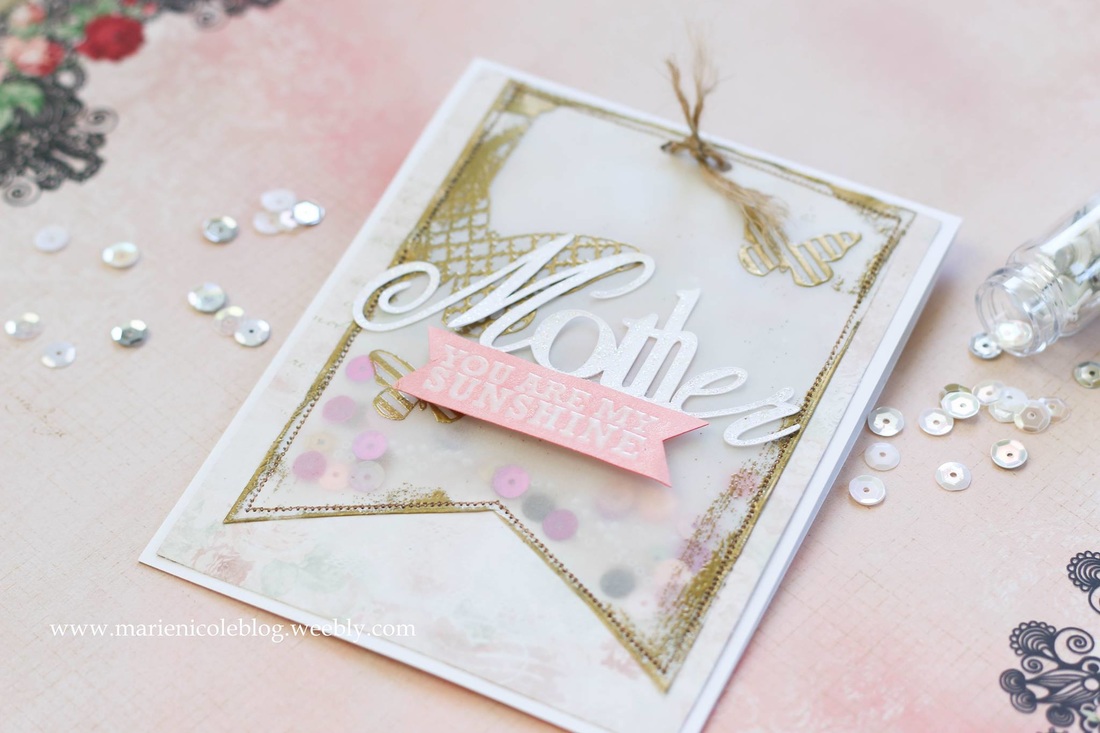
First, I cut a piece of patterned paper down to slightly smaller than my card base and adhered it down. Next, I took a piece of vellum and cut it into a flag shape. I stamped and embossed some butterflies in gold embossing powder, and then also embossed around the edges. I used a little tape adhesive to adhere the flag down on top of the background paper. BUT I DID NOT PUT ADHESIVE ON THE TOP OF THE VELLUM FLAG. This is important, because you need to leave the top open in order to fill the pocket with your shaker goodies.
I then ran the card through my sewing machine to sew down the sides of the flag pocket, again leaving the top open. Then I filled the pocket with several colors of sequins and some tiny clear beads.
After your pocket is filled, go ahead and sew the top shut.
I hope you take a look at the process video to see how I did this in more detail!
Thanks for stopping by and Happy Crafting!
Simon Says Stamps Monday Challenge
Simon Says Stamps Wednesday Challenge
 |
 |
 |
 |
 |
 |
 |
 |
 |
 |
 |
 |

I've had two new, beautiful nieces in the last few months so I thought a baby card was appropriate. I stamped and colored the little elephant with my distress inks and watercolor brush, and set him aside to dry. Then, I watercolored a background and after that was dry, sewed a piece of clear acetate over the top, leaving one side open until after I filled it with glitter.
I then stamped the greeting, and adhered all the pieces on top of the acetate with my ATG. I did put a little piece of foam adhesive behind the balloon, though, to pop it up for a little dimension.
It was super simple to assemble, and I am loving this way to make shaker cards!
I am linking this card up with:
Simon Says Stamp's Monday Challenge!
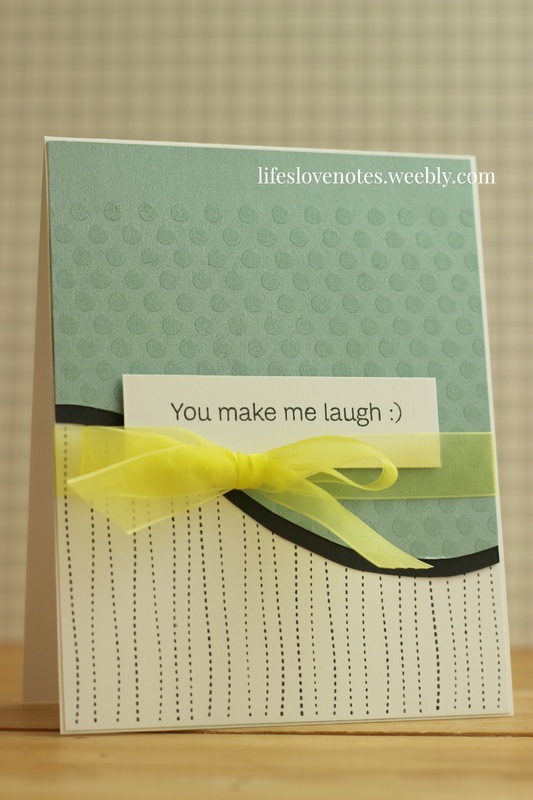
The bottom half I stamped with a dotted border stamp. I finished it off with some bright yellow-green ribbon, and a fun sentiment.
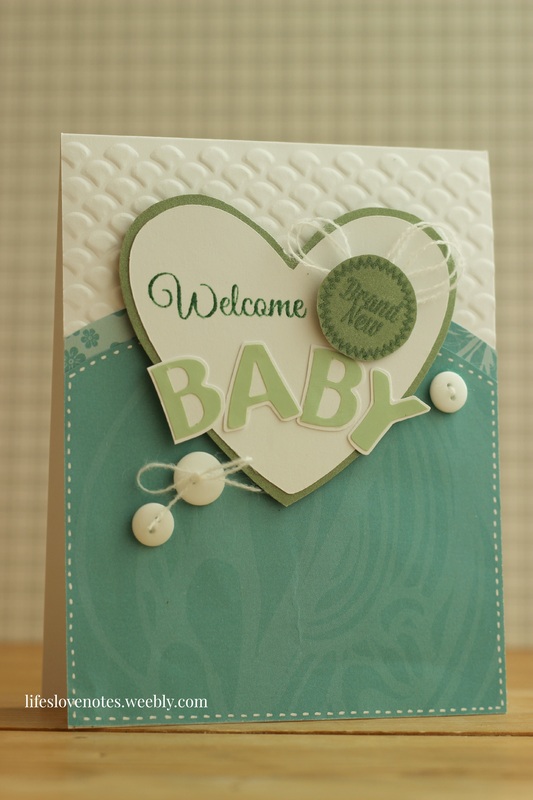
I started with my blue papers, drew a curve, and cut them out (seems to be a theme with me right now). Then I found the big heart die that I had cut out a while ago and it just seemed to fit perfectly on the card. I stamped on it using Avery Elle's "Oh, Baby!" stamp set, and also used some stickers for the word "baby".
FYI: I have been asked if this is some kind of announcement, and I just want to clear the air here. ITS NOT.
Moving on...
The top portion of the card I dry embossed to give it some more texture. I like how it turned out!

I stamped a number of birthday sentiments on the side with Versa Mark ink, just to leave a subtle watermark look. Then, I found some coordinating patterned paper for the other side. The stars were stamped and fussy-cut, and I stamped and clear embossed the sentiment.
Kinda simple but I think it turned out pretty cute. I could see it being sent to either a boy or a girl.
Some products I used:
 |  |  |  |
| |  |  |  |
 |  |  |  |
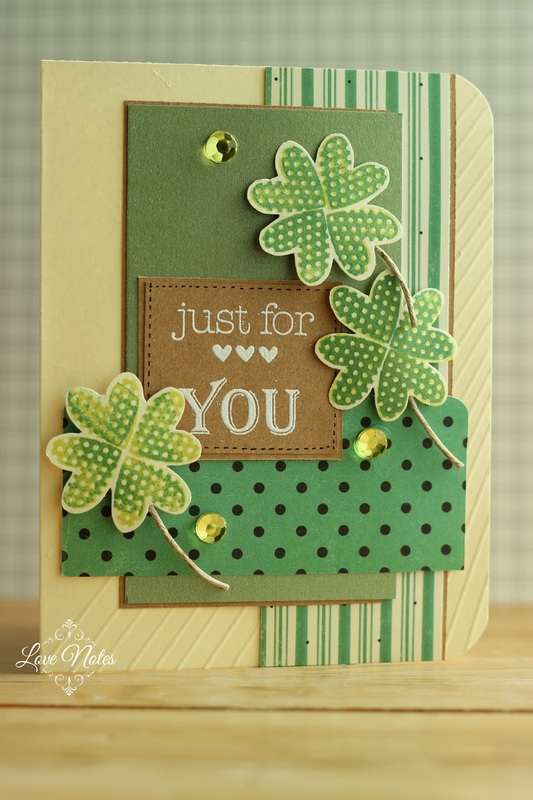
I started by searching through my papers to find anything green. I came up with a few fun, coordinating patterns.
I did a little scoring on the base of my card- some diagonal lines on one half of the card. It's subtle, but it gives it a little texture.
The clovers I made by using a heart stamp that I have. I just stamped them four ways to make it look like leaves, and then fussy cut them out. I have absolutely no St Patrick's Day themed stamps or anything, so I improvised. The stems of the clovers is just a bit of thick twine I cut and glued to the back.
I was so excited to be able to use these green/yellow rhinestones. I've had them forever but never used them since they never seem to match the cards I'm making.
The sentiment is stamped with Versa Mark and embossed in white.
***UPDATE- Wow! I'm so excited to announce that this card was selected as a challenge winner for Simon Says Stamp! ***
Some products I used:
 | |  | |
| |  | |  |
 | |  |
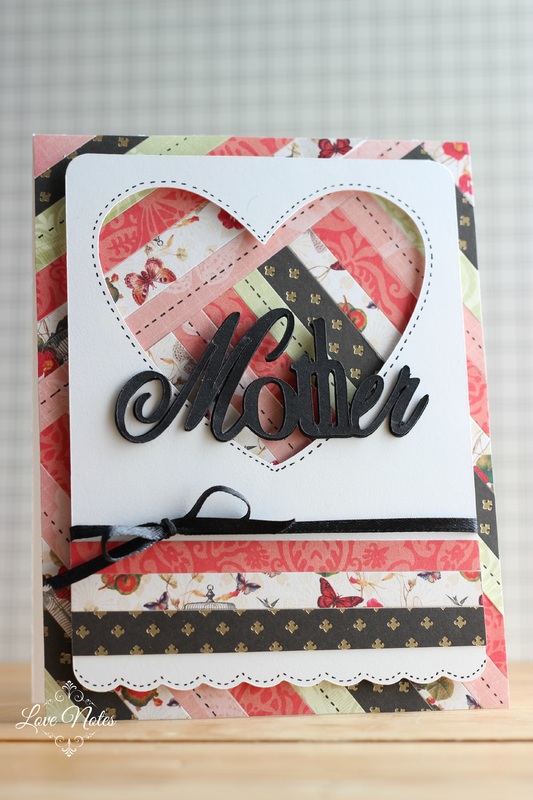
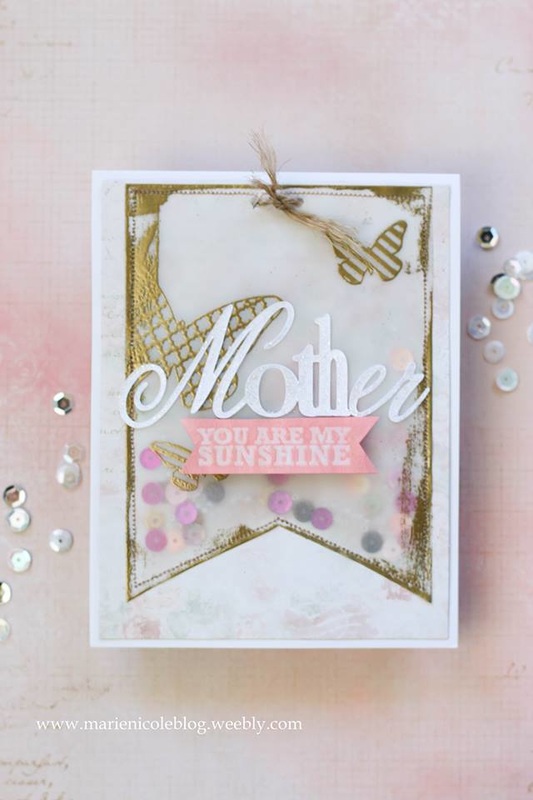
Simon Says Stamp's Wednesday Challenge is to make a mother/special girl card.
I decided to mash the two challenges together into this one card.
I started by cutting strips of paper from my Mariposa Matstack. I didn't measure my strips, I just cut them into similar sizes. Then I arranged the strips on my card so they would cover the whole front.
It started to look a little bit like a quilt to me, so I added some dash lines on some of the strips so make it have the look of being sewn.
The front window panel I cut with my Cricut. I added some faux stitching around the heart and bottom border as well.
The "Mother" sentiment was cut with my Cricut as well. I cut it three times and then adhered them together to give it a little more dimension. I really wish I had some glitter to add to the sentiment. I think that would make it really pop.
Some products I used:
 |  |  |  |
 | |  | |


Author
So glad you found me! This blog is my little space where I can share bits about my life and my latest crafting projects (mostly handmade cards). My goal is to share, inspire, and to be a positive presence in the creative community.
Take a look around and stop by anytime!


Find me on Instagram!
Archives
January 2018
December 2017
November 2017
October 2017
September 2017
July 2017
June 2017
May 2017
April 2017
March 2017
February 2017
January 2017
December 2016
November 2016
October 2016
September 2016
August 2016
July 2016
June 2016
May 2016
April 2016
March 2016
February 2016
January 2016
December 2015
November 2015
October 2015
September 2015
August 2015
June 2015
December 2014
October 2014
July 2014
May 2014
April 2014
March 2014
February 2014
January 2014
Categories
All
Albums
All Cards
ATCs
Birthday Cards
Brutus Monroe
Canvas Corp Brands
Cards
Christmas
Christmas Cards
DIY
General Cards
Get Well Cards
Halloween
Home Decor
Love Cards
Mixed Media
Papercraft
Planner
Punny Cards
Scrapbooking
Shaker Cards
Special Occasion Cards
Summer And 4th Of July
Tags
Techniques
Thank You Cards
Toddler Art
Tombow
Tutorials
Watercolor
Link Love


 RSS Feed
