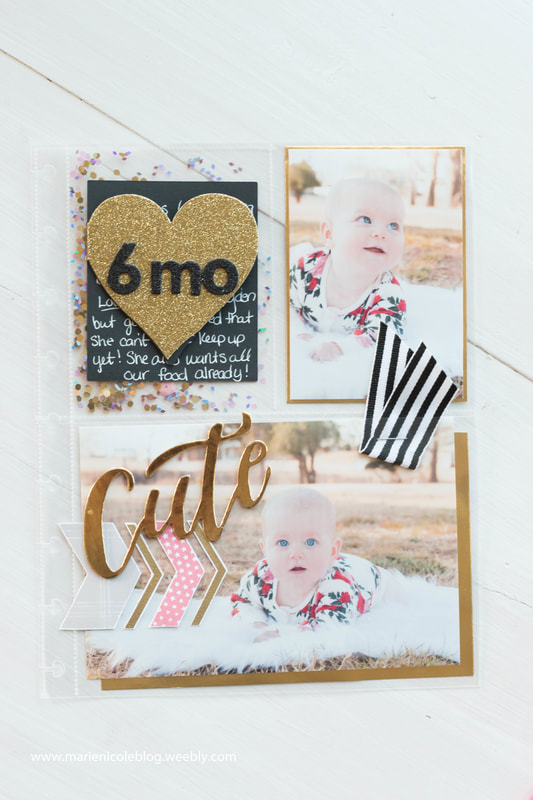
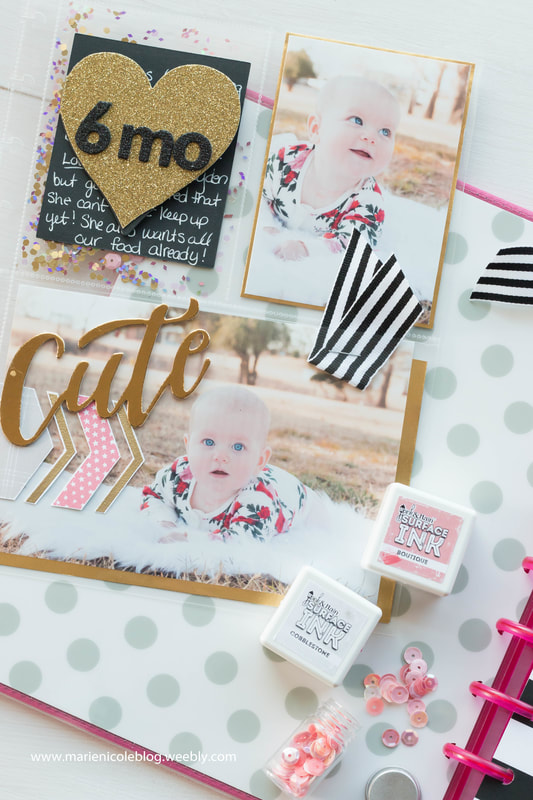
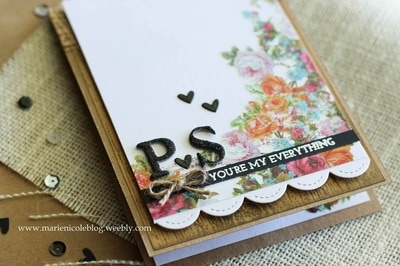
 My baby girl just turned 6 mo! I did a quick 5 minute momtographer photo shoot with her and loved how the photos turned out, so I decided to dedicate a photo page to her cute, chubby face. I kept it simple by just using several colors and only a few photos. Sometimes, less is more!
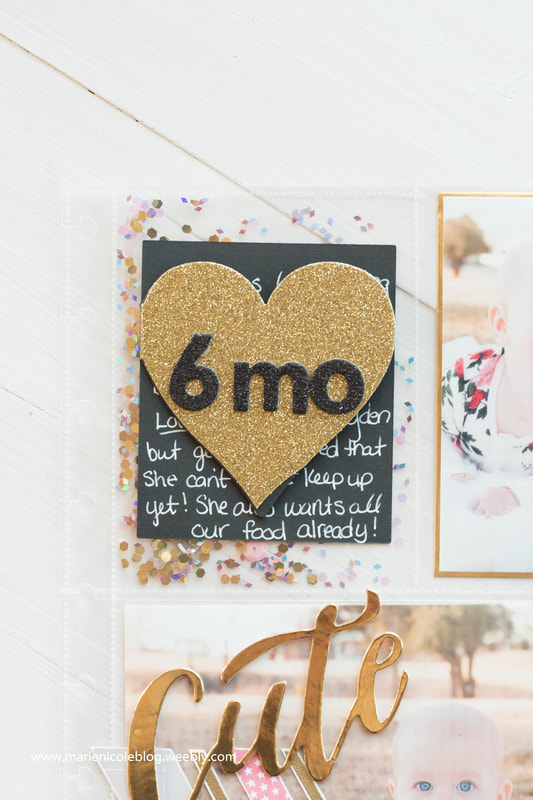
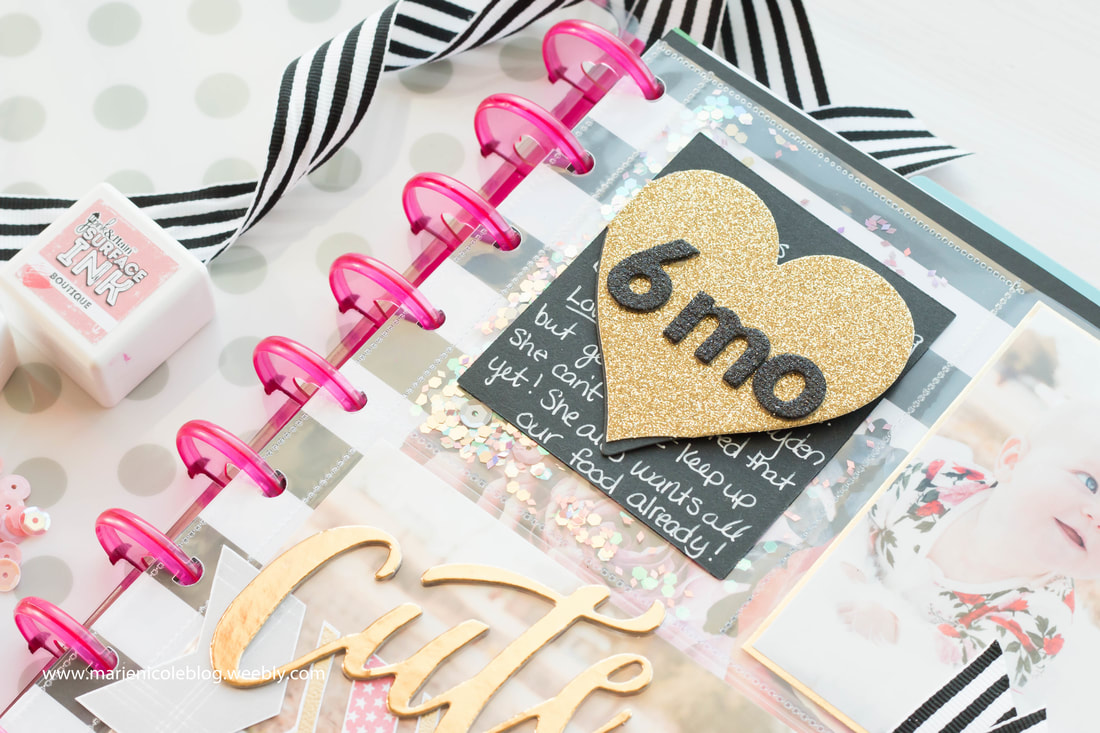
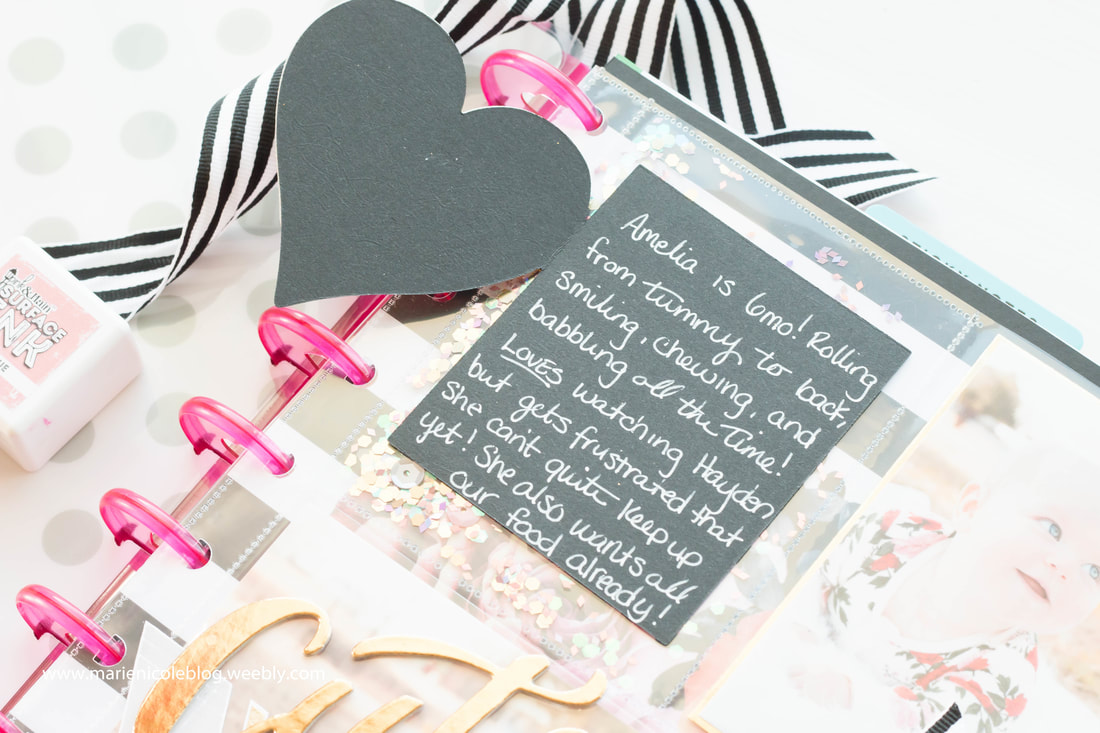
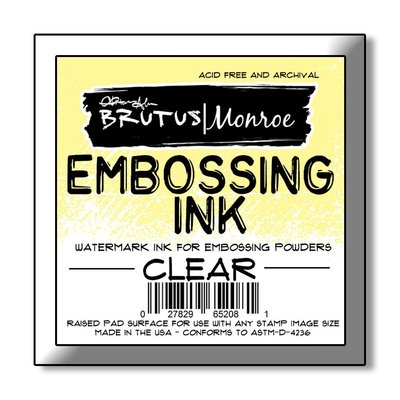
I also wanted to use the new inks and stamp set that I received from PINK AND MAIN. These inks are the same formulation as BRUTUS MONROE SURFACE INKS, but in Pink and Main colors! The colors are so vibrant and I LOVE the hues! I stamped out some of the arrows and then fussy cut them out. I also stamped the skinny arrows in some EMBOSSING INK and GILDED EMBOSSING POWDER to add a little shine. I adhered these arrows to the outside of the plastic pocket page, while the photo is safely tucked inside. This way, I don't actually have to glue anything onto my photo! 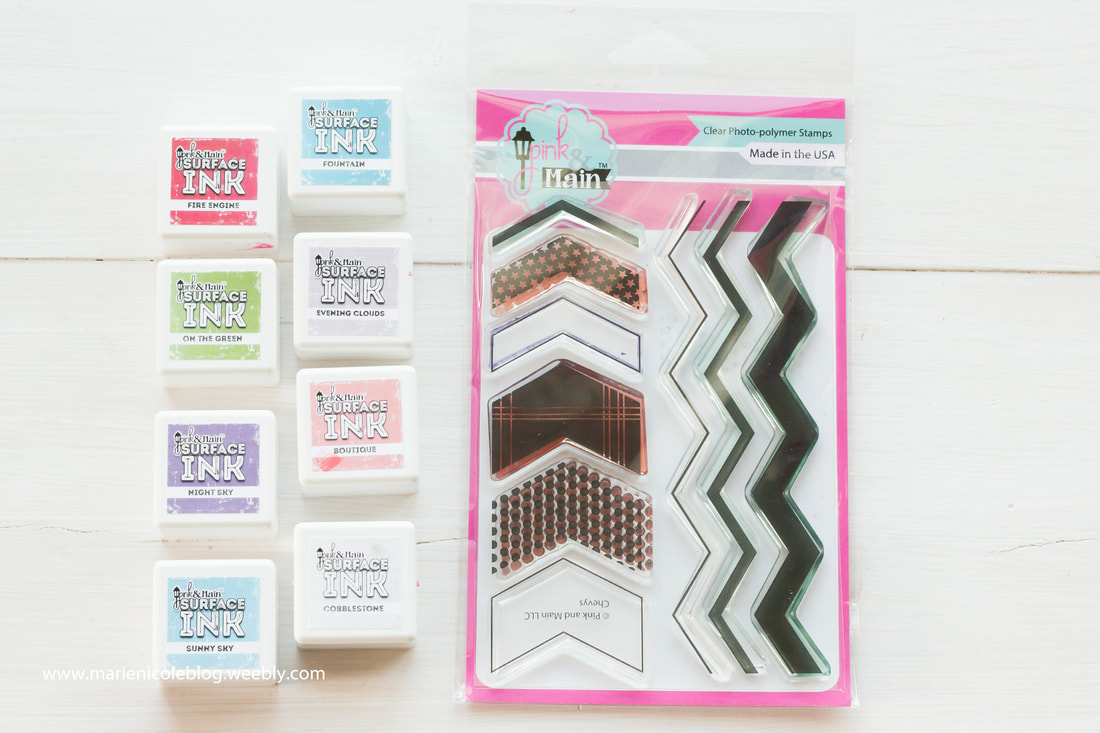 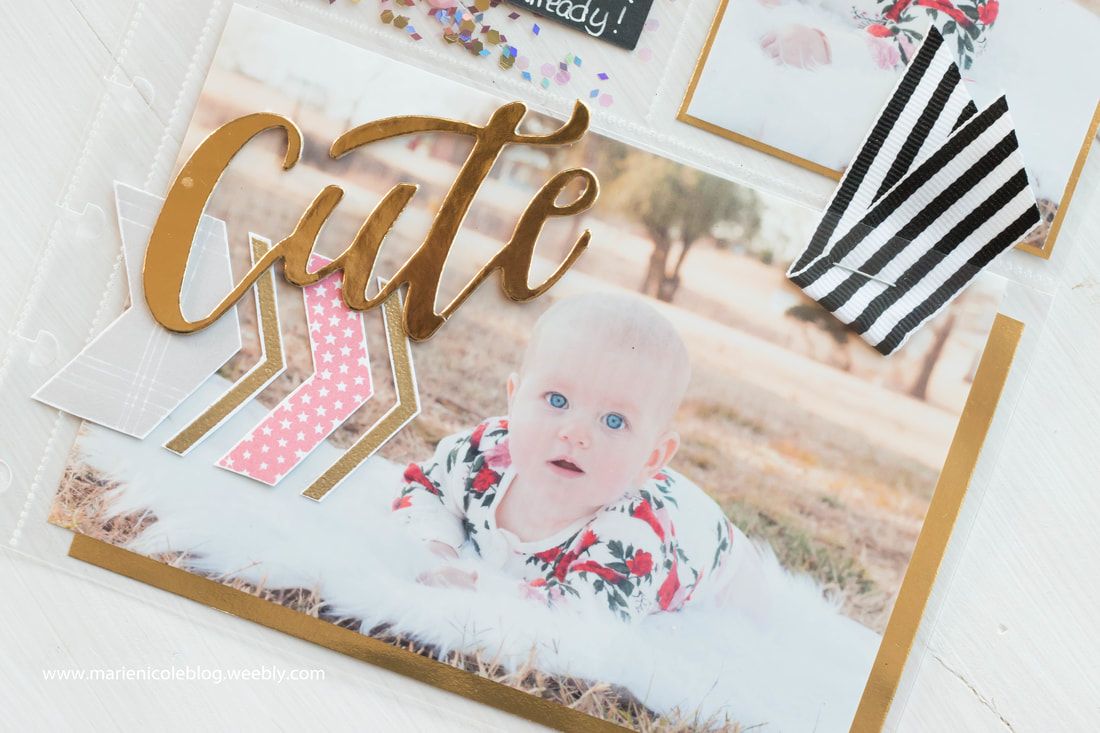 I also made the top left pocket a shaker pocket by filling it with sequins and glitter, and then sealing it up using my FUSE tool. I have LOVED my fuse tool for creating pocket pages and shakers. As long as you give it enough time to warm up before using it, sealing up your pockets is quick and easy! Also, I adhered a little note card that you can flip open to the outside of the shaker pocket. I wrote in a few memories on the card about my chunk-a-muffin's current milestones.
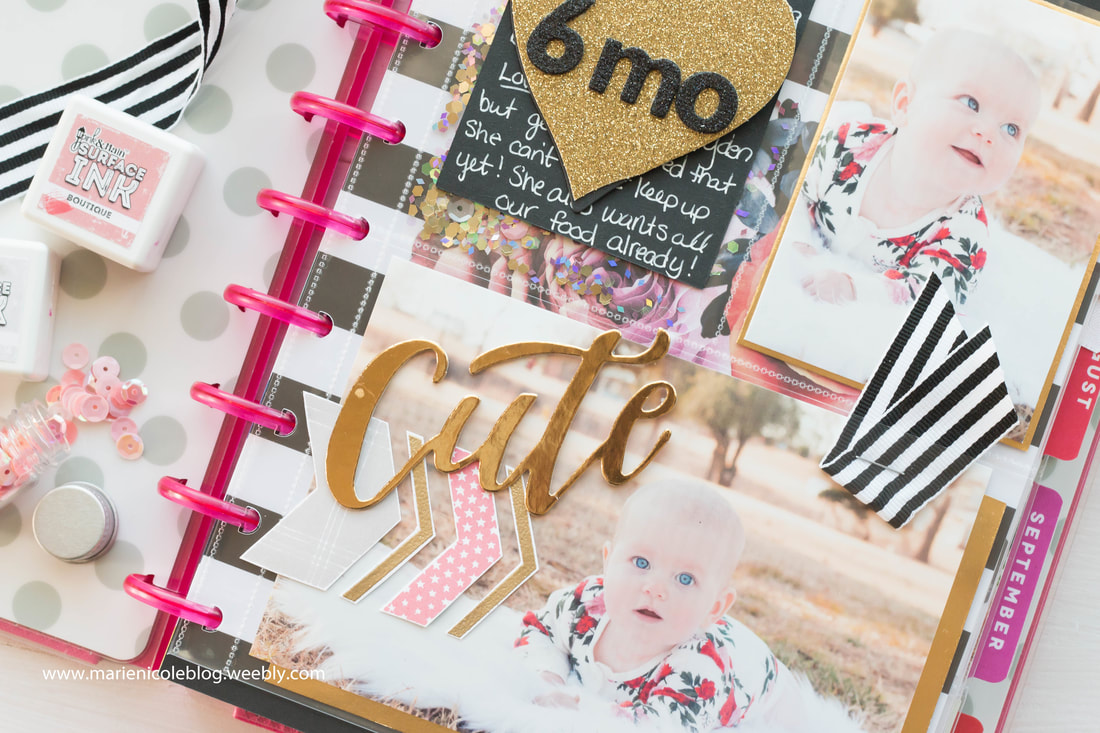 I also matted my photos using a little GILDED RINEA FOIL from Brutus Monroe. It worked beautifully with my color choices and just tied the whole page together! This foil is beautiful as-is, but can also be die cut and stamped on. I added some last touches with some ribbon and cardstock stickers and then placed this page into my planner! 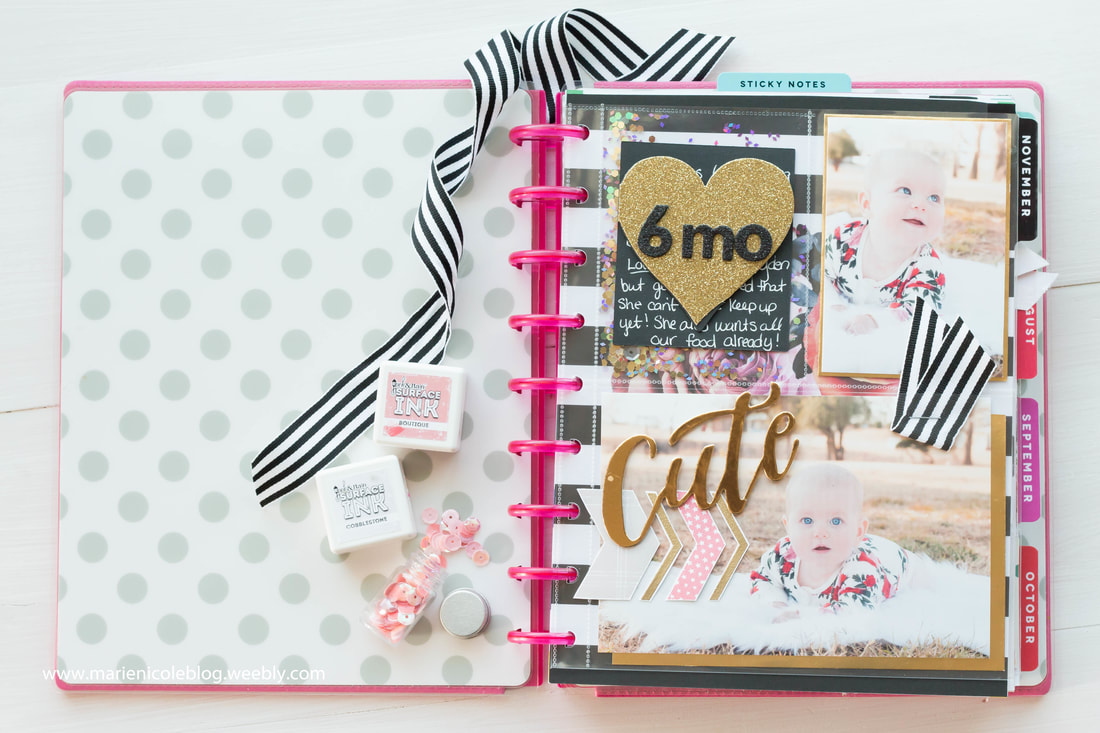 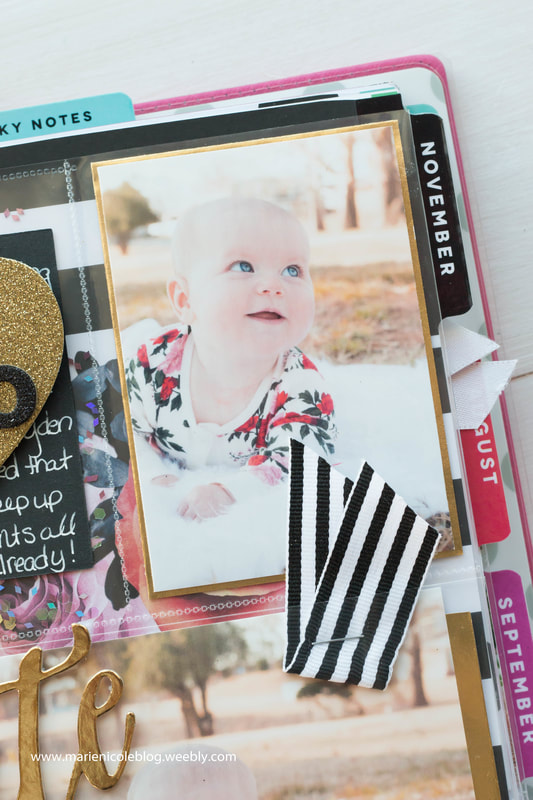 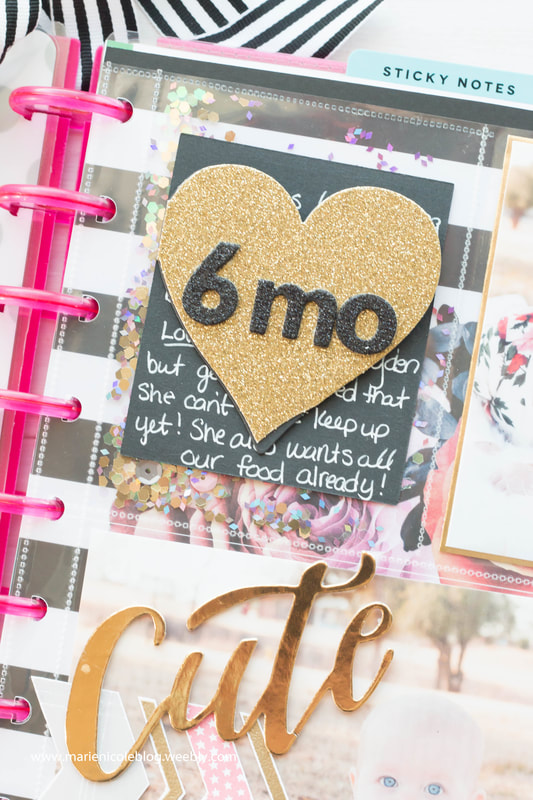  Thanks for stopping by today! I hope you've been inspired in your own crafting. Until next time, Marie Nicole More from Marie Nicole...
0 Comments
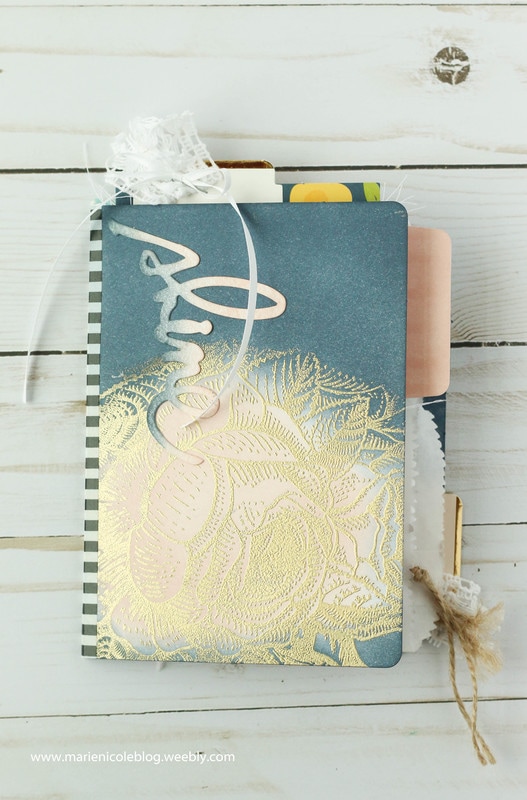
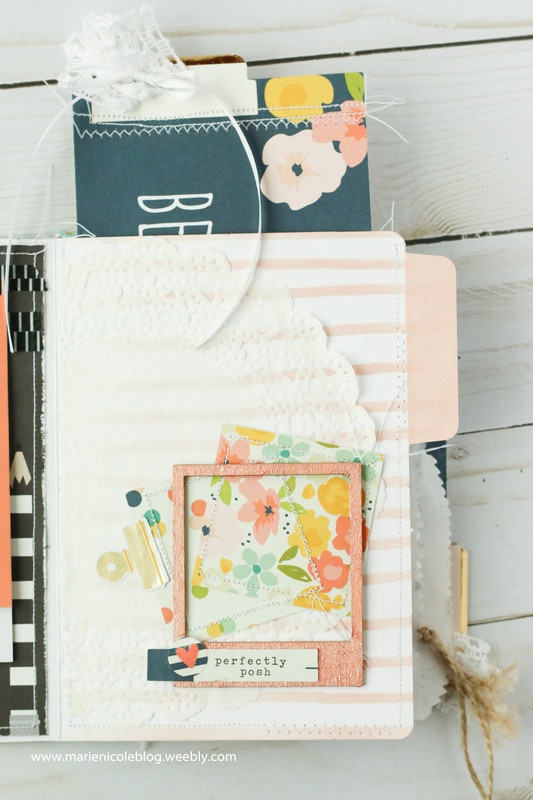
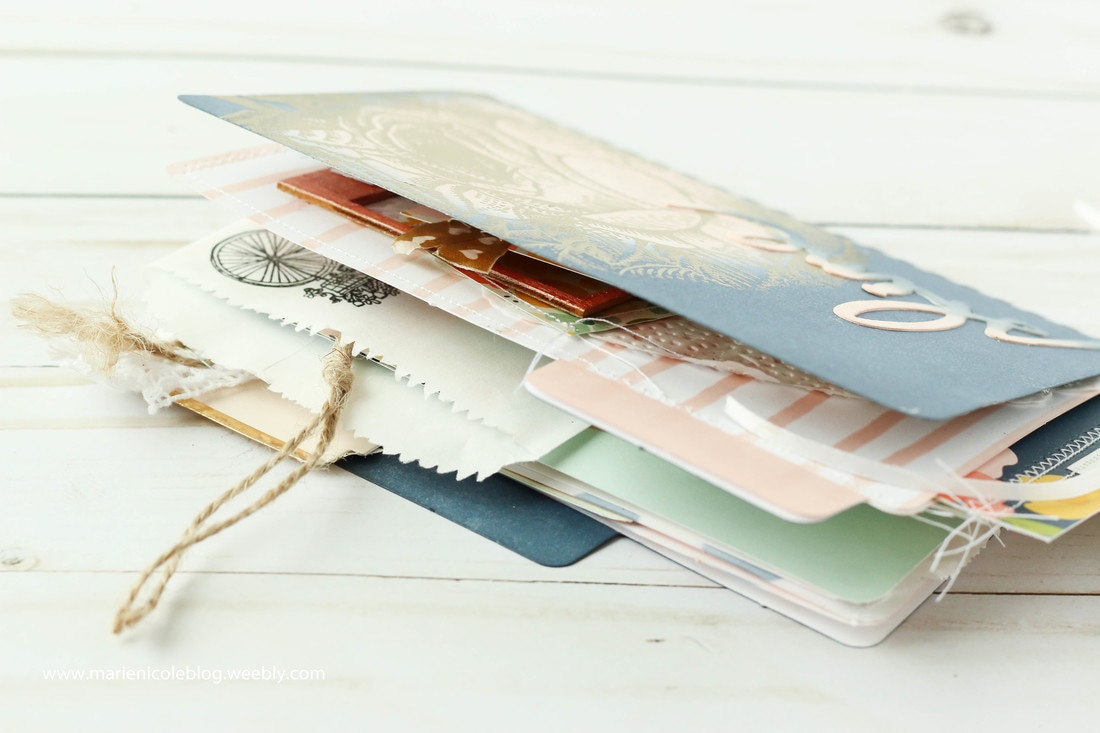
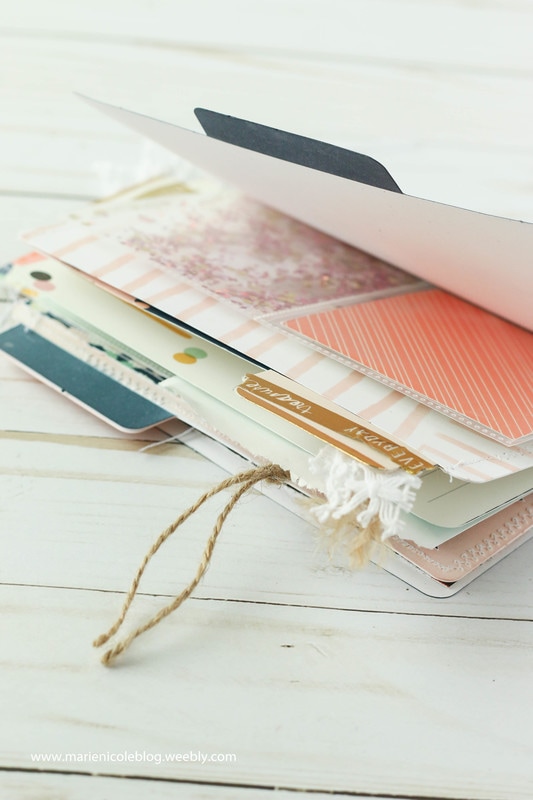
This little file folder album was so much fun to create. I was inspired by a few Pinterest posts and videos and decided to try to build my own. I grabbed my pack of White File Folders from Canvas Corp and stamped and inked three of them, and then sewed them together to create the "bones" of my album. I left a few of the sides unsewn in order to create a few pockets to tuck goodies or photos inside of.
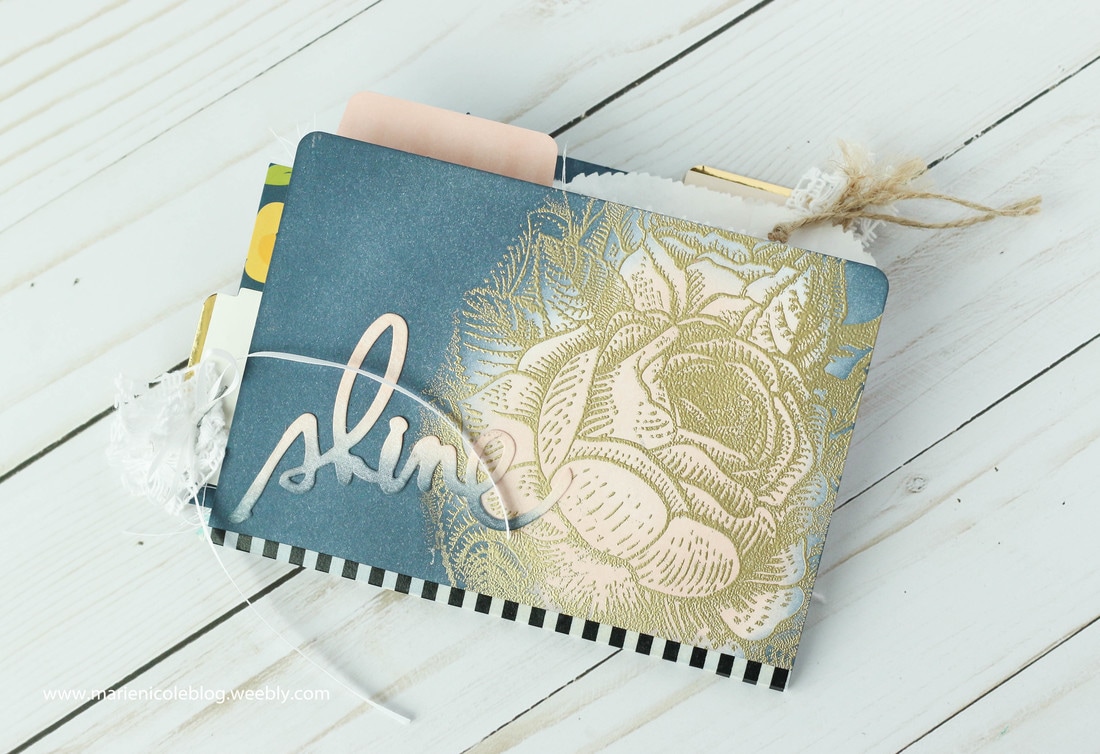
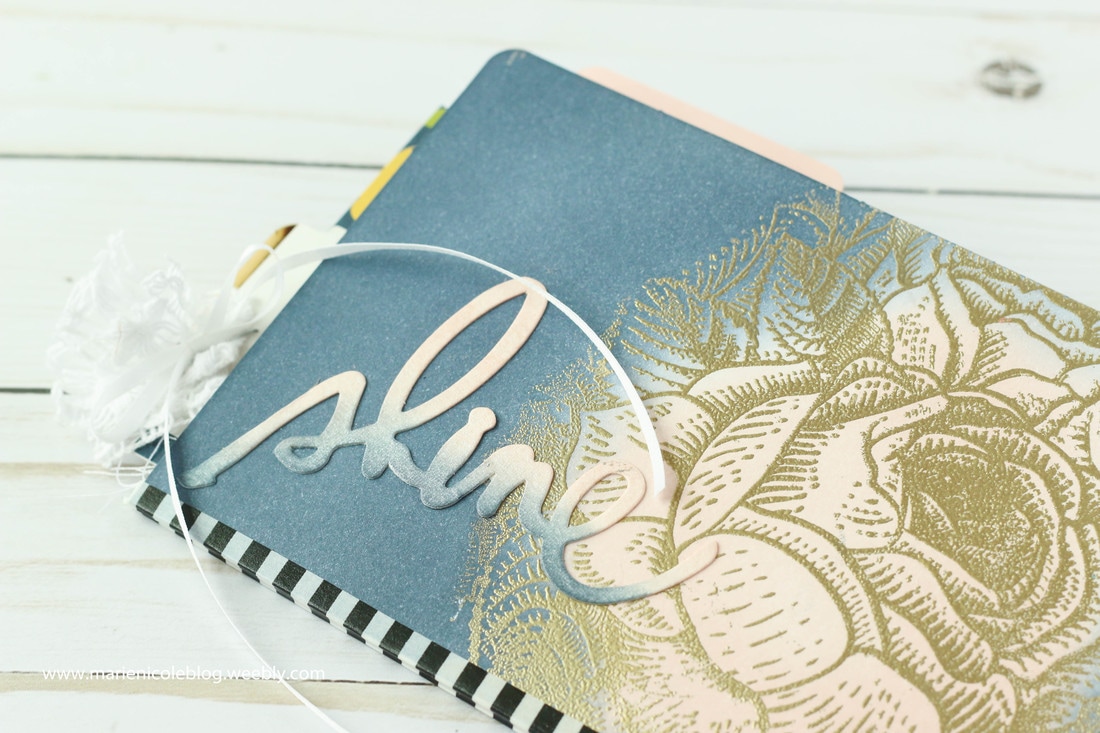
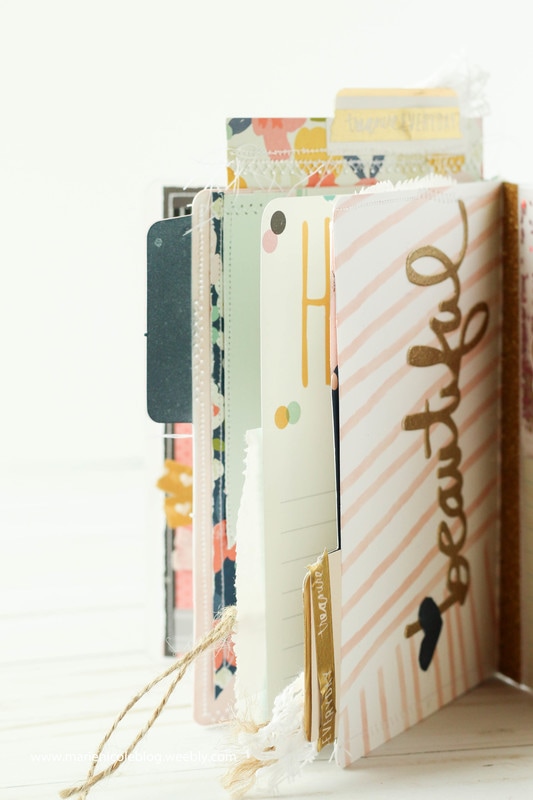
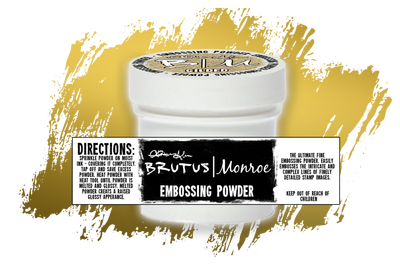
The front cover was decorated by stamping Brutus Monroe's Enchanted Rose stamp with embossing ink and then embossing in gold. Then, I just ink blended on a few colors and added the little die cut "shine" sentiment. I also spritzed it with a little Tattered Angels Pearl Glimmer Mist for more shimmer!
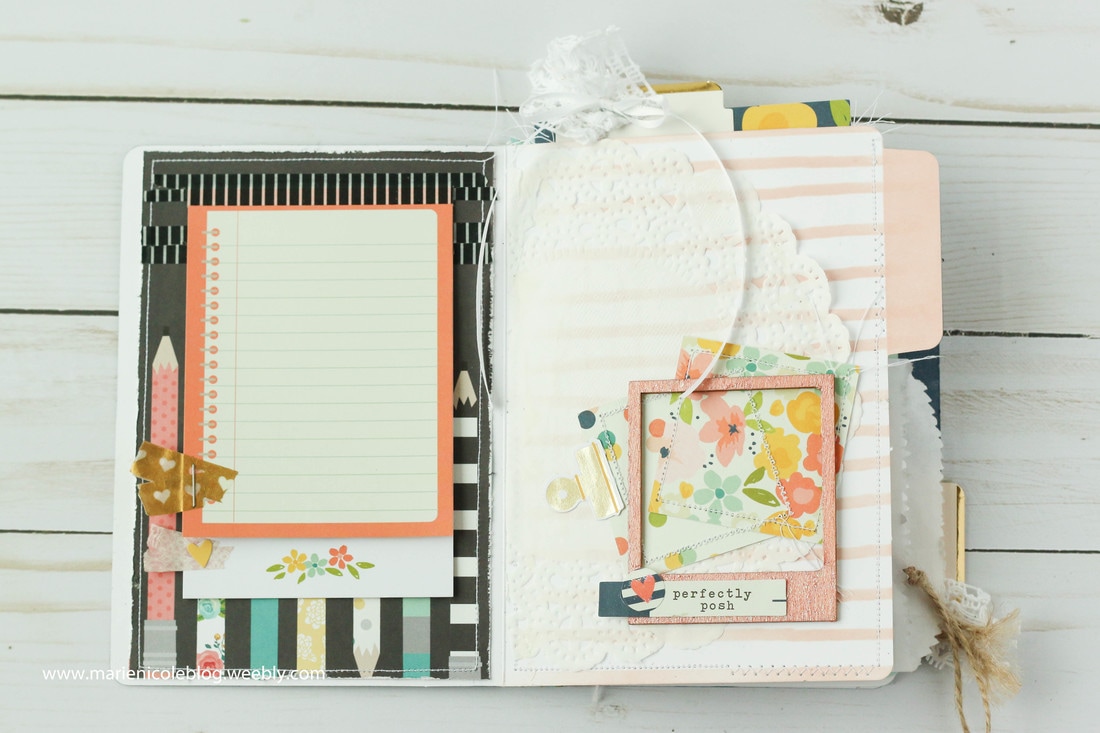
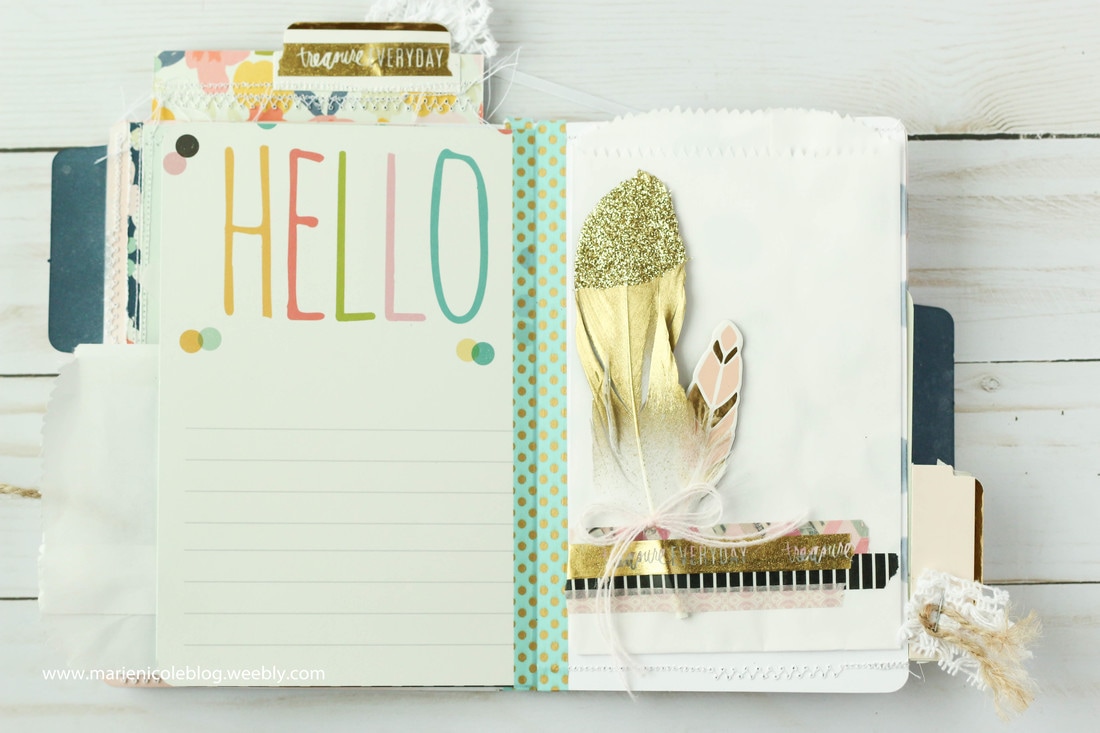
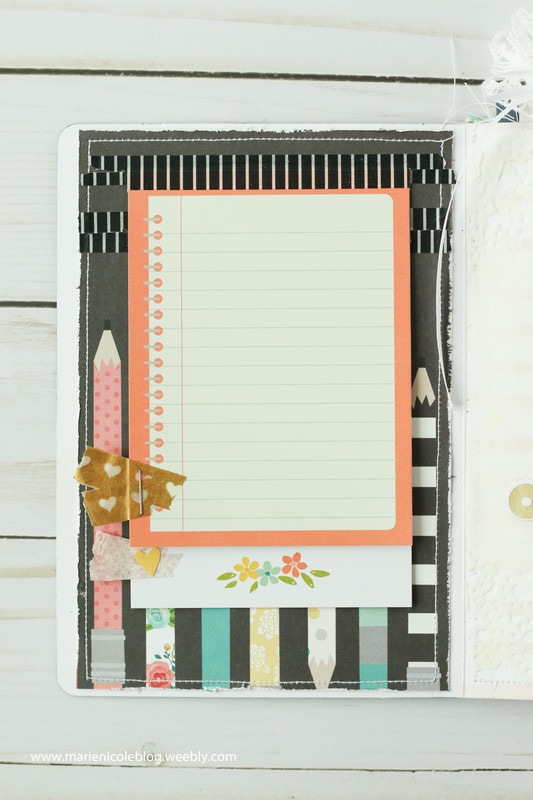
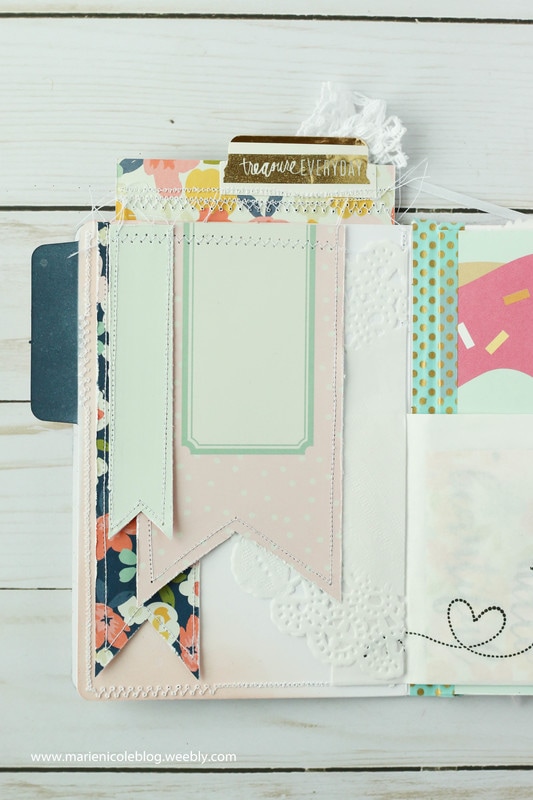
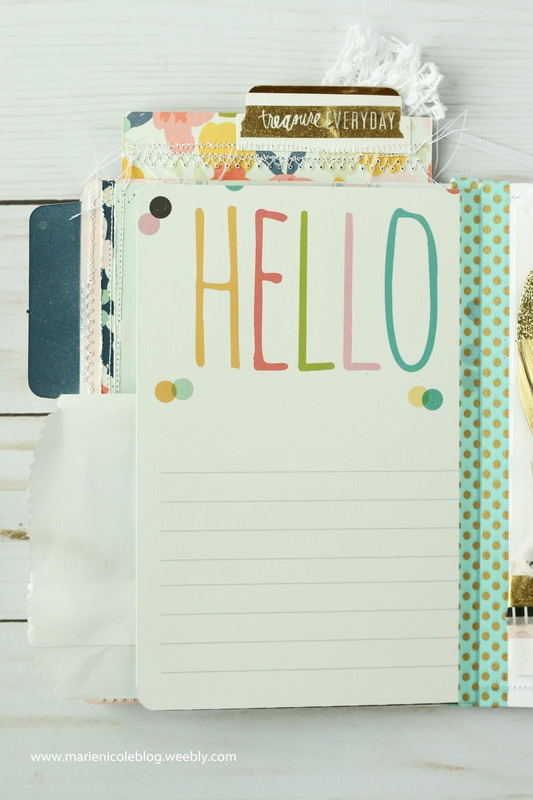
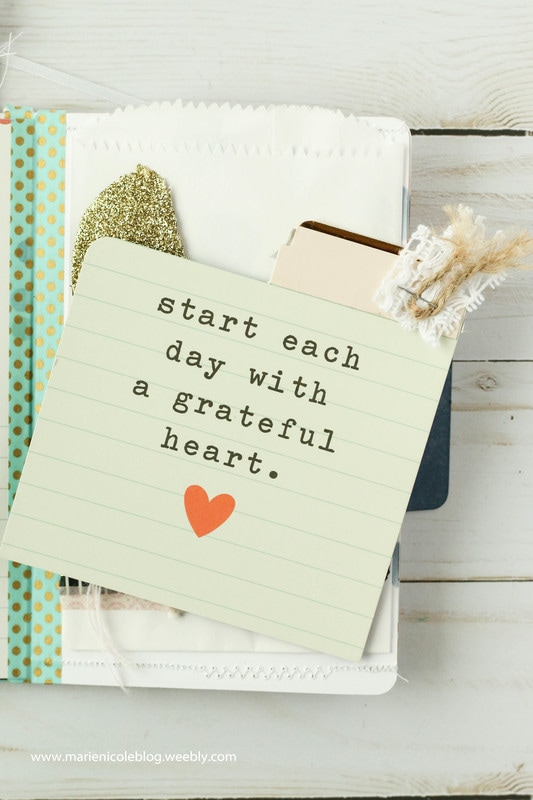
The first inside page is decorated with some journaling cards from Simple Stories. I wanted to add a lot of stitched details, so for most of my layers I roughed the edges with a scissors and then stitched around the outsides. I also added a few of the journaling cards with some washi tape so that you can flip them up and add photos or handwrite memories and stories on them.
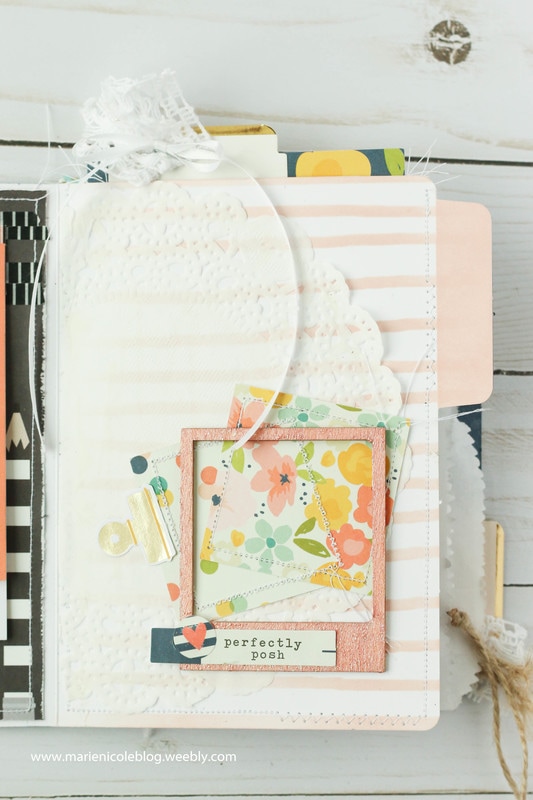
The page opposite the first has some ink blended stripes and then some more layered embellishments. I added a little wood frame that was painted with Tattered Angels paints in coordinating colors. This little frame is perfect for adding a little 2x2 photo inside of. 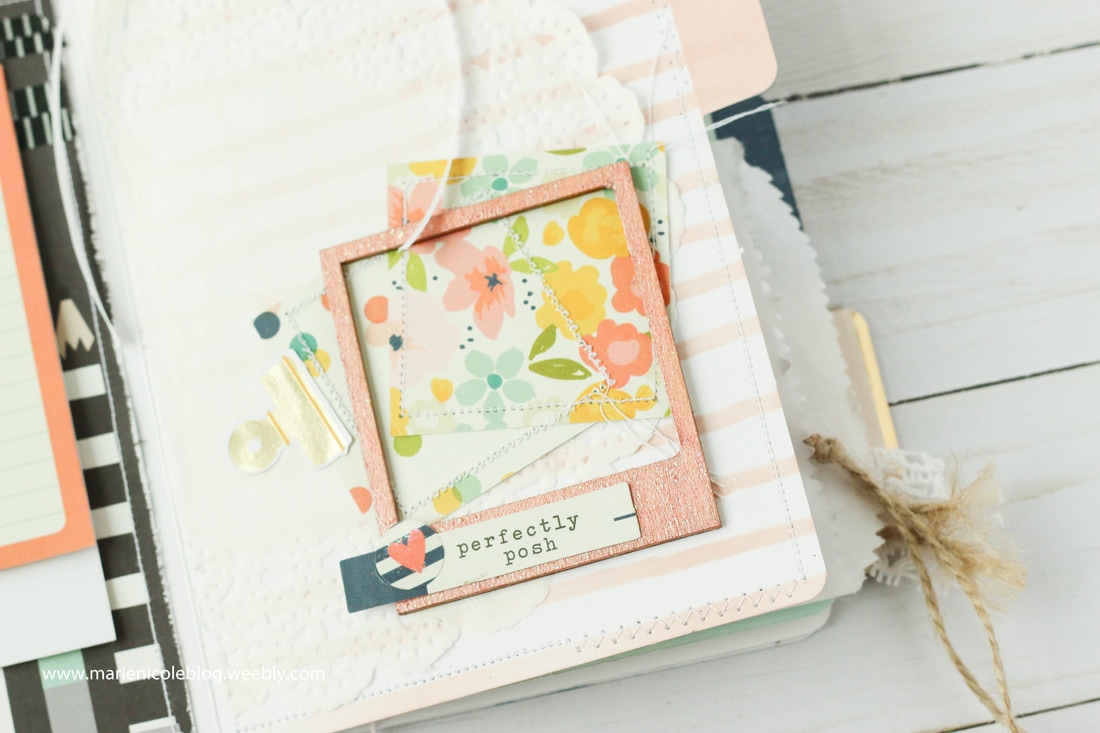
The top edge of this page I left unsewn in order to create a pocket. Inside the pocket I slipped in a fun journaling card on which I added a tab and some ribbon embellishments.
Using all these papers from the same Simple Stories collection made it so simple to mix and match everything! The colors and patterns all coordinate beautifully and took a lot of the guesswork out of selecting papers myself. 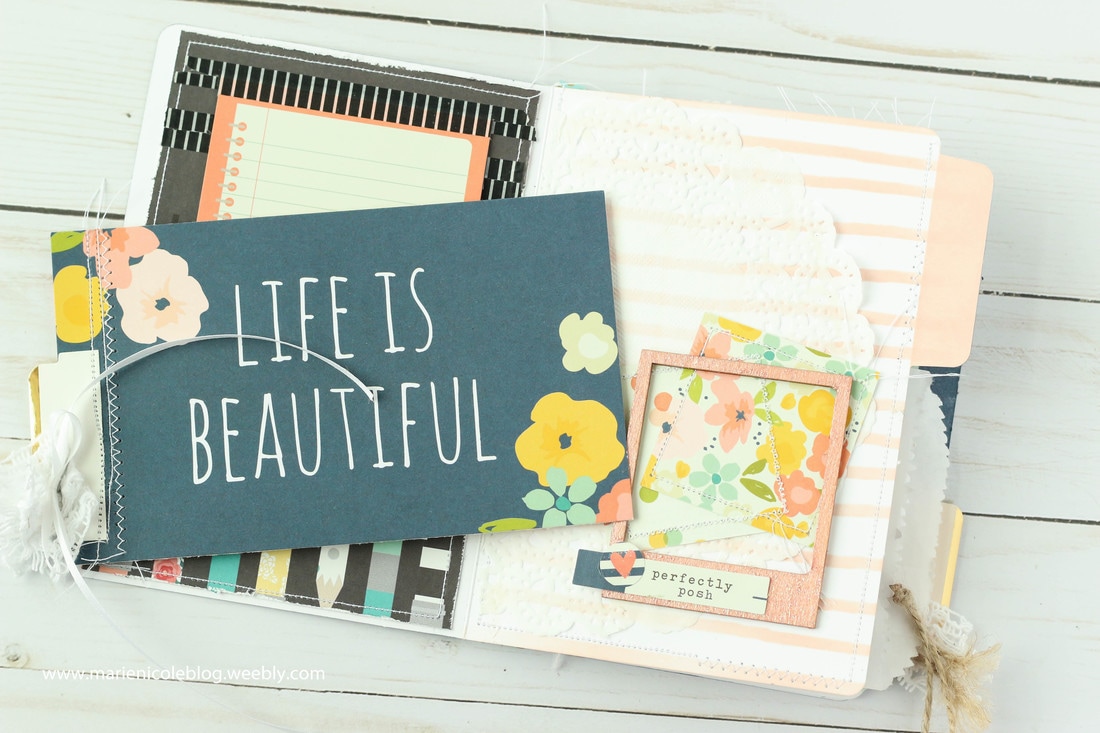
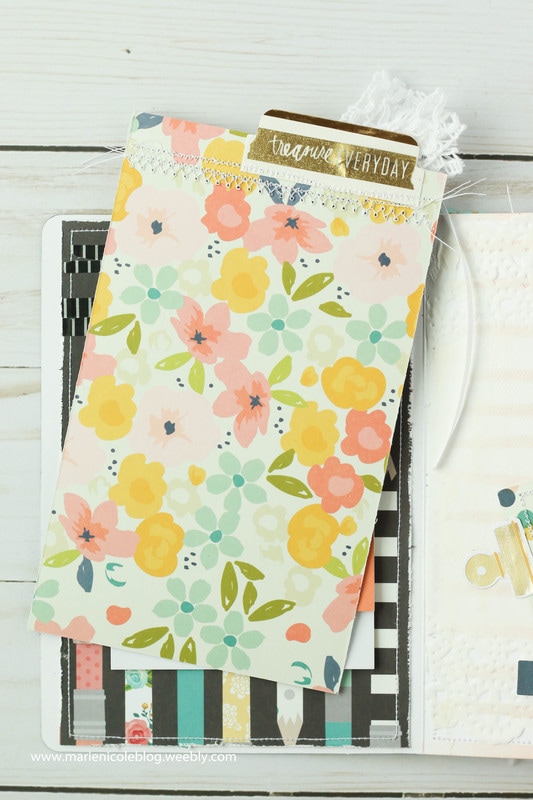
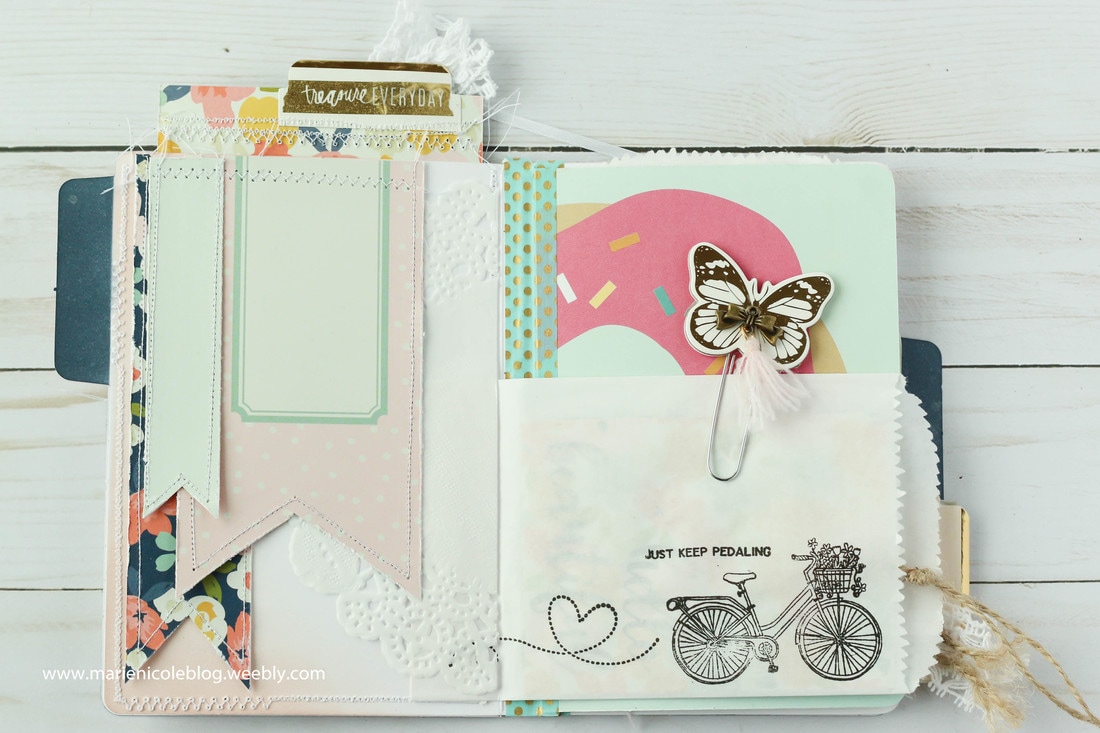
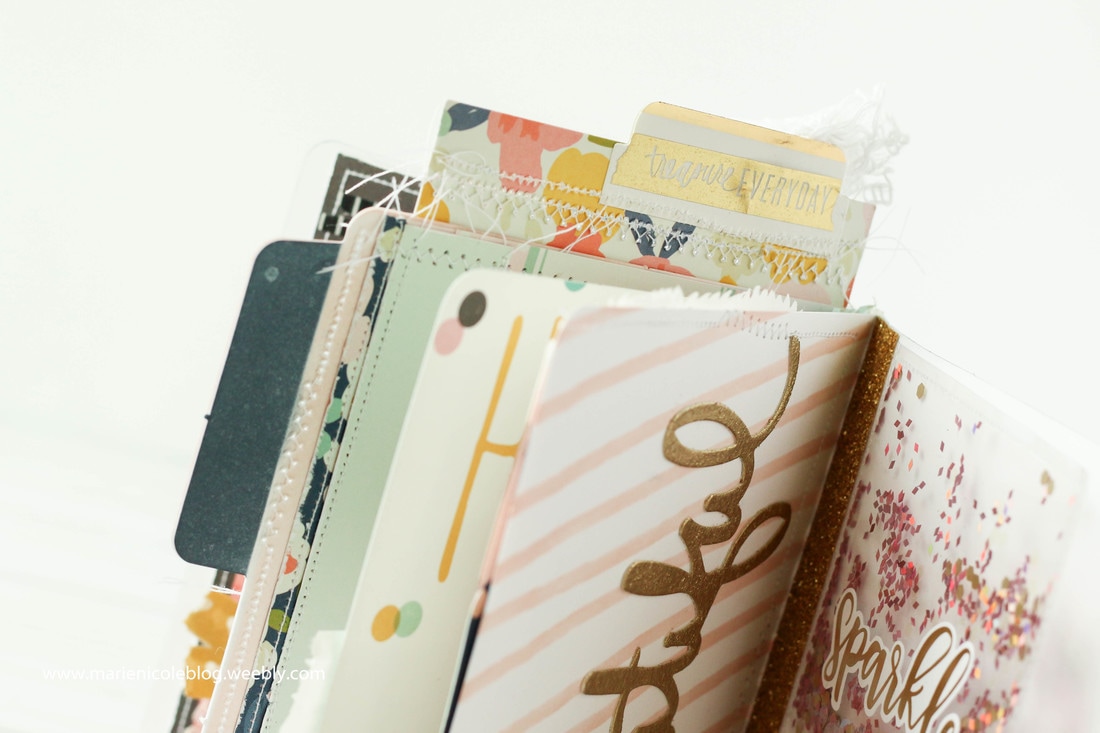
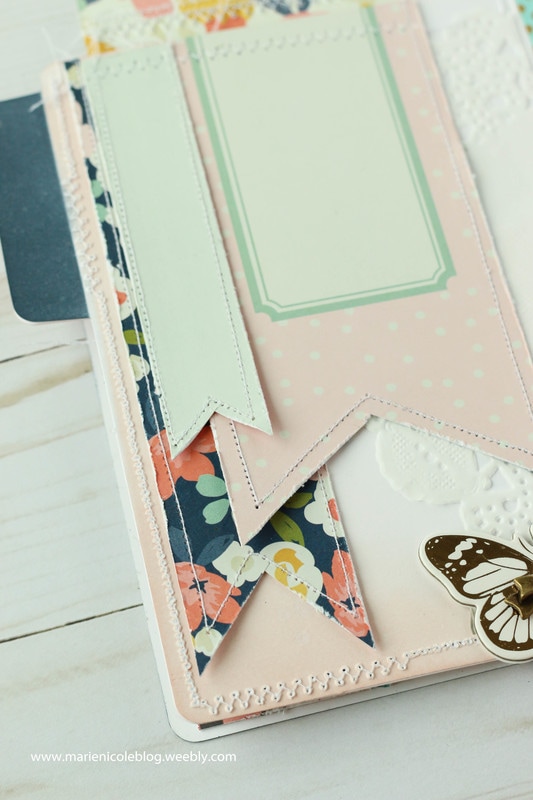
Moving on to the next page, I had fun embellishing with some strips of patterned paper that was also roughed up and sewn. I cut the ends into banner shapes and layered them over each other.
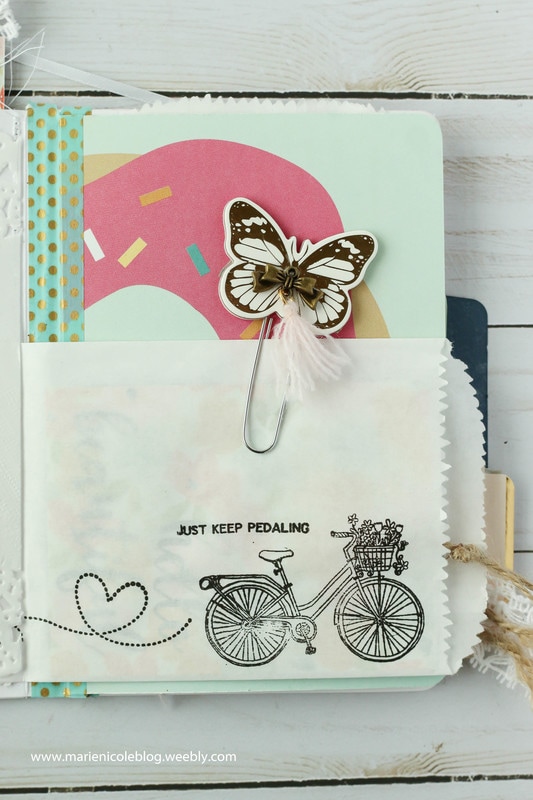
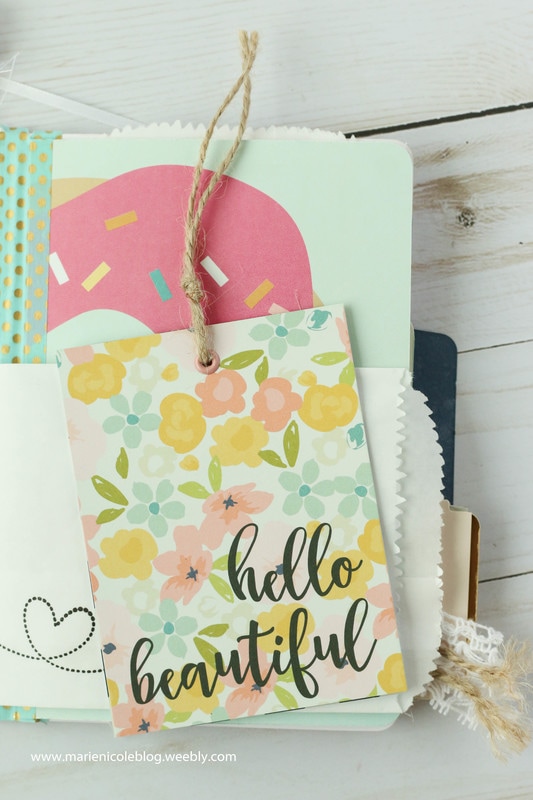
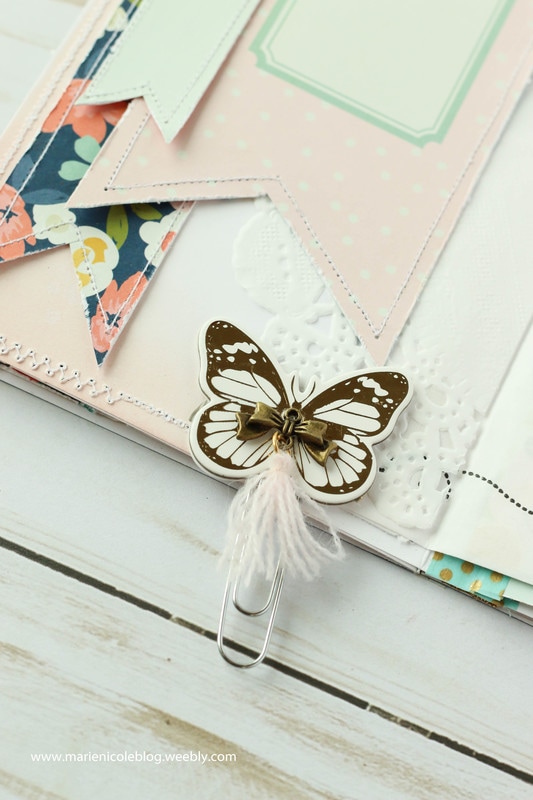
I also added a little paper bag from Canvas Corp that I stamped on, and added a chipboard butterfly paperclip that I created. There is another journaling card inside of the paper bag to give more room for memory documentation and photos.
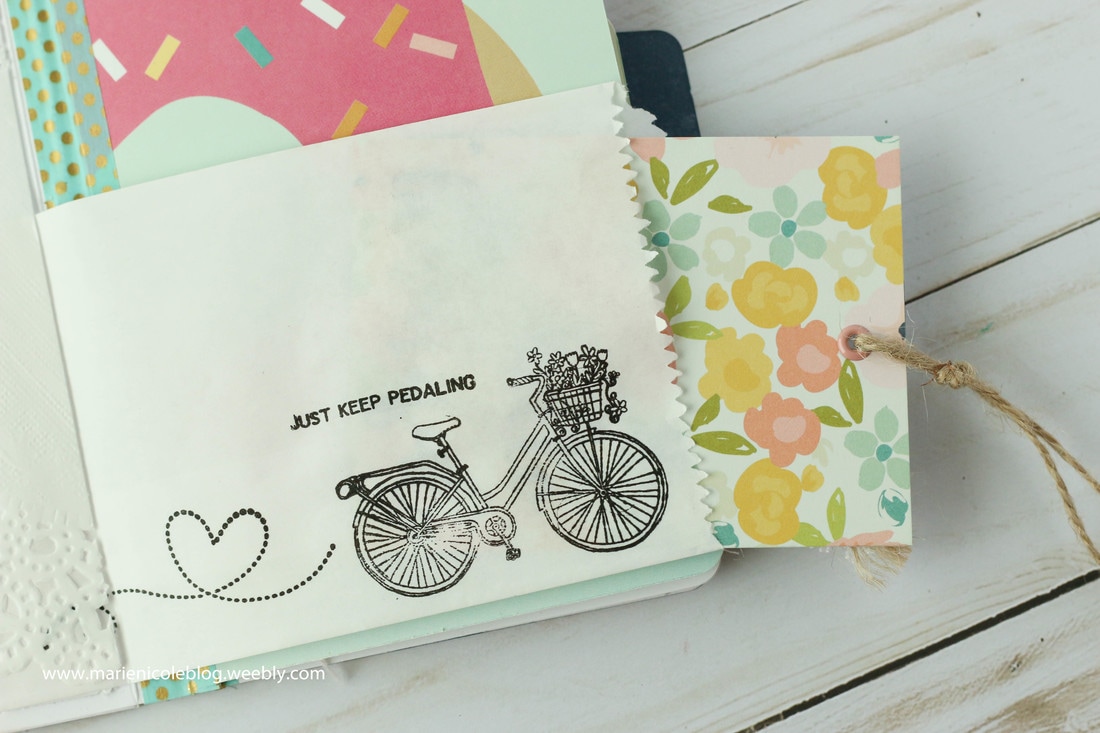
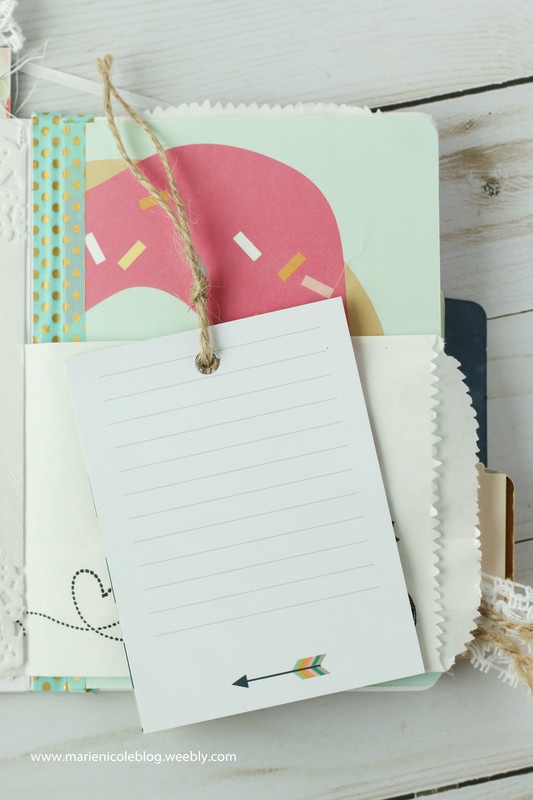
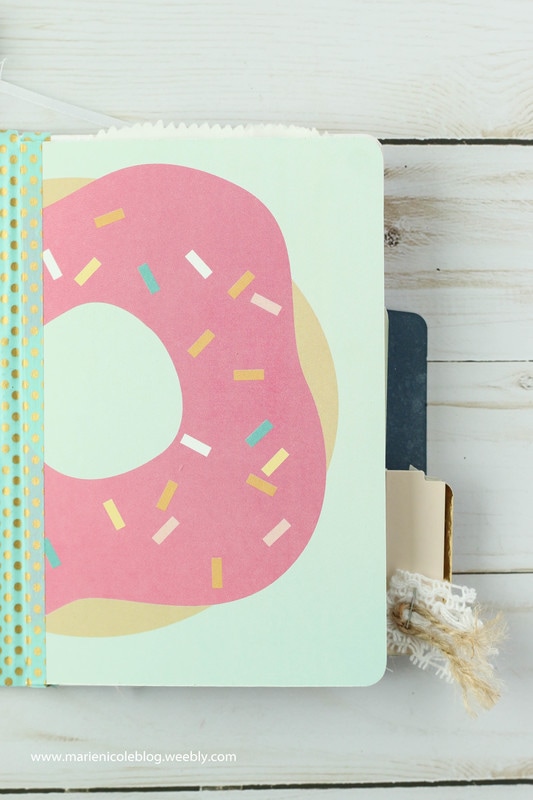
I also added another page here by taking a large journaling card and taping it down with some fun washi tape. I loved that donut image and the colors matched nicely with the soft color palette that I had going on. On the flipside of the donut image there is more lined space for writing on.
Opposite of the added page, I added another paper bag that I added more washi tape to, along with a few feathers. The paper bag is left empty to allow a little room to pace ephemera and fun little keepsakes in.
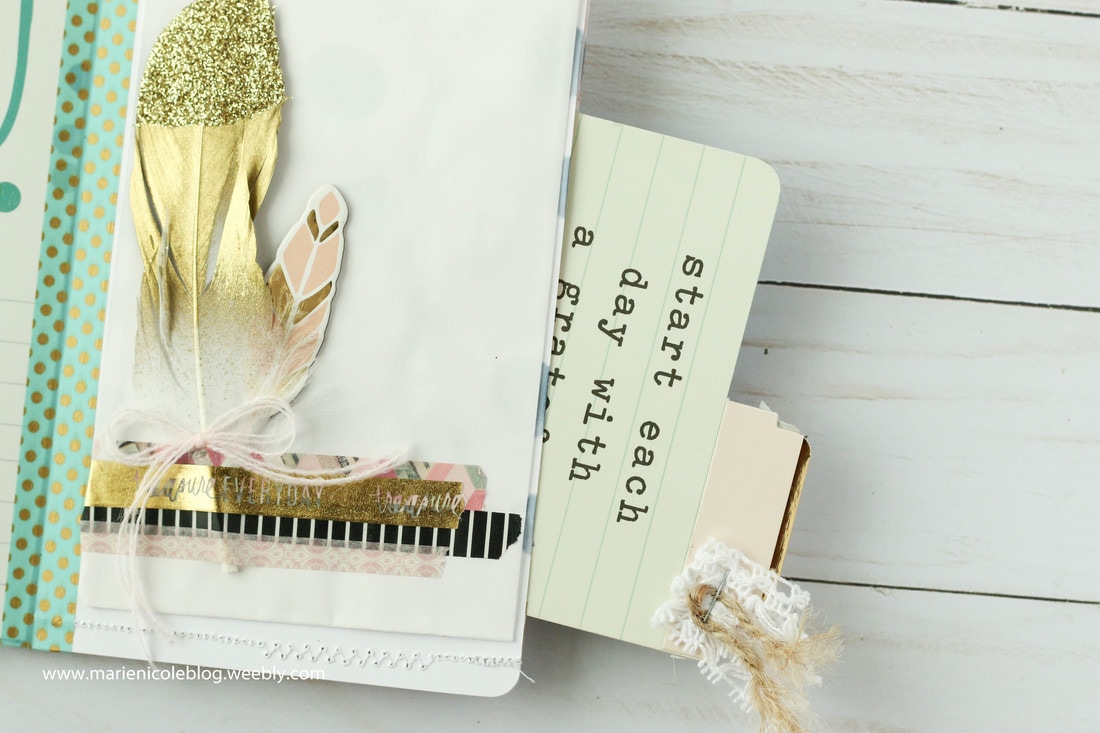
The side of this page I left unsewn to create another pocket. I found a journaling card I liked and added another tab and some ribbons and twine as well.
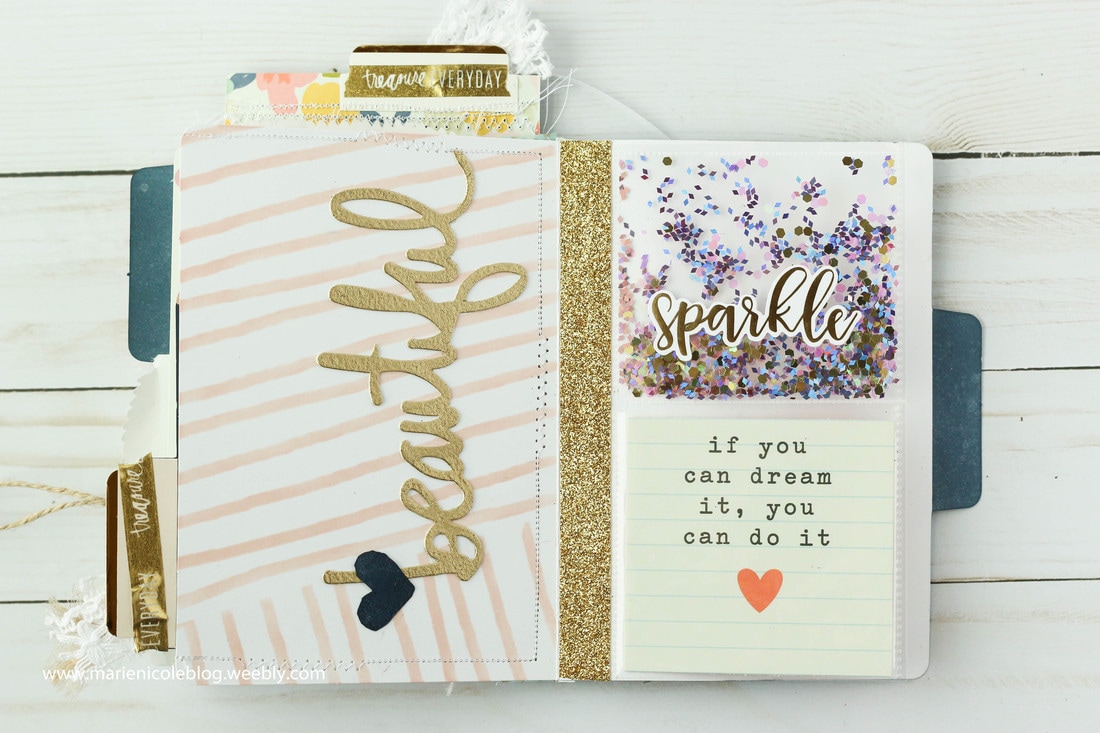
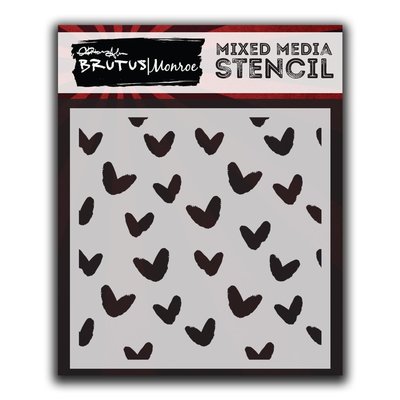
This last page was fun to decorate. I used my Pugsley stencil from Brutus Monroe to create ink blended stripes and then added a die cut sentiment, "beautiful", which I embossed with more gold embossing powder. I also created a fun pocket page with my Fuse Tool to add to the right side of this spread. The top pocket is a shaker pocket filled with glitter, and the bottom pocket is another journaling card.
This album was so much fun to put together and I have a feeling Ill be creating more of these albums in the future! I havent decided if I'd like to use this myself or send it away to a friend.
Thanks so much for stopping by to get a peek inside my mini file folder album! I have included some links below on items I used to create this.
Happy Crafting!
More from Marie Nicole...
Being a cardmaker, its just natural that I also love sending out happy mail to friends and family. I like to try to keep my address book up to date, but it can be hard to figure out how to keep my book tidy when I need to change the addresses in there!
I had this idea to use some of Canvas Corp's Chalkstock to create these fun little address cards. I embellished the front sides with photos of my friends and family, along with other pretty embellishments, and then left the backside blank so I could write their addresses and special dates in with chalk. 
I chose this Chalkstock for the reason that it acts as a paper verson of a chalkboard! You can write on it with chalk paint, markers, or regular chalk, and then wipe it off with water and write on it again. PERFECT for writing addresses and important info on the back of small cards. The best part? You can make your cards pretty and not have to worry when the time comes to change the info! I have my cards displayed here in a little 7Gypsies Librarie Drawer. Canvas Corp Brands currently has these drawers on sale, and once they are gone, they are gone for good! I'm so happy I picked one up when I did, but if you dont have one dont worry! Just find a cute little box that works for you! 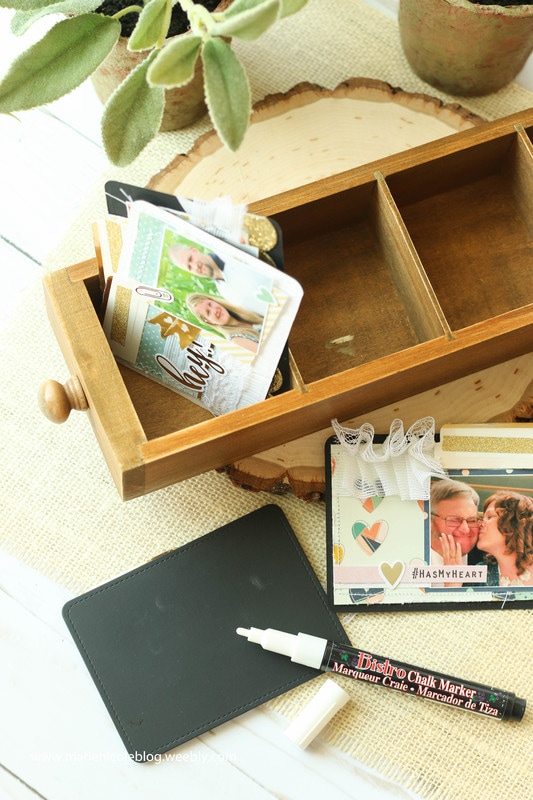
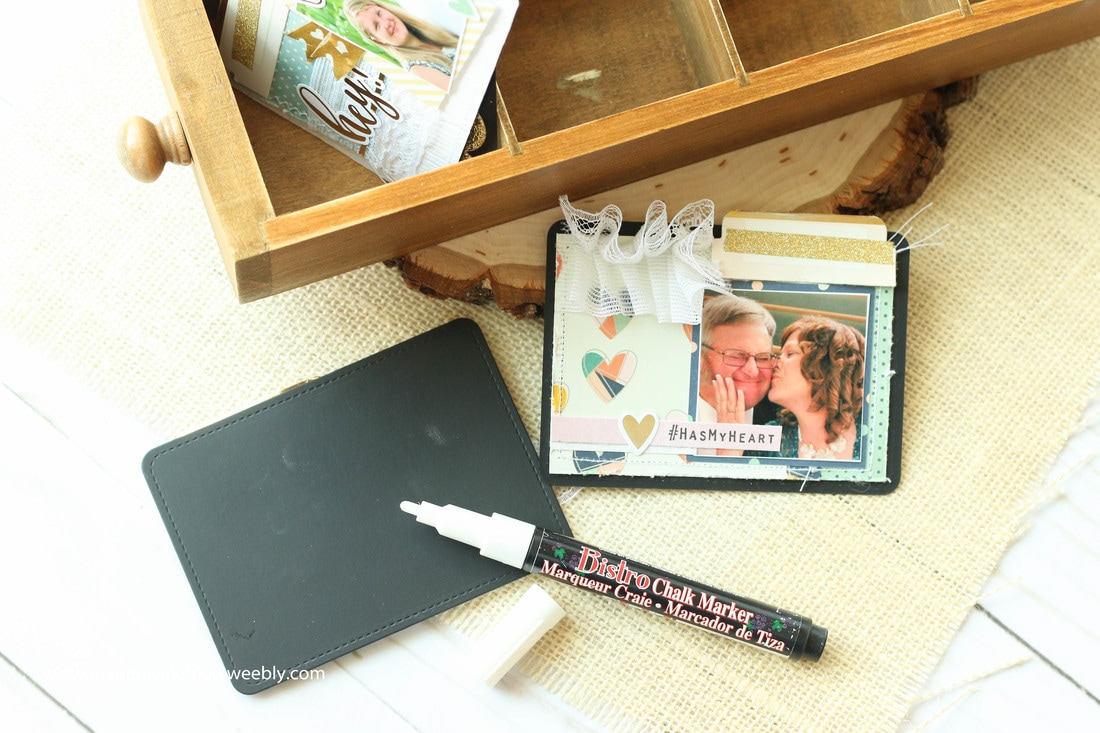
That's it! A simple way to keep my loved ones addresses organized even when they change. I used a journaling card die to make these little address cards, but you could make your own simply by trimming to the size you want and then rounding the corners. Hope that gives you some fun ideas on how to use this Chalkstock. Its such a unique paper that its really worth a try! Happy Crafting! 
|


|
|
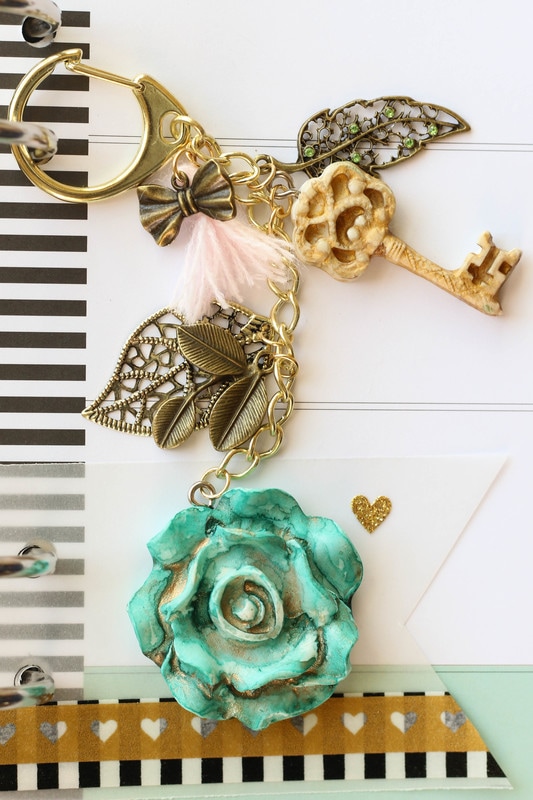
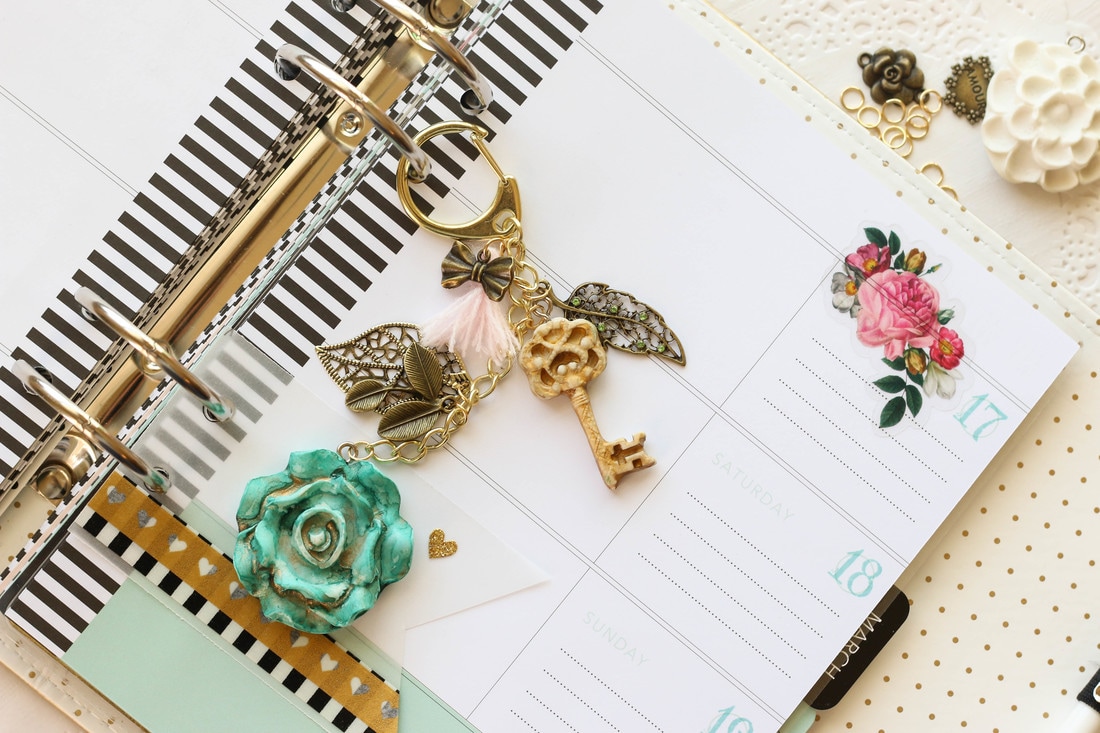
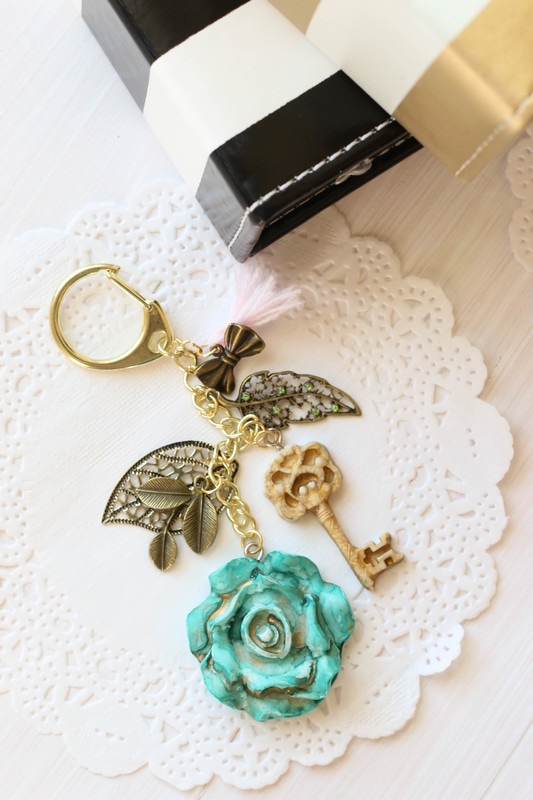
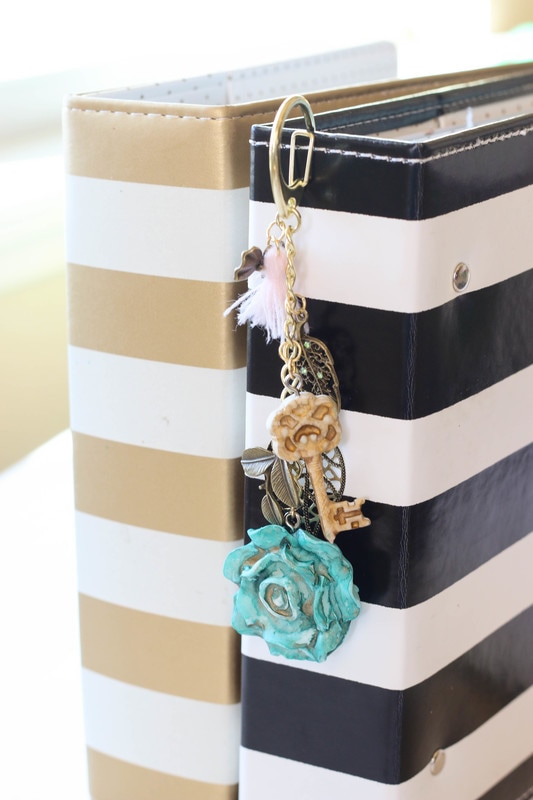
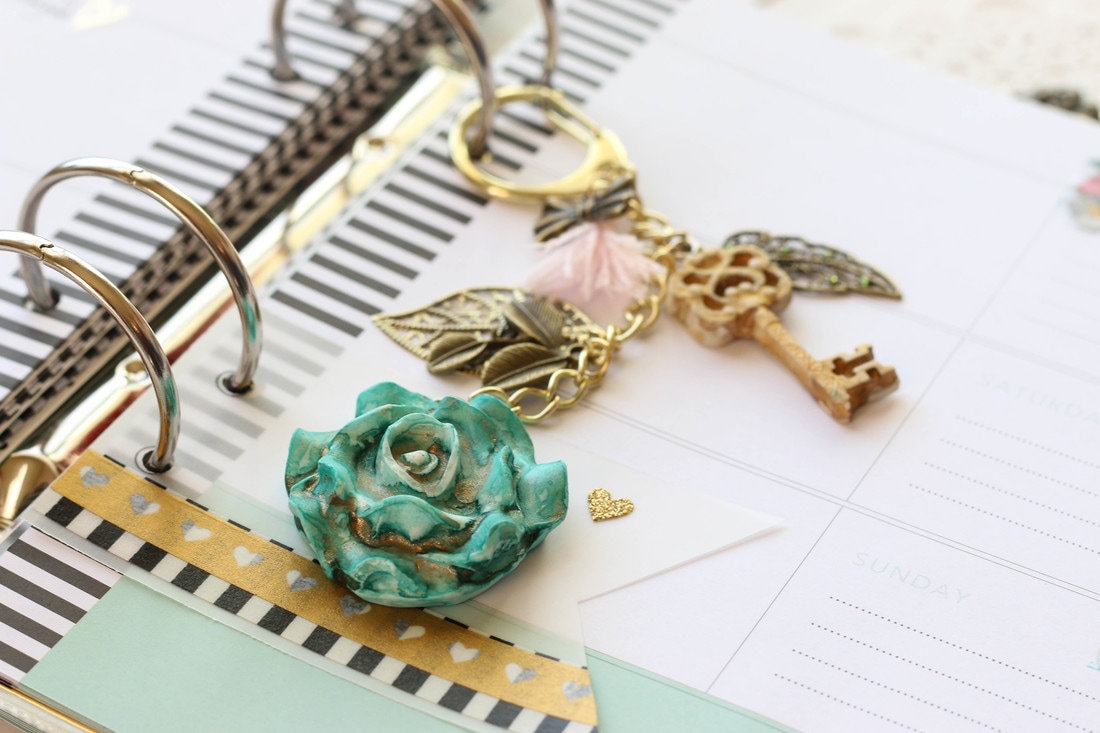
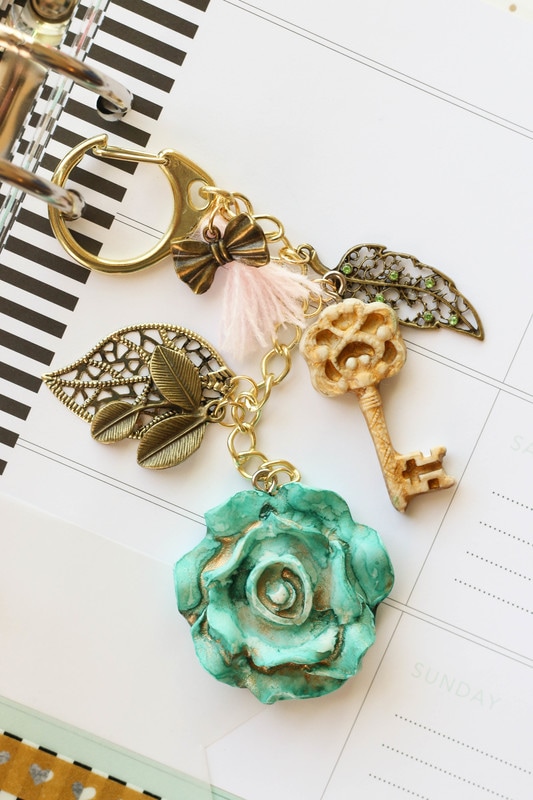
After the pieces were dry, they were attached to a large lobster clasp and chain using some small gold jump rings. Then, to add some more interest to the charm, I used some little brass charm pieces that were picked up at a thrift store.
The little pink tassel at the top of the charm was created by wrapping some thin yarn around a piece of cardstock, then tying it and cutting the loops. Very simple, but it adds a little soft texture in contrast with all the metal brass charms.
The fact that this charm is handmade and totally unique to me makes it all the more special. The vintage feel of the colors and brass charms also adds to its personality!
There are still a number of flower blanks left, as well as some butterfly pieces that I have ideas for. Hopefully I can share them with you in the near future!
 |
 |
 |
More from Marie Nicole...
Recently, Shannon Green shared a video on How to Make a File Folder. It's pretty simple! You just need two sheets of 12x12 paper, some adhesive, and a paper trimmer. You can also use whatever embellishments you would like, but thats totally optional.
Anyway, after she posted her video, she challenged a few of us from the Creative Crew to go ahead and make our own file folders in our own styles. Well, ok then! I think I can handle this one!
I started by grabbing a few papers that I've had for a while now. I like to hoard those pretty papers but then I realize I end up never actually using them and that does no body no good, right?
I followed Shannon's instructions from her video and came up with a bright and modern file folder. Here's my video of the process:
I've always got more and more papers coming into my house and I really need to keep them organized, so hopefully having the knowledge to make my own folder with help in that area!
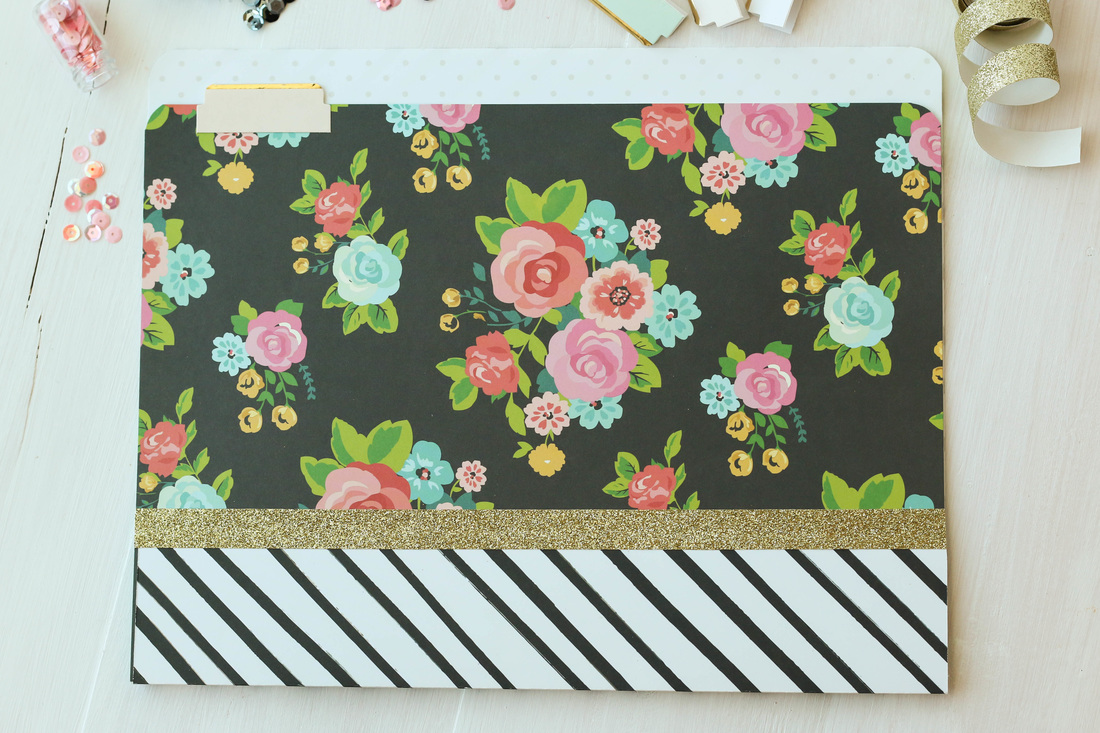
Best thing about making your own is that you can customize them to fit whatever office decor you may have!
Hope this gives you some ideas on what to do with that paper you have been hoarding (don't deny it, we all do it)!
Thanks for stopping by, and Happy Crafting!
 |
 |
 |
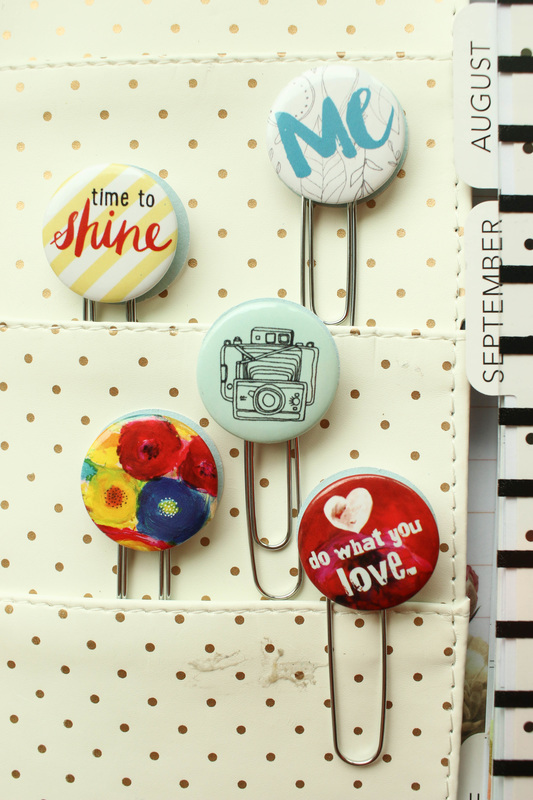
I have had these little Flair buttons from Fancy Pants Designs for a while now, and they have just been begging for me to turn them into something cute for my planner!
All you need is these buttons (or any other cute little embellishments you might have), paperclips, paper, and foam adhesive.
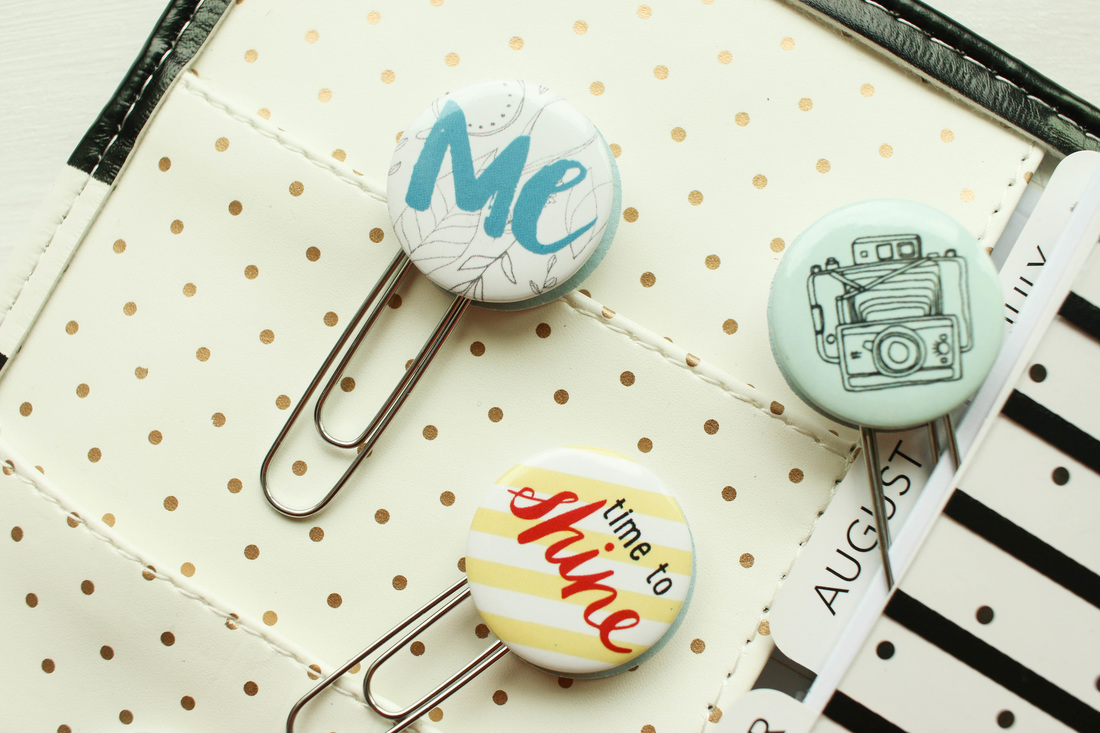
Remove the backing from the foam adhesive and sandwich your paperclip between the button and the paper.
Thats it!
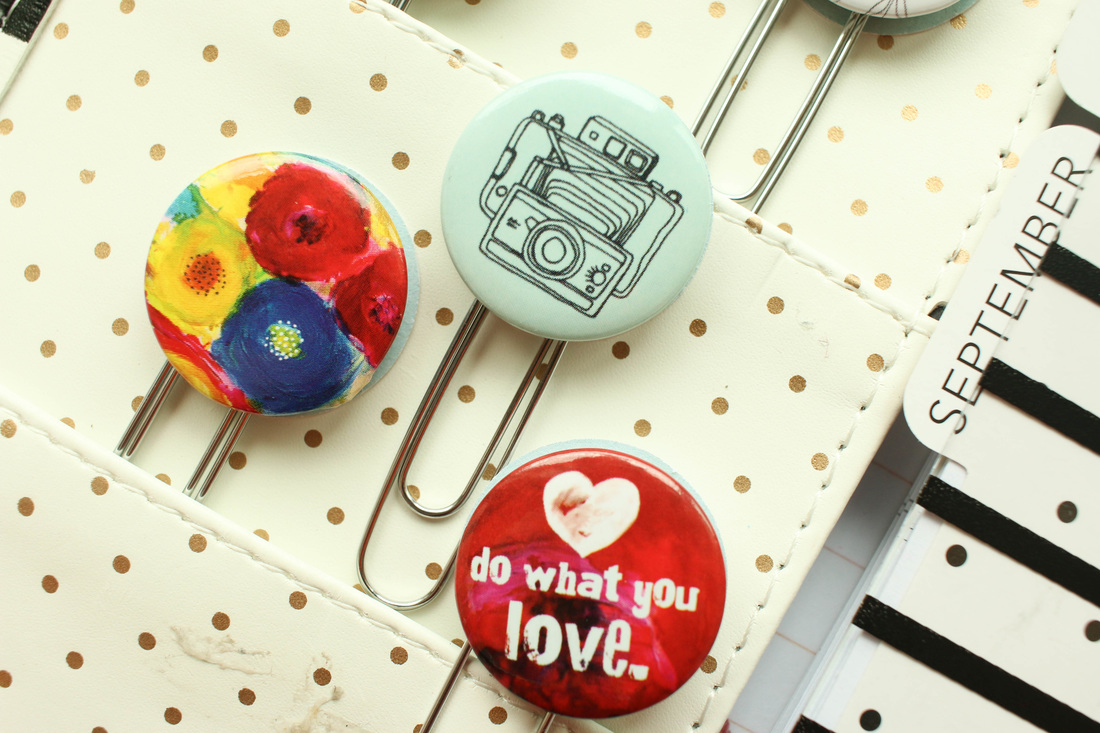
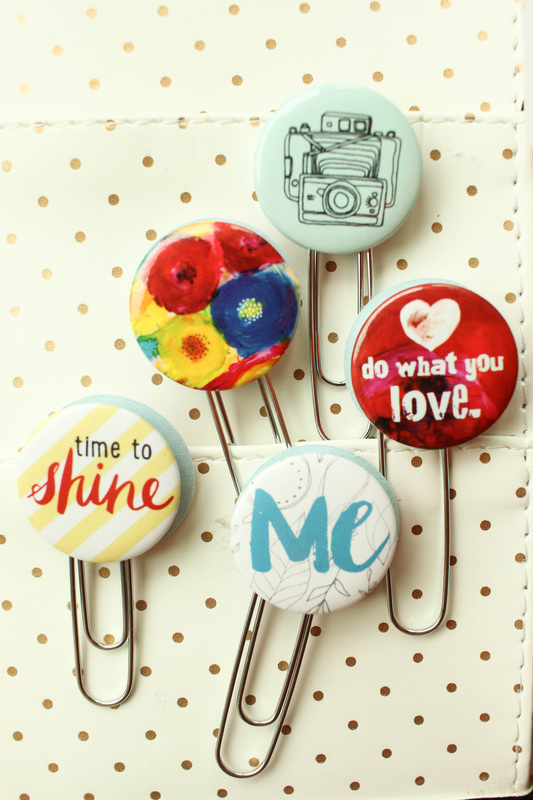
I also made a quick little video of how I put these together. Enjoy!
 |
 |
 |
 |
Of course, there are no rules, you just plan, decorate, and share as you like, but here's a few things Ive been crushing on lately...
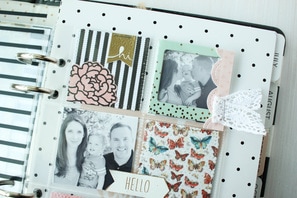
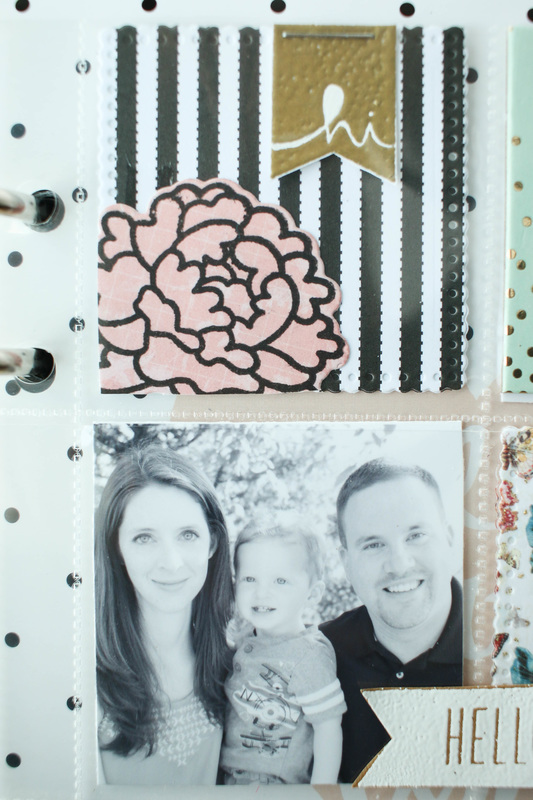
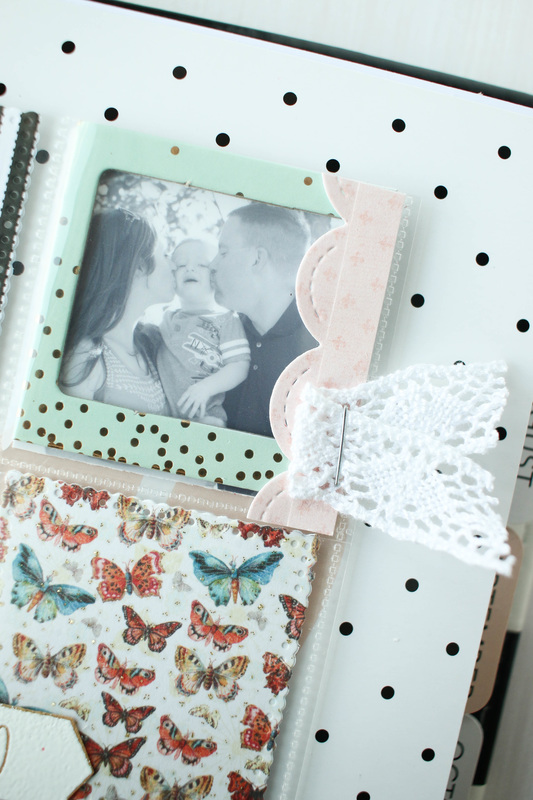
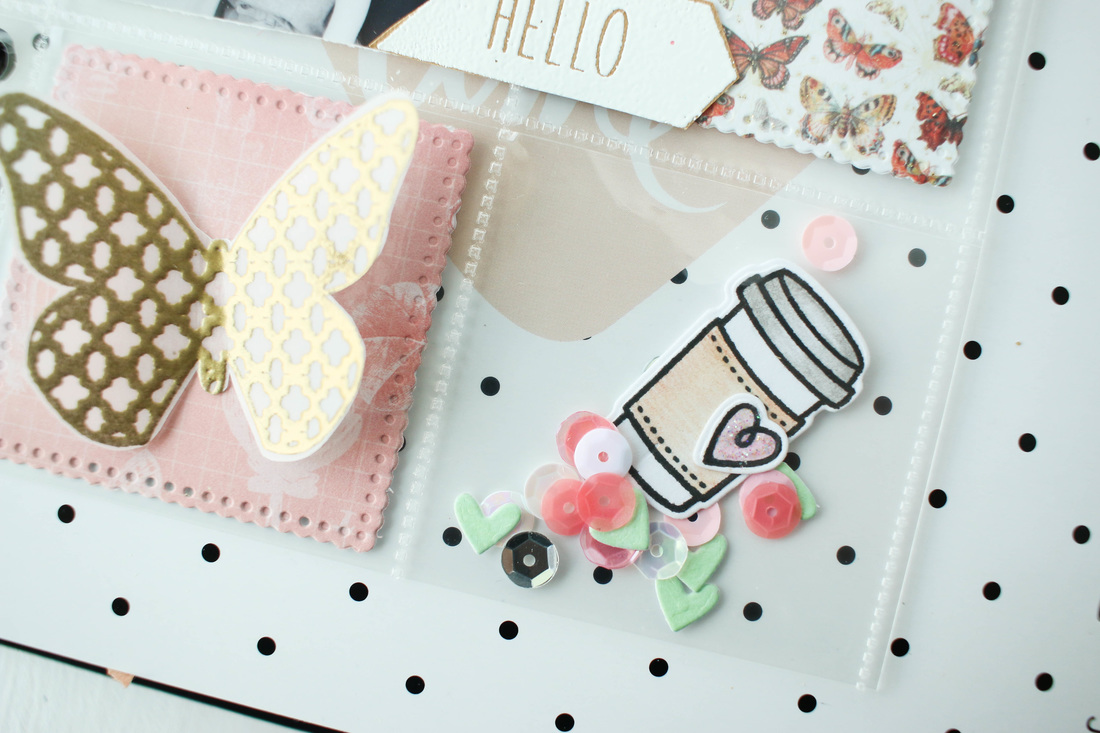
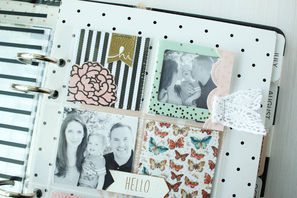
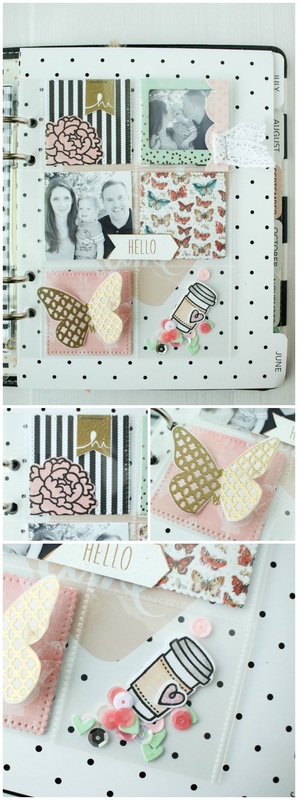
Pocket Pages
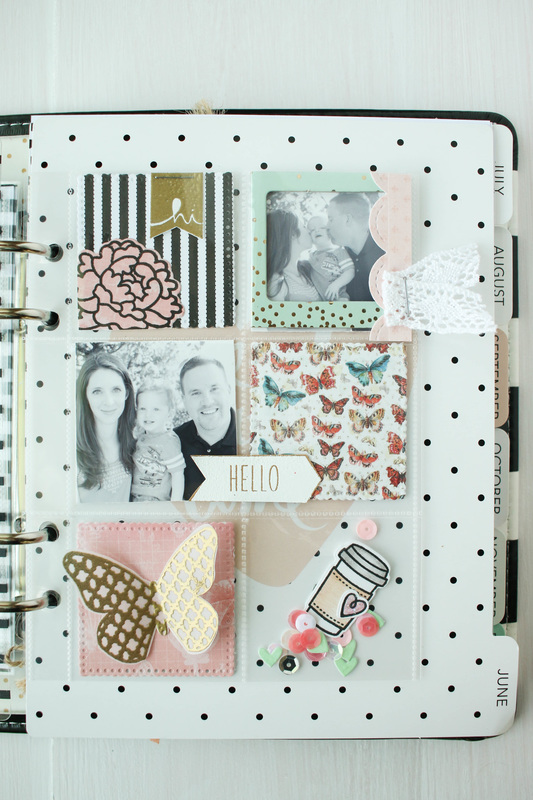
I used a bunch of papers from my scrap bin. Most of these papers you see here are from DCWV's Mariposa paper pad, but there are also a few papers from Canvas Corp, as well.
|
|
The upper right photo has a Heidi Swapp cardstock frame around it, as well. I just love it!
The very bottom left pocket I turned into a shaker. I added some pink and white sequins, some tiny die cut hearts that I misted with Tattered Angels' Mint Julep Glimmer Mist, and a die cut coffee mug.

|
|
Journaling Cards
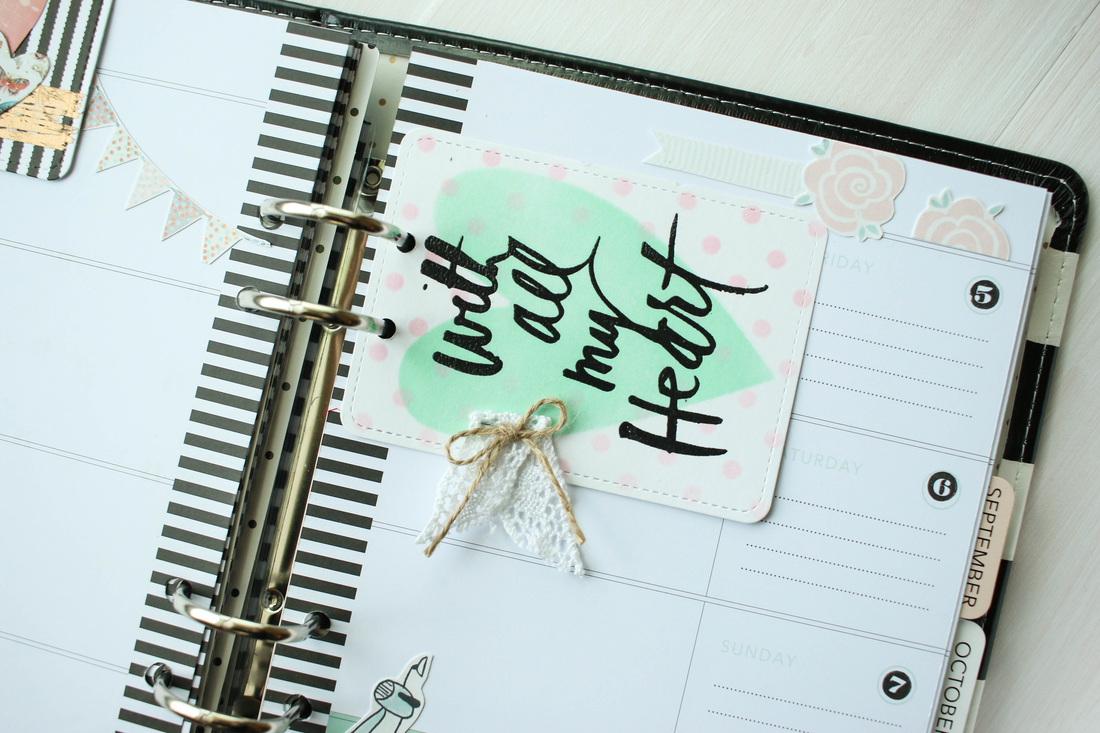
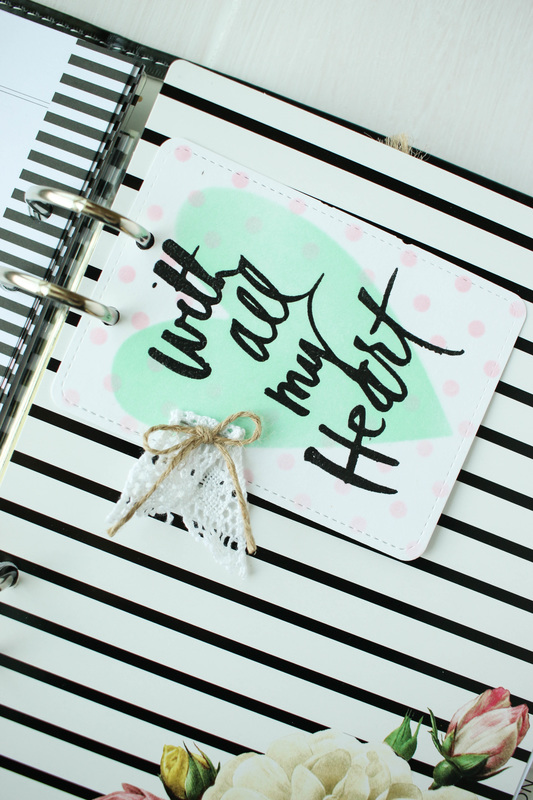
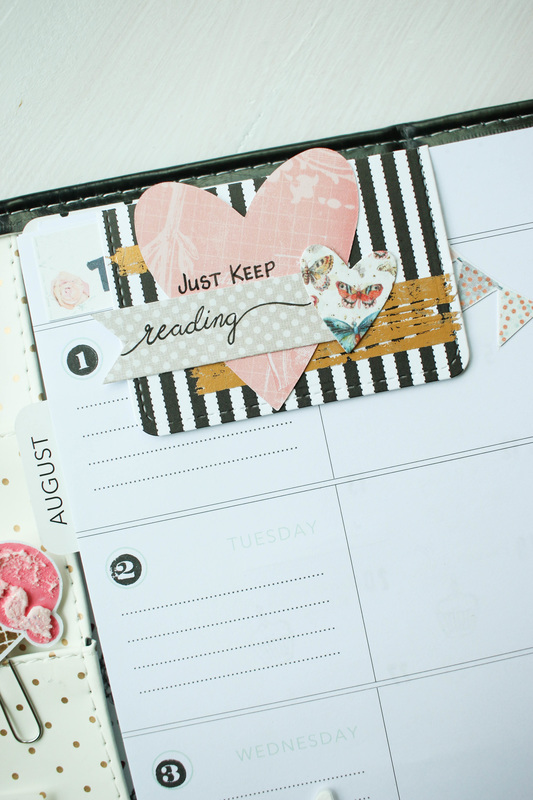
I also like to make little journaling cards that I can punch holes in and clip them into my planner. I write little notes, memories, and lists on them. They give me a creative outlet that is also useful!
I'm also learning to use more of my scraps. I have an ever-growing scrap bin. I can't bear to throw out some of those pretty patterned scraps, and yet I haven't been using them either! Digging through the scraps and finding bits of patterns I had forgotten about has been fun and motivating, especially when I can match them with a new stamp or stencil!
|
|
Bookmarks
|

|
So, bookmarks aren't planner specific, but that's great! They have multiple uses, and SO EASY to make!
The long skinny one you see is just a strip of scrap paper that I found, and cut a flag on the bottom of it. I stamped and embossed the sentiment in gold, and then added an eyelet and Canvas Corp cord on the top.
The other bookmark is a magnet bookmark. I got some Heidi Swapp magnet bookmarks and I love them! I decided to try to make my own. I used some Canvas Corp paper die cut it with a Lawn Fawn Journaling card die. I scored and folded it in half, and then adhered some magnets to the insides. Then, all you need to do is decorate it and clip it on your page!
So, that's what I have been up to lately in my planner. I'll add some links to some products that I used below.
Happy Crafting!
 |
 |
 |
 |
 |
 |
 |
 |
I do need to get photos printed yet for the last several weeks! I have been pretty busy lately so the photos are lacking, but at least the memories are written down.
Loving my Heidi Swapp Memory planner so far!
Happy Crafting!


Author
So glad you found me! This blog is my little space where I can share bits about my life and my latest crafting projects (mostly handmade cards). My goal is to share, inspire, and to be a positive presence in the creative community.
Take a look around and stop by anytime!


Find me on Instagram!
Archives
January 2018
December 2017
November 2017
October 2017
September 2017
July 2017
June 2017
May 2017
April 2017
March 2017
February 2017
January 2017
December 2016
November 2016
October 2016
September 2016
August 2016
July 2016
June 2016
May 2016
April 2016
March 2016
February 2016
January 2016
December 2015
November 2015
October 2015
September 2015
August 2015
June 2015
December 2014
October 2014
July 2014
May 2014
April 2014
March 2014
February 2014
January 2014
Categories
All
Albums
All Cards
ATCs
Birthday Cards
Brutus Monroe
Canvas Corp Brands
Cards
Christmas
Christmas Cards
DIY
General Cards
Get Well Cards
Halloween
Home Decor
Love Cards
Mixed Media
Papercraft
Planner
Punny Cards
Scrapbooking
Shaker Cards
Special Occasion Cards
Summer And 4th Of July
Tags
Techniques
Thank You Cards
Toddler Art
Tombow
Tutorials
Watercolor
Link Love


 RSS Feed
