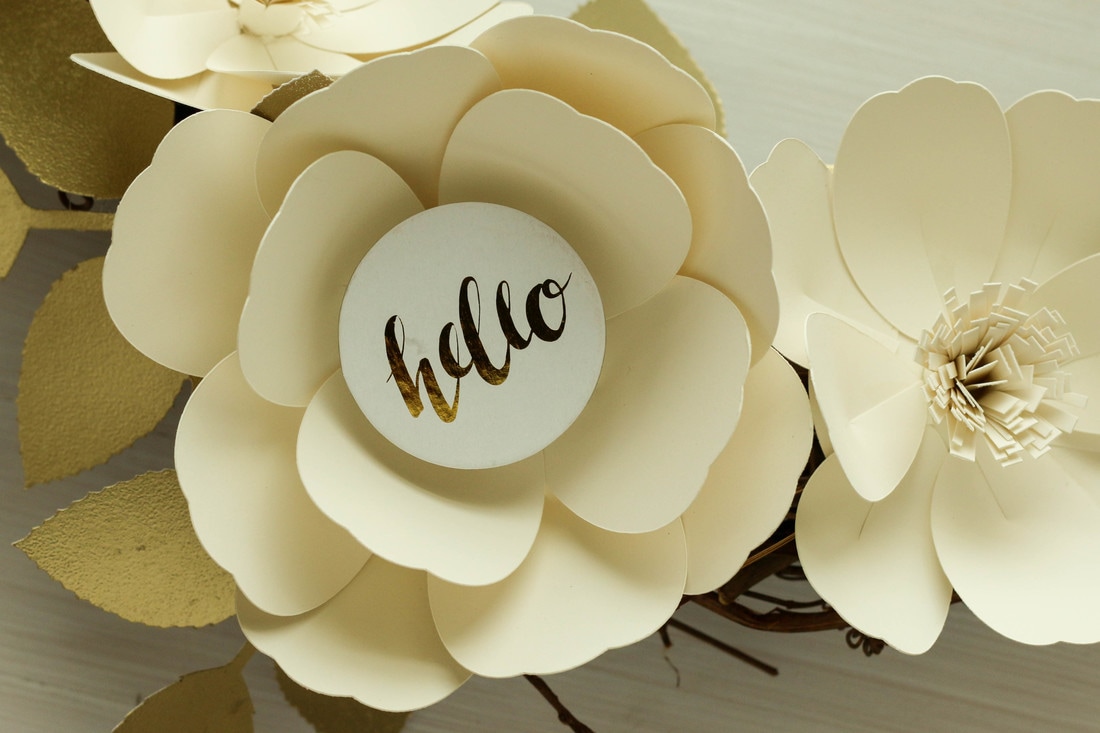
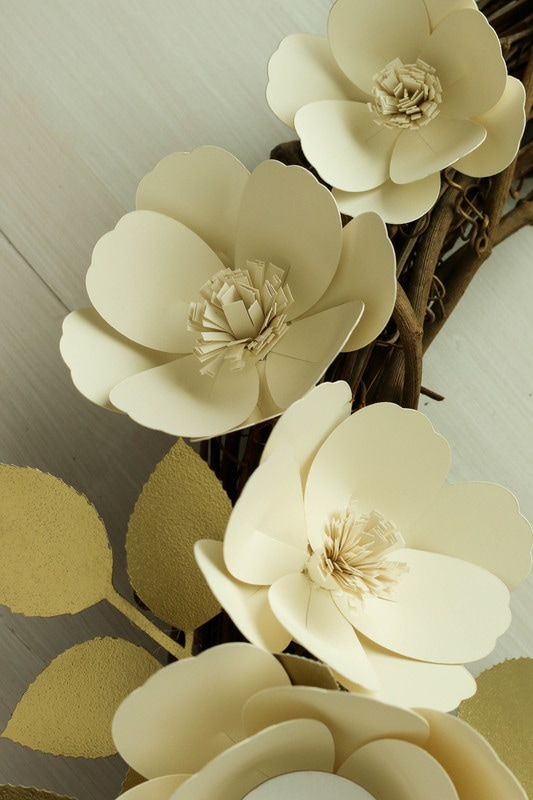
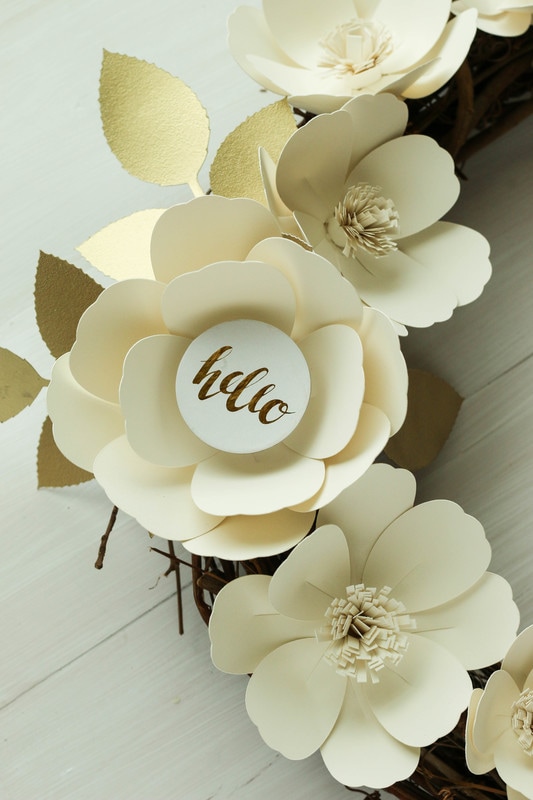
 Not sure about you, but this paper flower trend has me totally excited. I love the look of those giant flowers! They are just gorgeous as photo backdrops, wedding decor, nursery embellishments, and party themes! My grapevine wreath needed and update so I turned to the web to try to find paper flower templates. It was disappointing to find that most of the tutorials either wanted you to buy their template, or you had to cut all your flowers by hand. After about three hand-cut flowers I was done! So, taking what I gleaned from other tutorials, I made my own template on Cricut's Design Space. Guys... it is SO SIMPLE! You only need one basic shape- a circle.I have a video below showing exactly how I created my own petal shape and I also have dimensions included. LARGE FLOWER Circle- 3" Petals- 2"x2.75" 12-16 petals per flower MEDIUM FLOWER Circle- 2" Petals- 1 1/2"x 2.25" 8-12 petals per flower SMALL FLOWER Circle- 1 1/2" Petals- 1.25"x1.75" 8 Petals per flower Hope you enjoyed the video! I also have some photos below that show the step by step process, as well as my finished wreath. 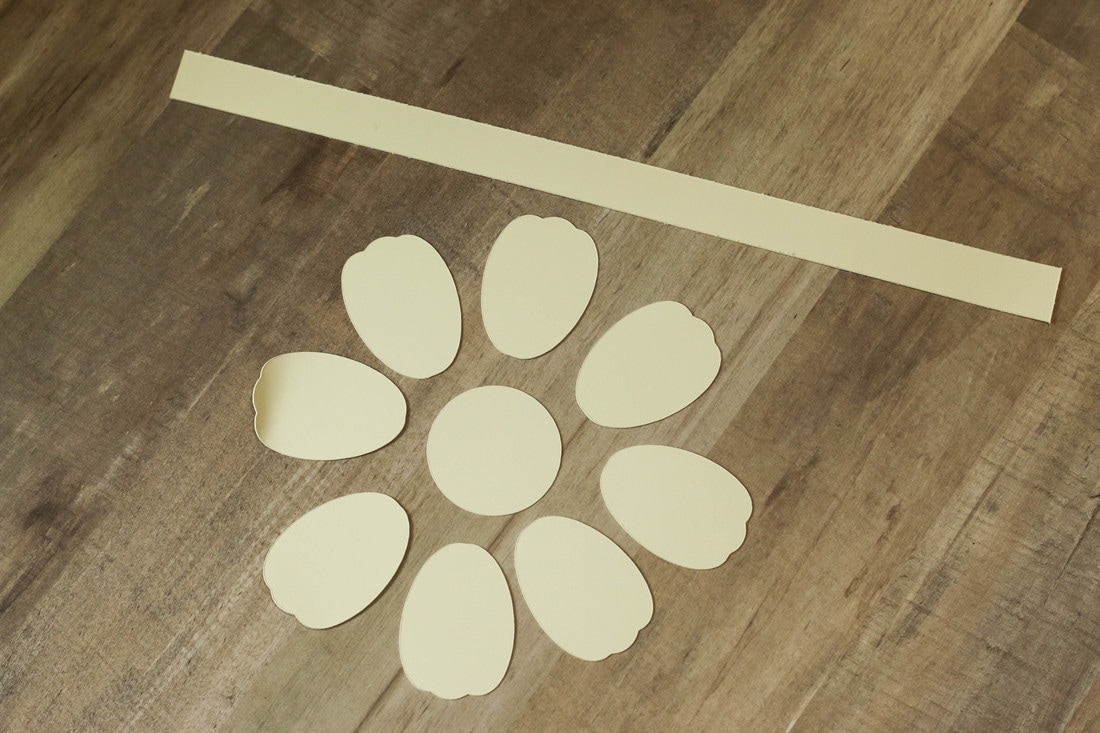 Step 1 Cut out your flower parts using the dimensions you prefer. The one I am making here is the small flower. Step 2 Take all your petals and cut a slit partway up the center, starting from the bottom. This will create two "flaps".  Step 3 Add some adhesive to one of the flaps. You can use tape adhesive, glue dots, hot glue, or anything you prefer. For my photos here I used tape adhesive, but hot glue will hold much stronger. After you have your adhesive added, take the other flap and fold it over to adhere them on top of each other. This will create dimension in your petals.  Step 4 Take your assembled petals and adhere them to the circle base. I like to add them symmetrically. This helps me space out the petals evenly. 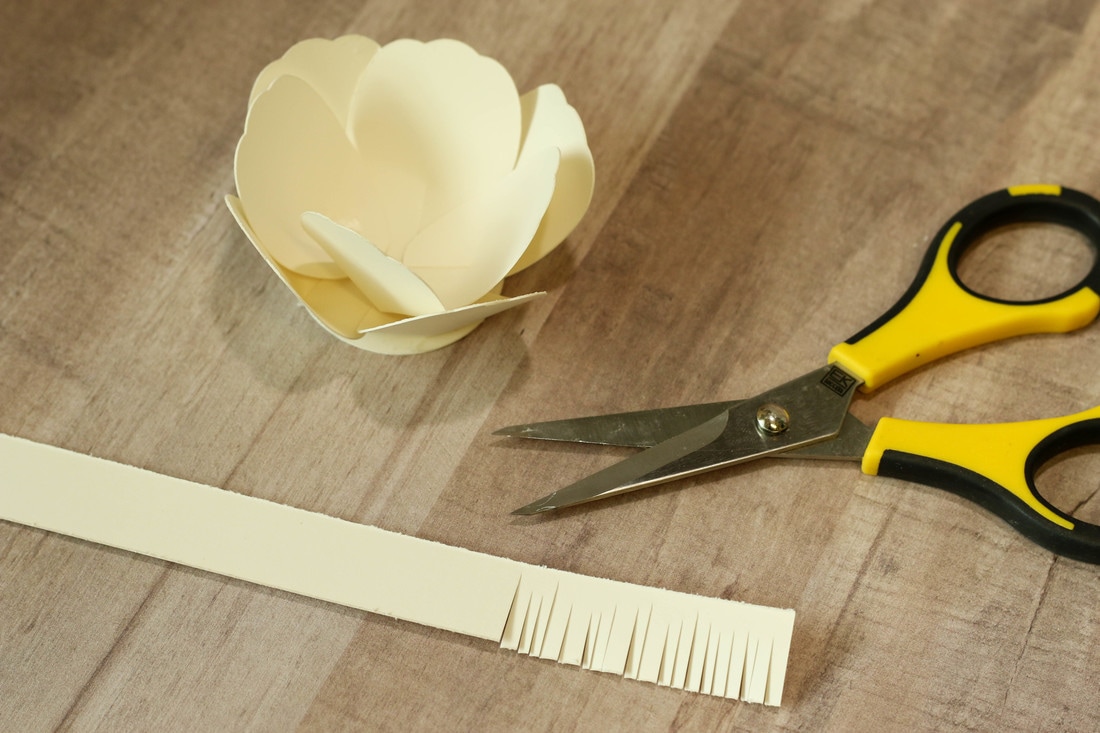  Step 5 Add your center to the flower by taking a long strip of cardstock, cutting fringes all the way along the top, and then rolling it up. Glue the rolled fringe to the middle and you are done! The biggest part of making these flowers is just cutting out the pieces. Once you have the template on your Cricut it goes very quickly! I was able to make enough to cover my wreath in no time at all. For my flowers, I used Canvas Corp's Ivory Cardstock, but you can use whatever color you would like. I hot glued them onto my wreath and then cut out a few leaves with my Cricut as well to fill in a few blank spaces. For the leaves, I also embossed them gold using Brutus Monroe's Gilded Embossing Powder along with their Embossing Ink. Ivory and gold is such a winning combination! I hope you enjoyed this tutorial and that you are able to create a ton of these gorgeous paper flowers. Thanks for stopping by! 
1 Comment
2/26/2019 04:48:02 am
This is amazing! I love crafting flower design. Cricut machine makes it easy for you. Leave a Reply. |

Pin it!

AuthorSo glad you found me! This blog is my little space where I can share bits about my life and my latest crafting projects (mostly handmade cards). My goal is to share, inspire, and to be a positive presence in the creative community. 

Find me on Instagram!Archives
January 2018
Categories
All
Link Love
 

|
 RSS Feed
