|
I am so excited to share this project with you! It's one that we have been talking about doing for quite a while and have finally gotten around to doing it! My husband brought into our marriage his beat up little dresser that he has used for probably most of his life (don't tell him I called it "beat up", please!). When we were planning Hayden's nursery, instead of buying a new dresser we decided to just give him Daddy's old one. We have been planning on fixing it up for a while, it just never happened. Until now... I introduce to you, Daddy's old dresser!! 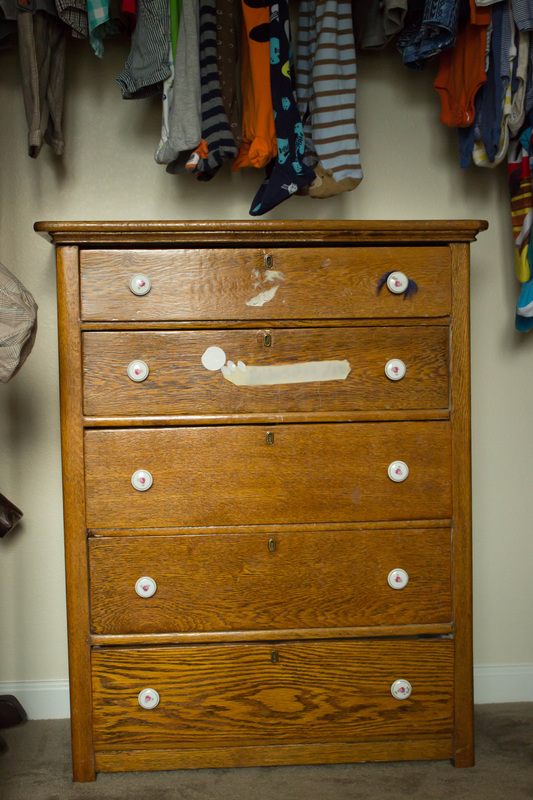 After scouring Pinterest, I found a few inspiration ideas and settled on staining the dresser and painting the front of the drawers with chalkboard paint. I thought it would be fun to write notes to Hayden on it, or label his drawers, or let him do his own thing with the chalk once he gets older. We recently finished staining the toy box I had made at a woodworking class I attended over a year ago (yes, I know, I procrastinated). Anyway, we had leftover stain from the toy box so we just used it on the dresser as well. We thought it would be nice to have Hayden's furniture somewhat matching. Well, the first step was to take off the hardware and get sanding.  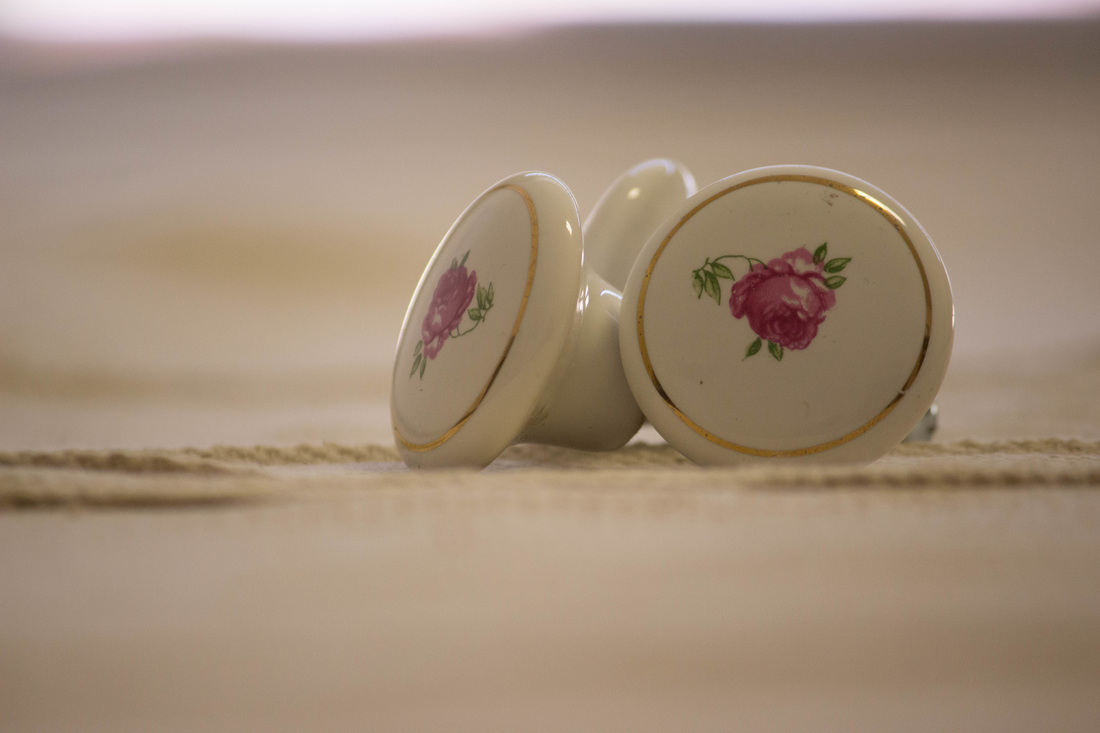 I plan on keeping the dresser knobs so I can use them in future projects. 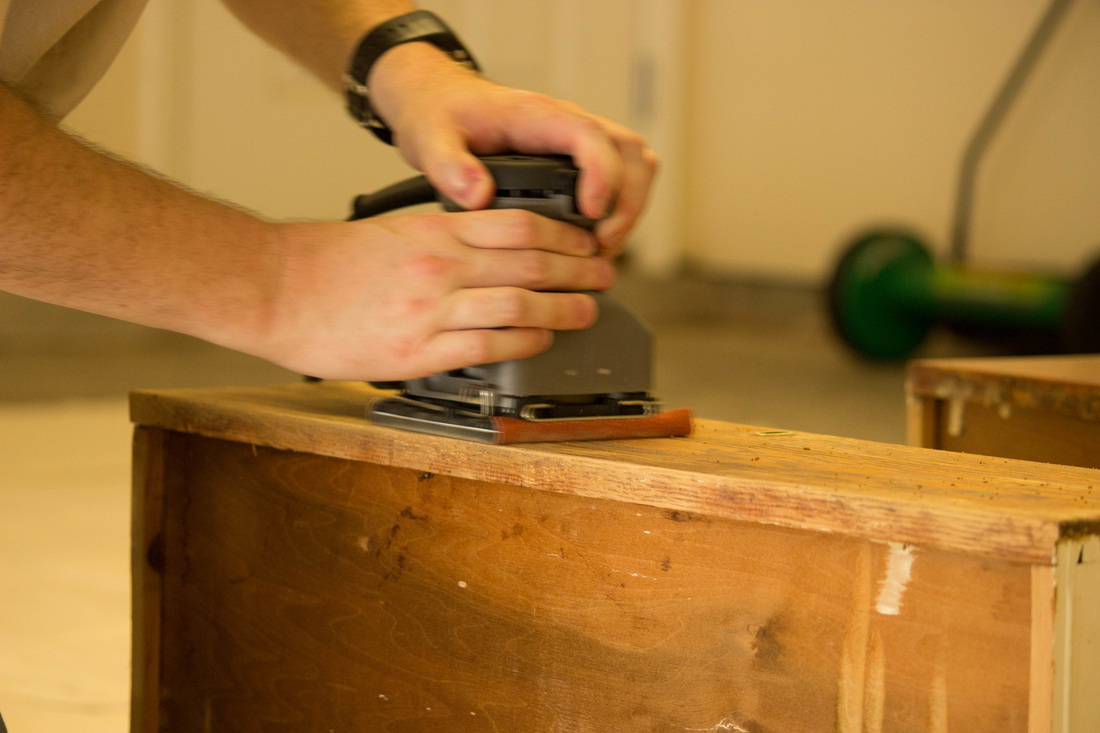 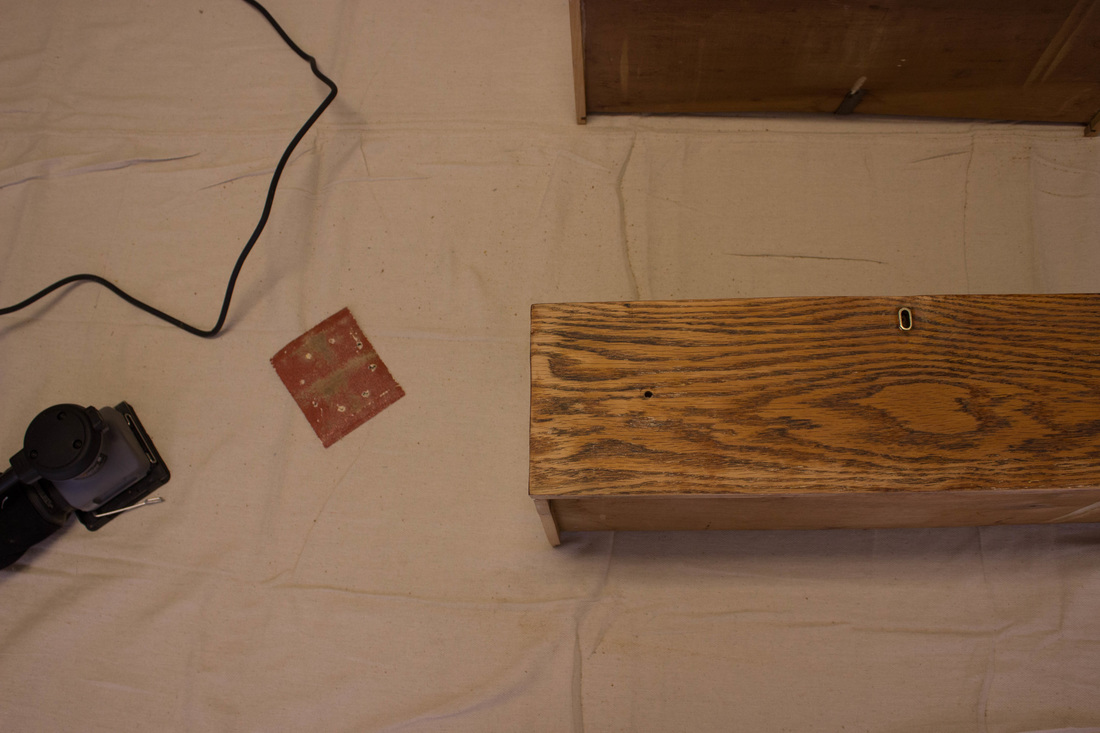 After all the sanding was done, we moved on to the staining...  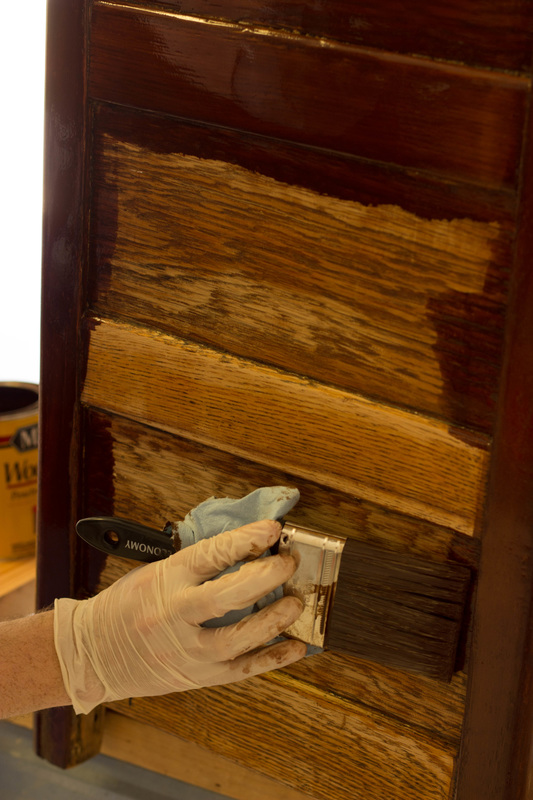 Finally, the painting of the drawers! As I mentioned earlier, we used chalkboard paint. 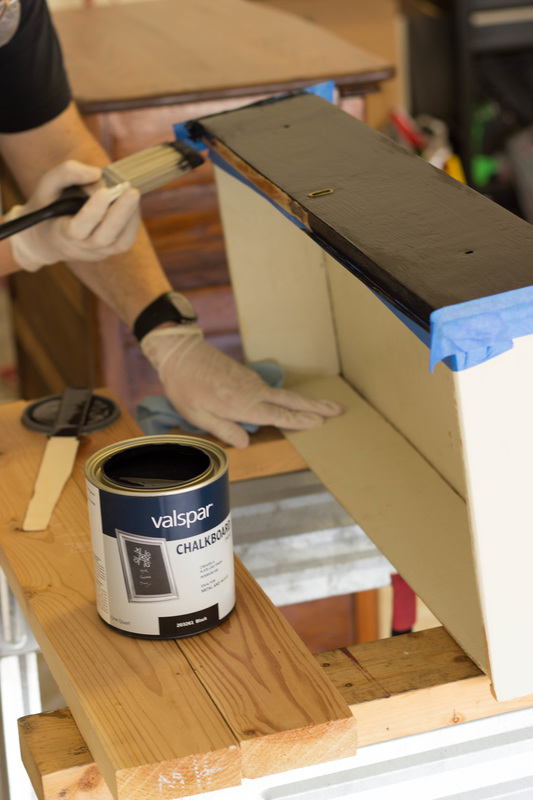 We let it set outside for a good week so it could totally dry and air out before bringing it inside. Then, Daddy put on the new knobs and brought it inside. LOVE the finished product!! 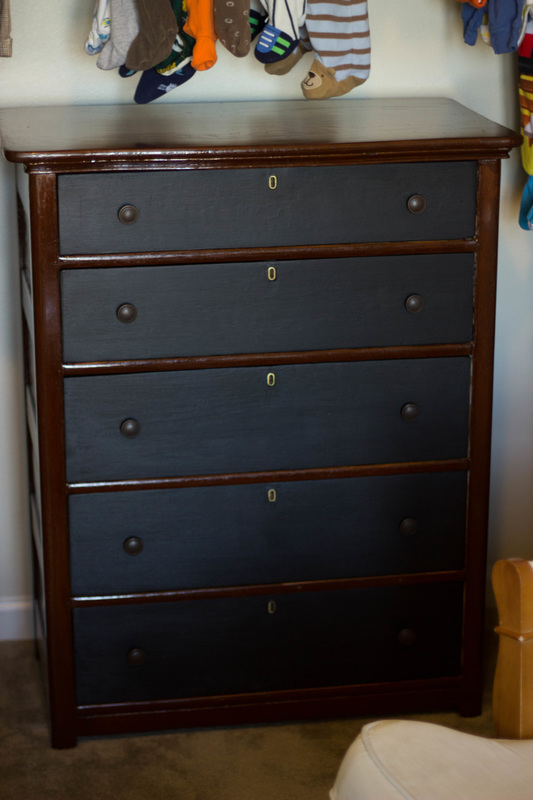 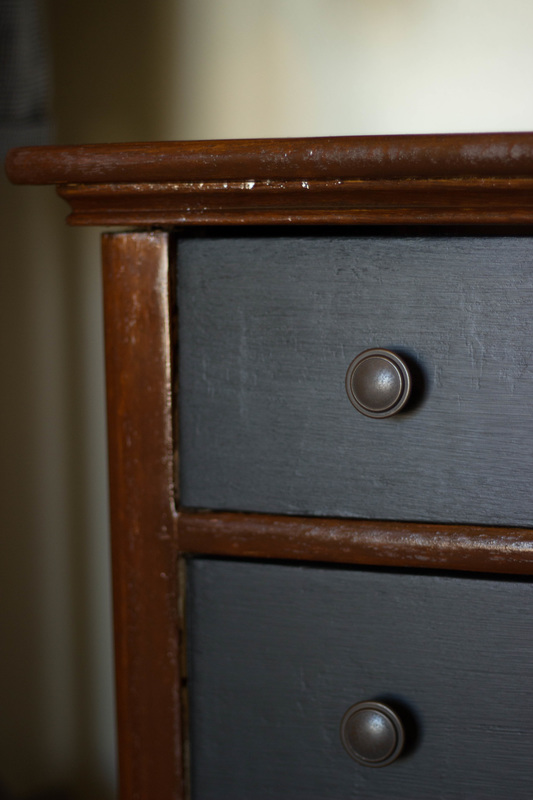 I think it turned out even better than I thought it would. Can't wait to label those chalkboard drawers!
Also, after finishing this project I catch myself eyeing my other old furniture in the house thinking about what we could make into our next project....
1 Comment
 I have something a little different to share with you than the usual cards! My husband does a little woodworking as a hobby. I always hate seeing the scrap wood just sitting there going to waste, so I asked him to cut me three blocks for this project. I started by sanding down my wood blocks with a piece of 80 grit sandpaper. You don't have to use 80, any number will do, but its what I had on hand. Giving your blocks a little sanding will help the paint go on smoother. After I had my blocks sanded, I just used some orange acrylic paints and laid down one base coat. I didn't worry about a second coat because I like the look of some imperfections and grain showing through. After the orange base coat was dry, I used some cream colored paints and did a different design on each block. And then, after the blocks were totally dry, they sat in my garage for a few weeks (maybe even longer). It just became one of those projects that I had good intentions to finish but just didn't get around to it... until today! I was out walking and finally remembered to grab a stick to use for the stems. That's right. A good old stick from nature. Totally free! Can't get better than that! Anyhow, I brought my prized stick home and used my husband's drill to make a hole in the top of each block. Then, I put a little hot glue down in each of the holes and stuck a piece of the stick in each, creating the pumpkin's stems. 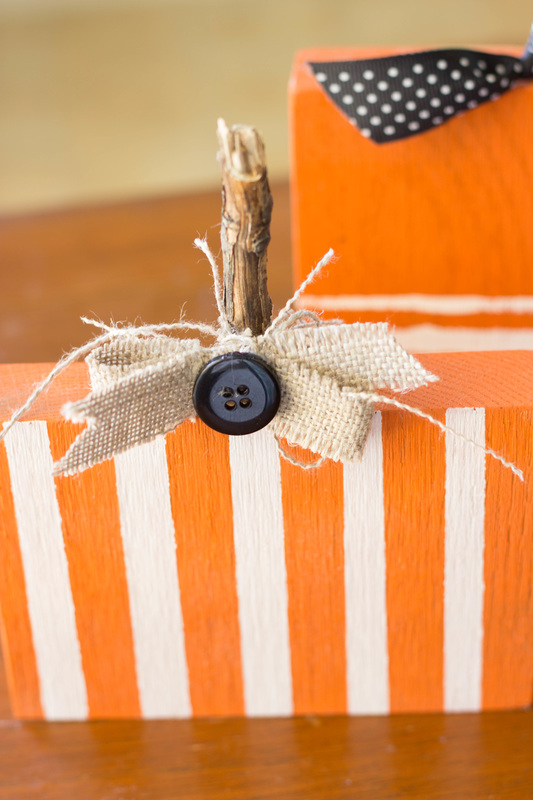 To give my pumpkins a finishing touch, I grabbed some of my ribbons, burlap, and string and gussied them up. It probably could be a pretty quick project if you don't leave it in your garage for several weeks! 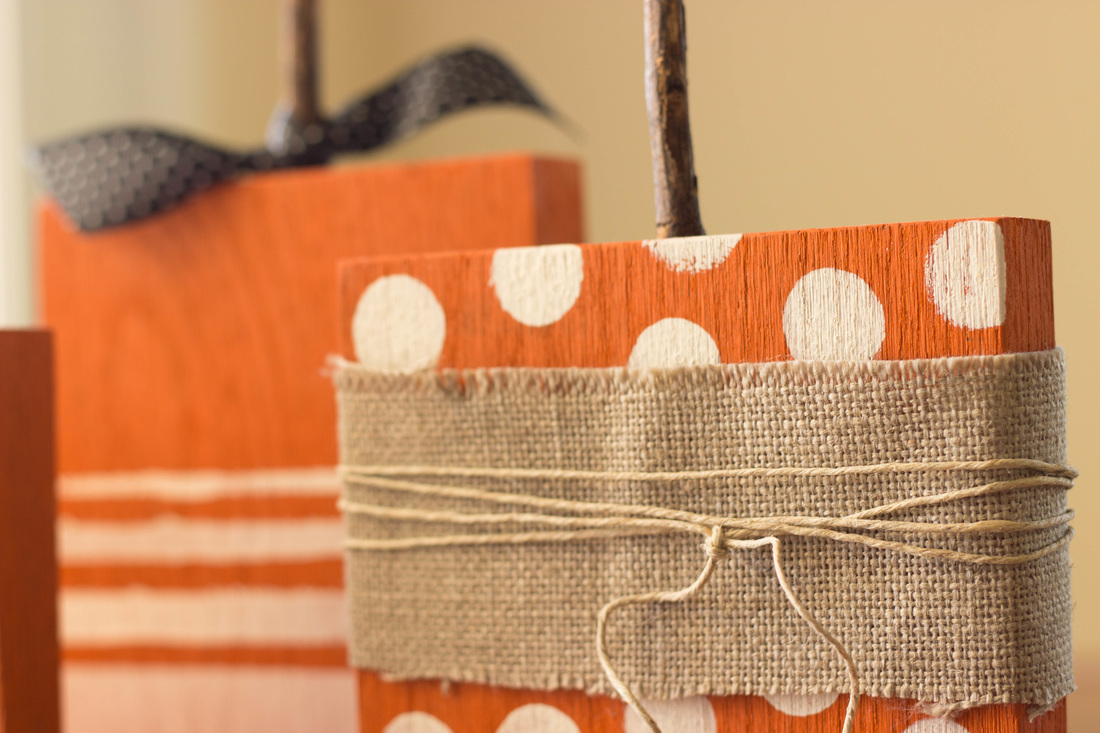 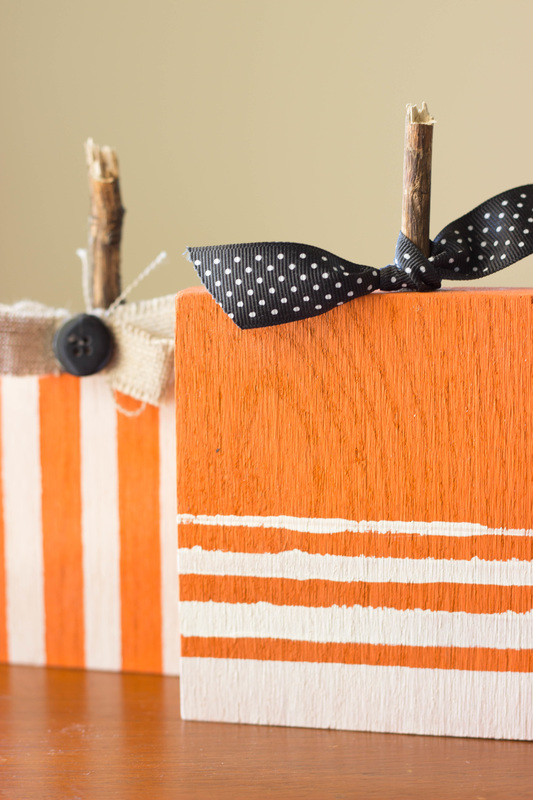  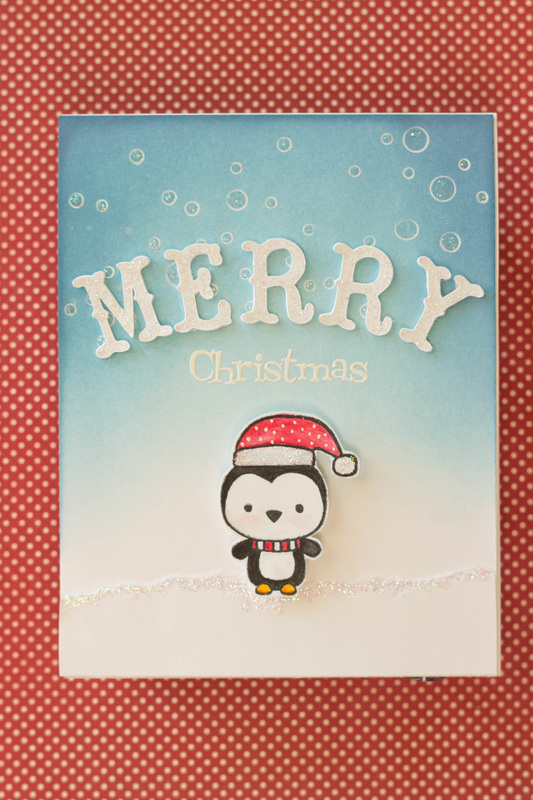 This card is very similar to one I did a few weeks ago, but it has several differences. I started by stamping out my little penguin. Then, I colored him in using my watercolor pencils. I usually like to wet a brush, and rub it on the tip of the pencil to pick up the color that way. I find that I get more saturation of color and less water seeping through my cardstock with that method. Unless you are using a very heavy cardstock or a watercolor paper, too much water can make your cardstock warp and pill. After he was colored, I added some Stickled and a few dots with my white gel pen to his hat and set him aside. For my background, I took some Distress Inks and blended them to get this ombre sky. I started with Tumbled Glass, then Broken China, and finally some Faded Jeans. I always go from lightest color to darkest. I figure you can always go darker, but can't go lighter! Over the Distress Ink I used my Heidi Swapp Confetti stencil and white gel pen to create the circles that look like snow. I took some more Stickles and filled in the circles. Gotta have some glimmer! For my sentiment I stamped and embossed "Christmas" in white. Then, I cut "merry" three times with my Cricut and adhered them together to make them look like chipboard. I added Stickles to the top of my letters, as well. Finally, I tore a piece of white cardstock, glued it along the bottom and (you guessed it), added more Stickles! Then I just adhered the penguin with foam adhesive and glued on the "merry" letters. It ended up being a pretty simple, yet fun card! I'm linking this project up with: Simon Says Stamp's Monday Challenge!! The throwback challenge Im doing is the Ombre one. I felt it was so fun and a great way to use my Distress Inks! 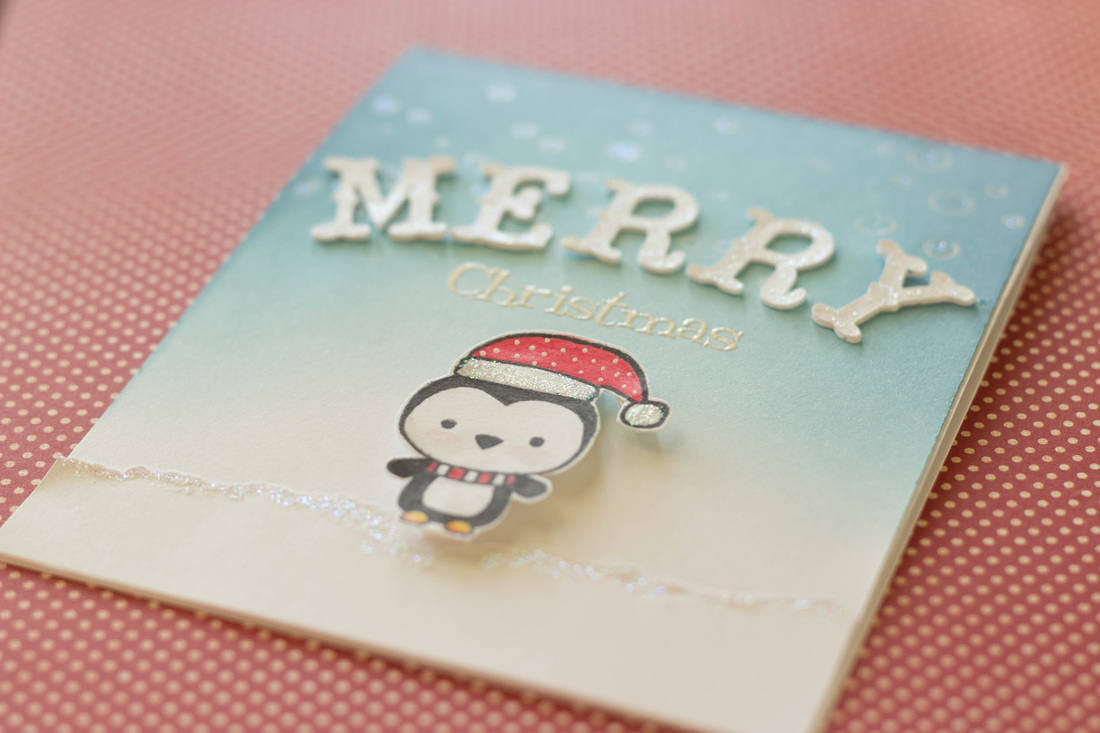 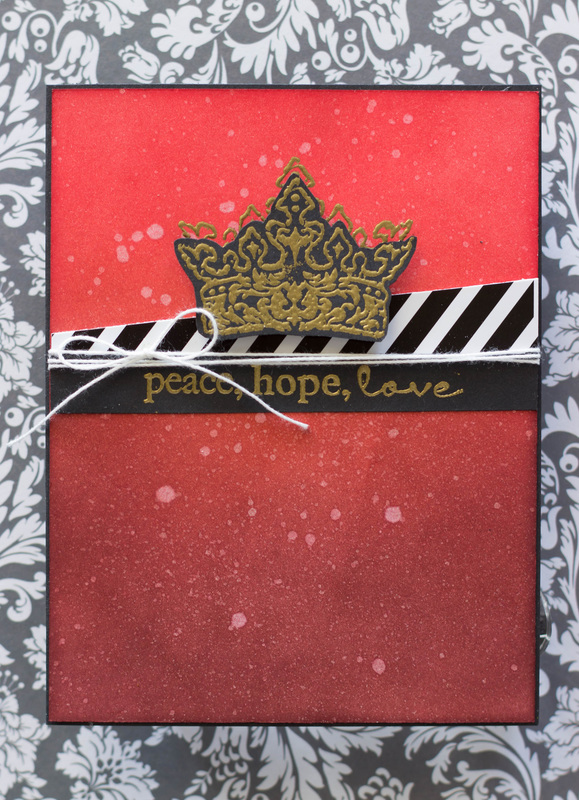 I've got another Christmas card to show you today! I started by Distress Inking my background with three shades of red, starting with the lightest shade and blending into the darkest shade. Then, I was going for a light spritz of glitter mist, but my bottle got clogged so I ended up with much bigger drops than anticipated. I like how it turned out, though! The crown was stamped and embossed in gold on the background, and then again on a piece of black cardstock. I adhered it with some foam adhesive. I also stamped and embossed the sentiment. To finish it I added a little piece of bold black and white striped paper, and wrapped some string around it. The design is simple, but the colors give it such a bold look! Im linking this project up with: Simon Says Stamp's Wednesday challenge 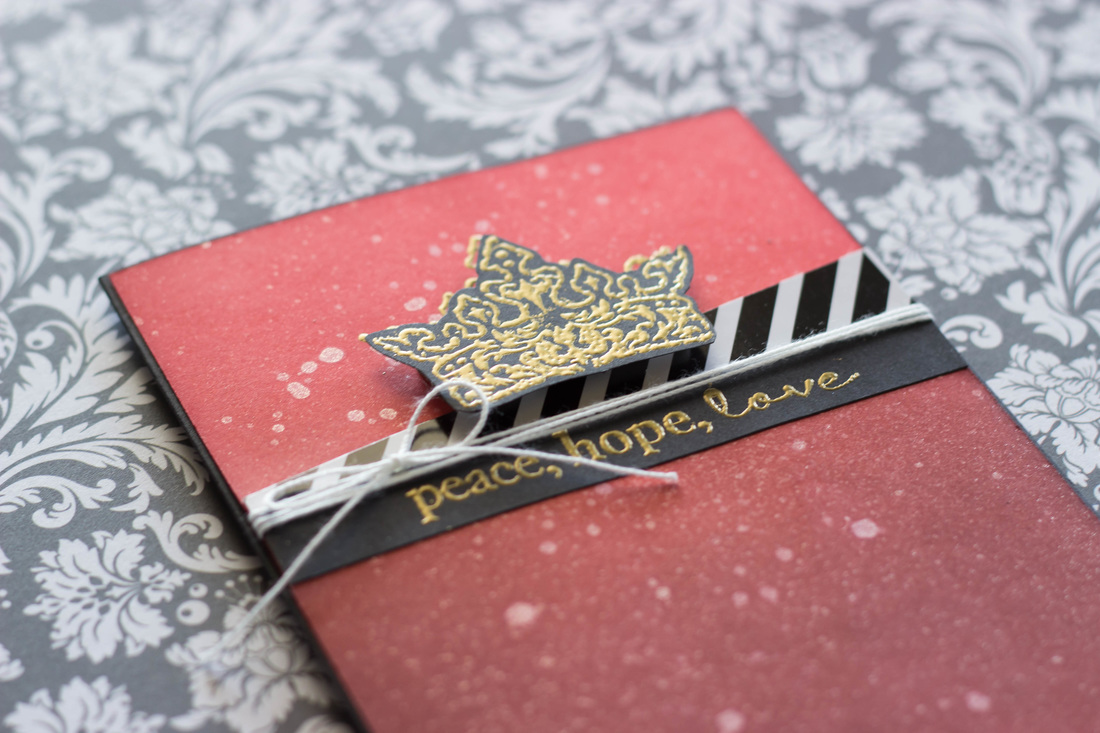 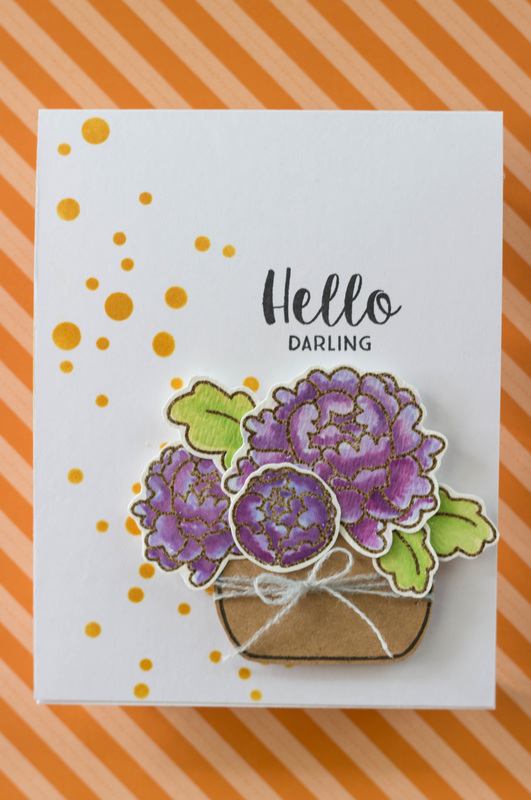 I am currently loving on this stamp set by Avery Elle. The peonies are so much fun to watercolor! I started by stamping and embossing the peonies onto watercolor paper, and then used Distress Ink to color them in. I then cut the vase from kraft cardstock. I did have a patterned paper for the vase, but decided it looked a bit too busy, and I really wanted the flowers to stand out. I then used Heidi Swapp's Confetti stencil to add some orange dots to the background. Stamped the sentiment in black, adhered the flowers with foam adhesive, and called it a day! I love when I can make pretty cards quickly, since my little guy doesn't take long naps these days! 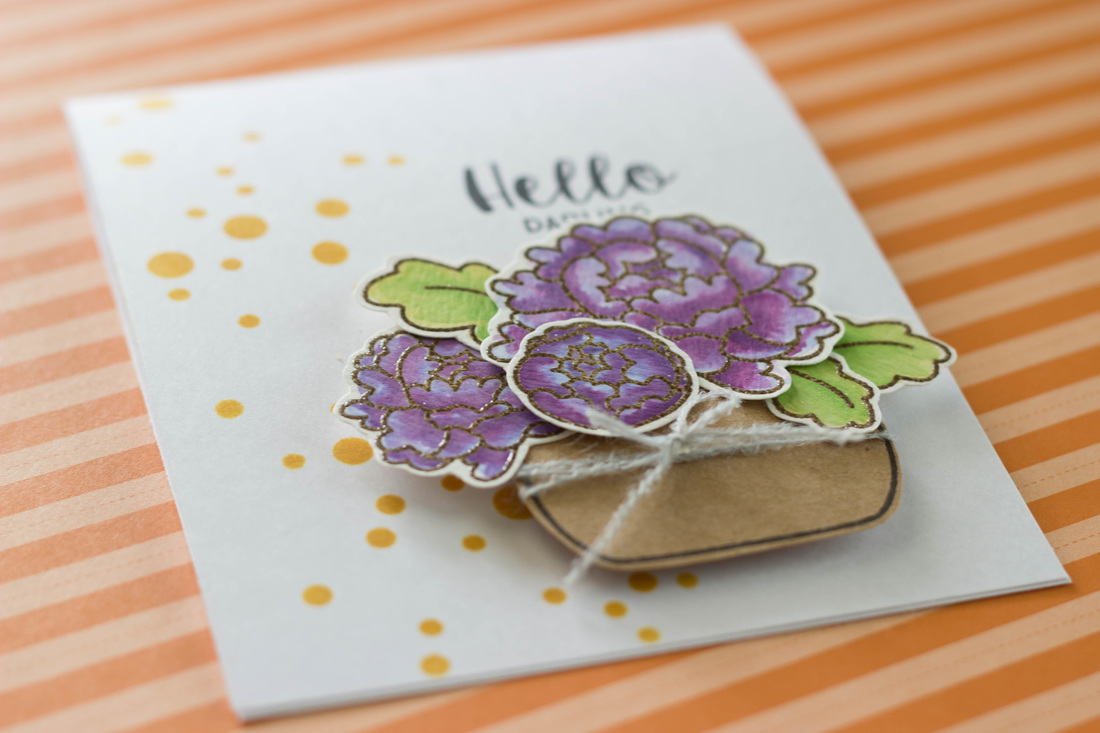 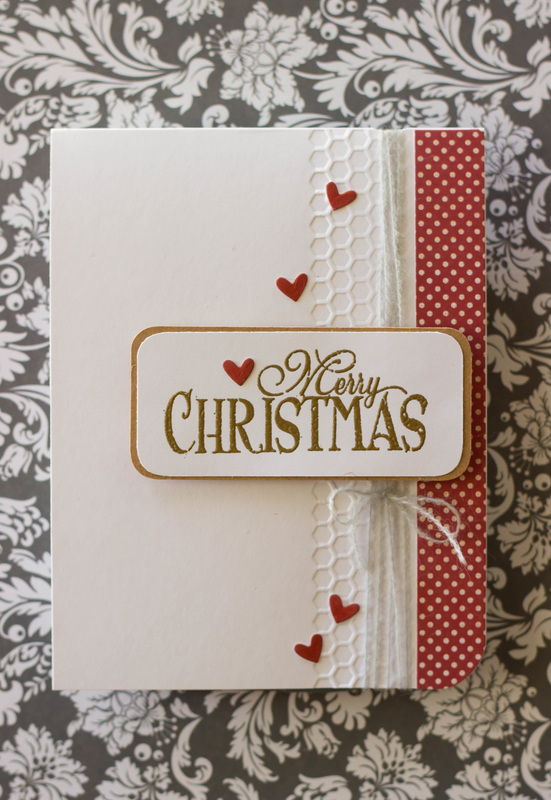 I have a very simple card to share with you today. Sometimes you just don't have a lot of time to whip something together, but that doesn't mean it can't look nice! I always try to get a head start on my Christmas cards because I definitely am not the kind of person who likes being in a rush last minute. For this card I just took a white card base, and adhered some red polka dot paper on one side. Then, I rounded that bottom right corner. I thought it needed a little bit more, but didn't want it to be too overdone, so I just ran it through my Sizzix with a small honeycomb embossing folder. Then, I added some string for a little more texture. The sentiment is stamped and embossed in gold, and matted on some kraft cardstock. The edges of that is rounded, as well. I then adhered the sentiment over the string with some foam adhesive. For a finishing touch and to tie the red together, I added some Sizzix cut hearts that I colored with some Distress Ink. Again, its simple, but it would be an easy one to make multiples of! 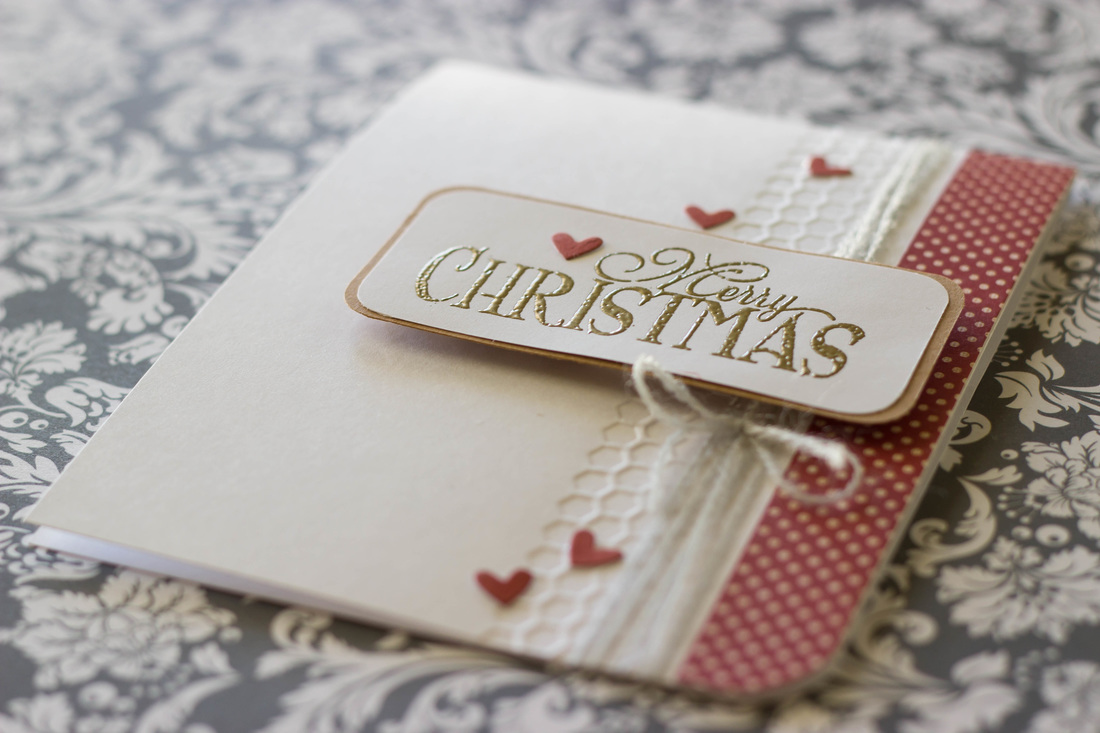  I haven't tried too many shaker cards yet, mostly because of the ridiculous amount of foam adhesive it usually takes. I recently saw one of Kristina Werner's shaker cards and just had to try my own version.
I've had two new, beautiful nieces in the last few months so I thought a baby card was appropriate. I stamped and colored the little elephant with my distress inks and watercolor brush, and set him aside to dry. Then, I watercolored a background and after that was dry, sewed a piece of clear acetate over the top, leaving one side open until after I filled it with glitter. I then stamped the greeting, and adhered all the pieces on top of the acetate with my ATG. I did put a little piece of foam adhesive behind the balloon, though, to pop it up for a little dimension. It was super simple to assemble, and I am loving this way to make shaker cards! I am linking this card up with: Simon Says Stamp's Monday Challenge! 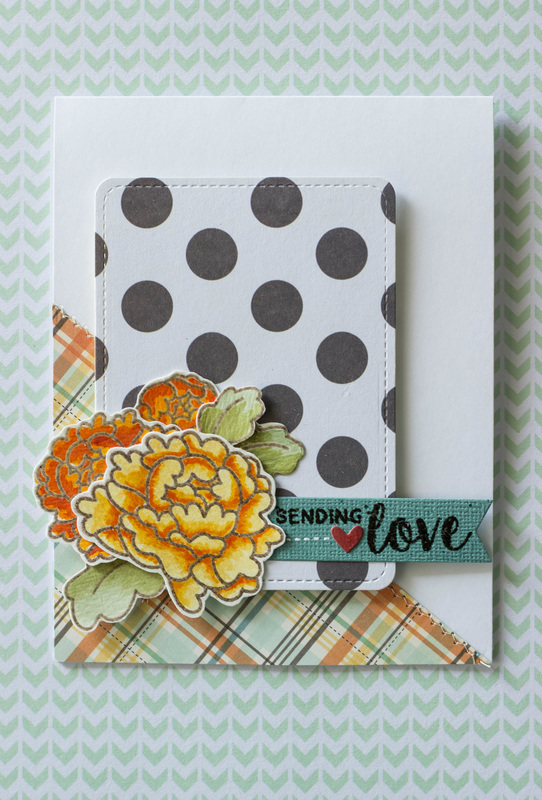 I've been having a lot of fun with Avery Elle's Peony stamp set lately. I stamped it out on watercolor paper and colored it in with my water brush and Distress Inks. I decided to go with a fall-ish color scheme, so lots of orange, yellow, and some browns. I've also discovered that I love the combination of orange and teal together!! I added a little bit of teal with the banner that the sentiment is stamped and embossed on. The colors coordinate beautifully with the plaid paper I used from Witch Hazel's 6x6 paper pad, October Afternoon. I cut the paper on an angle and also ran it through my sewing machine for a little extra texture and detail. Then, my polka dot stitched note card is popped up on some craft foam for some dimension. This stamp set also has an amazing selection of sentiments that you can mix and match to send cards for any occasion. This one will be going to a special friend to let them know I'm thinking of them. Linking this project up with: Simon Says Stamp's Monday Challenge! 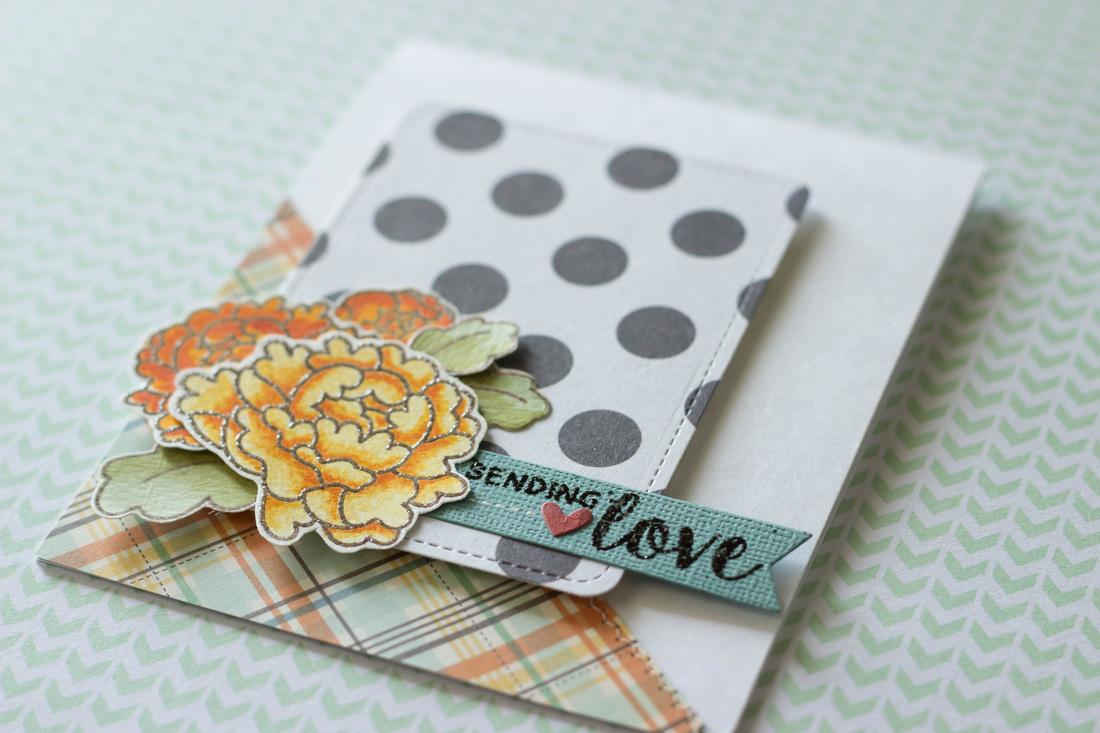 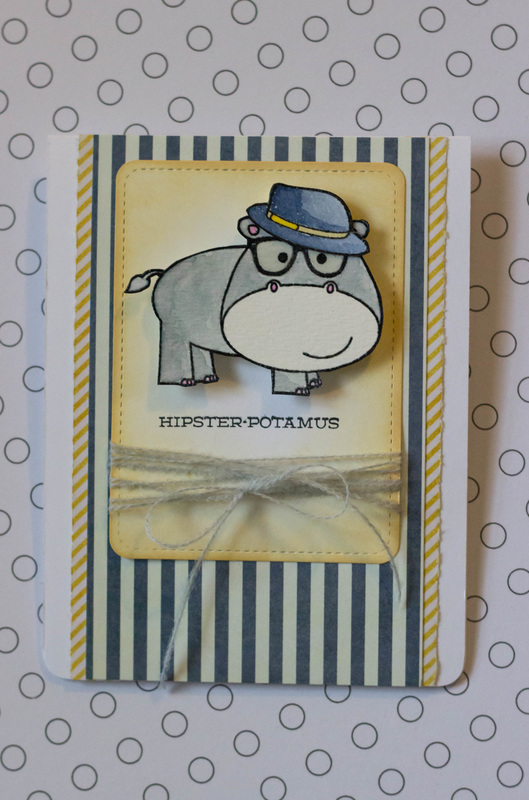 I'm not quite sure if its pure coincidence or if was meant to be, but it just so happens that World Card Making Day and my birthday are both today!! Just too perfect, if you ask me. Anyway, I had so much fun making this card with the stamp set my husband got me for my birthday. If you have seen any of my recent cards you can probably tell Im kinda into puns lately. They just make me laugh. I started by stamping the hippo in distress ink and then embossed it with clear embossing powder over the top. It gives it a shiny finish and also doesn't run with the other colors while Im painting in the image. I used a brush and some more Distress Inks to color in the rest of the hippo. You can probably tell Im still working on my shading skills. Definitely needs improvement but I still have fun with it! I added some Glossy Accents to the hippos glasses and set him aside to dry while I worked on the card base. I found some cute striped paper, and added some yellow stripes to the side. I then cut a stitched note card with my Sizzix and shaded it in with some Distress Ink to match the yellow on the sides. I adhered the hippo, added some string, and stamped the sentiment. Finally, I chomped the bottom corners and it was finished! Definitely simple, but I think it turned out so cute! Happy Card Making Day!!! Im linking this project up with: Simon Says Stamp!! Simon Says Stamp Wednesday Challenge! |

Pin it!

AuthorSo glad you found me! This blog is my little space where I can share bits about my life and my latest crafting projects (mostly handmade cards). My goal is to share, inspire, and to be a positive presence in the creative community. 

Find me on Instagram!Archives
January 2018
Categories
All
Link Love
 

|
 RSS Feed
