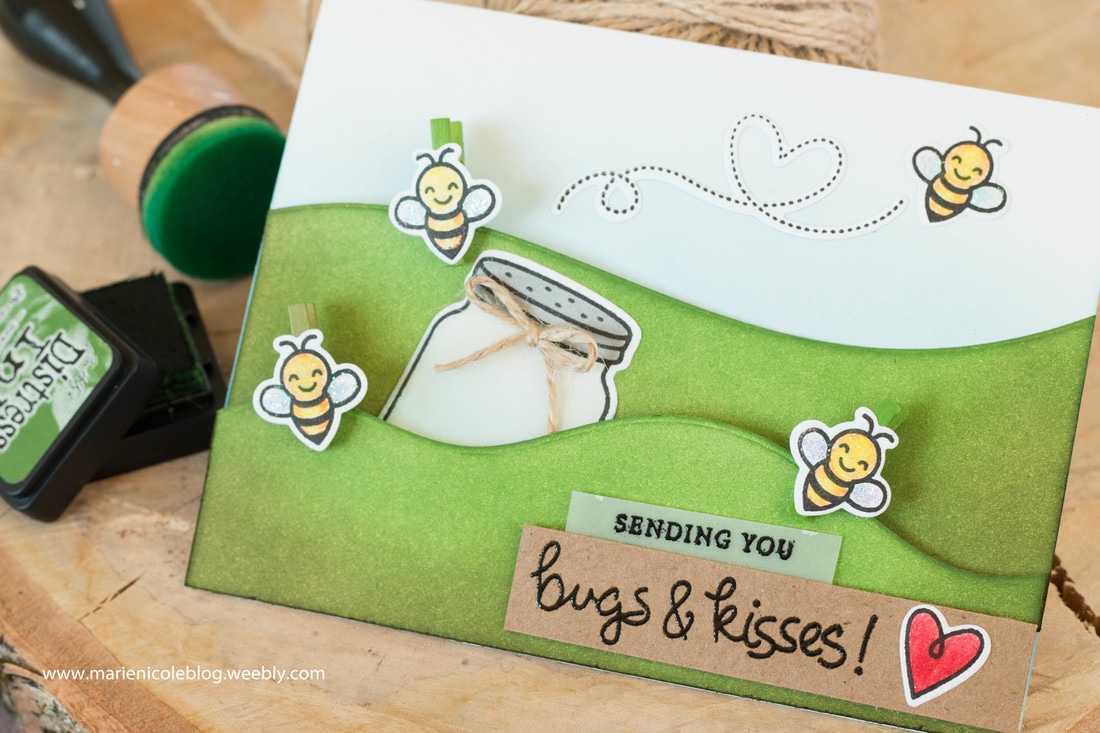
 I just love interactive cards. I think it makes your already special creations just that much more special! I've recently been playing around with shaker cards, slider cards, and for this one, some cute clips that you can remove and use on other things! There are three little bees on this card that I stamped out using Lawn Fawn's Bugs and Kisses stamp set, die cut, and then adhered to some Canvas Corp Mini Clothespins. 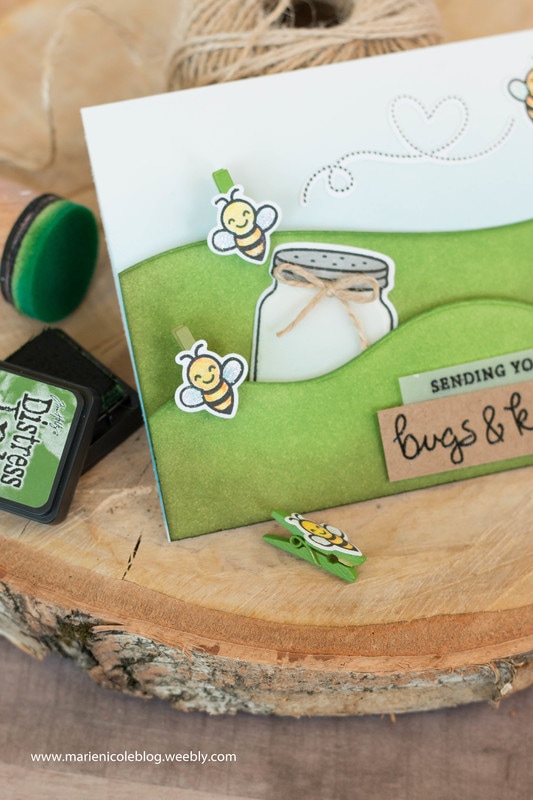 First, I stamped out all my images and die cut them using my Sizzix. Then, to build my background scene. I did some light blue ink blending for the sky, and also ink blended on the landscape panels using a few shades of green Distress Ink. The landscape panels are cut with Lawn Fawn's Stitched Hillside Borders dies. I layered them over each other, using some foam adhesive to pop up the front layer. This created some space behind the hillside that I was able to clip my little bees to. 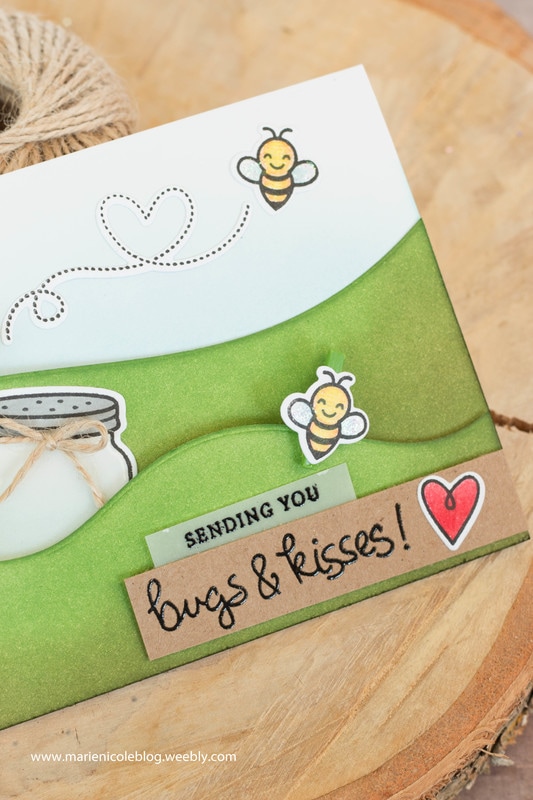 I also tucked the mason jar in behind the front hillside, and covered it with some Glossy Accents to make it look like glass. Then, I added some Canvas Corp Jute Cord that I tied into a tiny bow. The sentiment is also from the Bugs and Kisses stamp set. It is stamped and embossed on a strip of kraft as well as vellum. I added a little heart to the sentiment, as well. 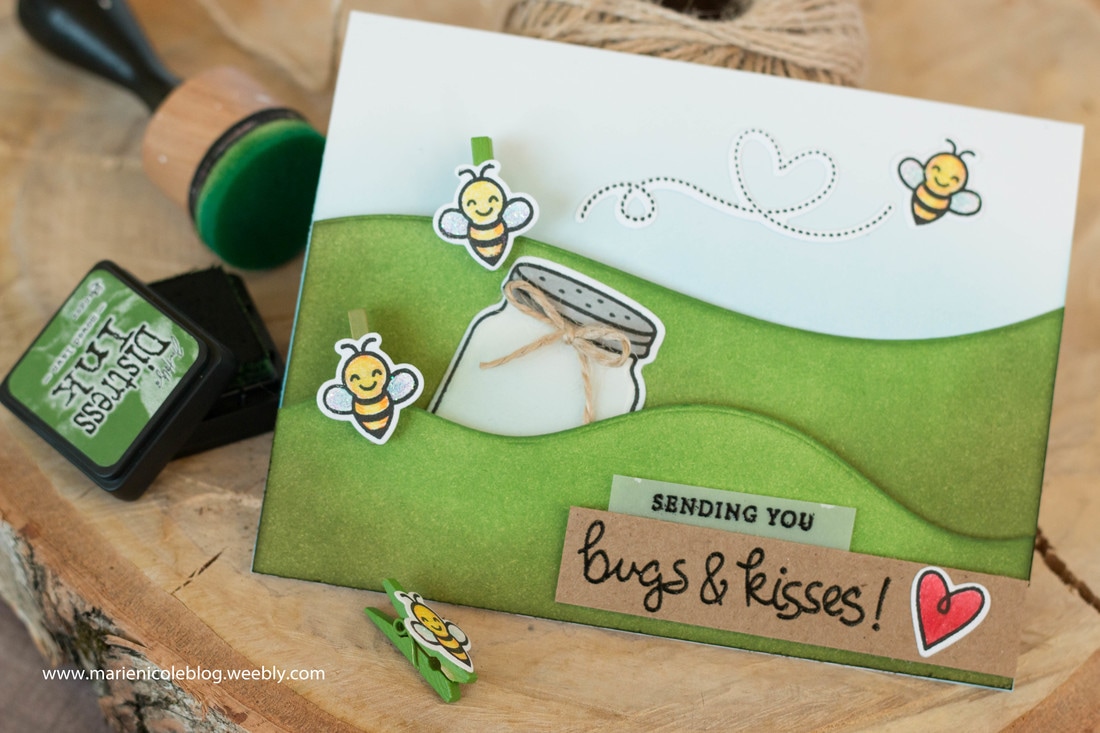 I think this would be such a fun card to send to my nieces and nephews! They could remove the bee clips and add them onto the school notebooks, planners, or even use them as little bookmarks! Of course, its fun to just move them around the card, as well! Thanks for stopping by to see this fun little card! Hope it gives you some ideas and inspiration for your own crafting!
2 Comments
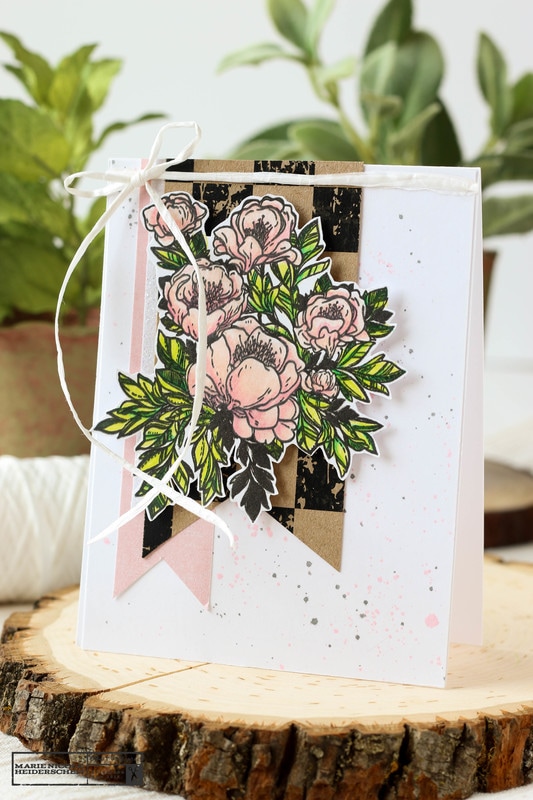
This stamp set from Brutus Monroe is just fabulous! It has this great floral image and a number of sentiments along with it that can be used for different occasions. I decided to go ahead and make two cards with this stamp, just to show that it can be used in a variety of creative ways.
For this first card, the florals were stamped out using my Misti and Raven Detail Ink. Then the image was colored in using Prismacolor pencils. After fussy cutting the image, I popped it up on some foam adhesive and layered it over some coordinating pieces of paper cut into banner shapes. I also used some Hickory Smoke and Spun Sugar Distress Inks to add some ink splatters to the background, and then tied some white raffia in a bow at the top. 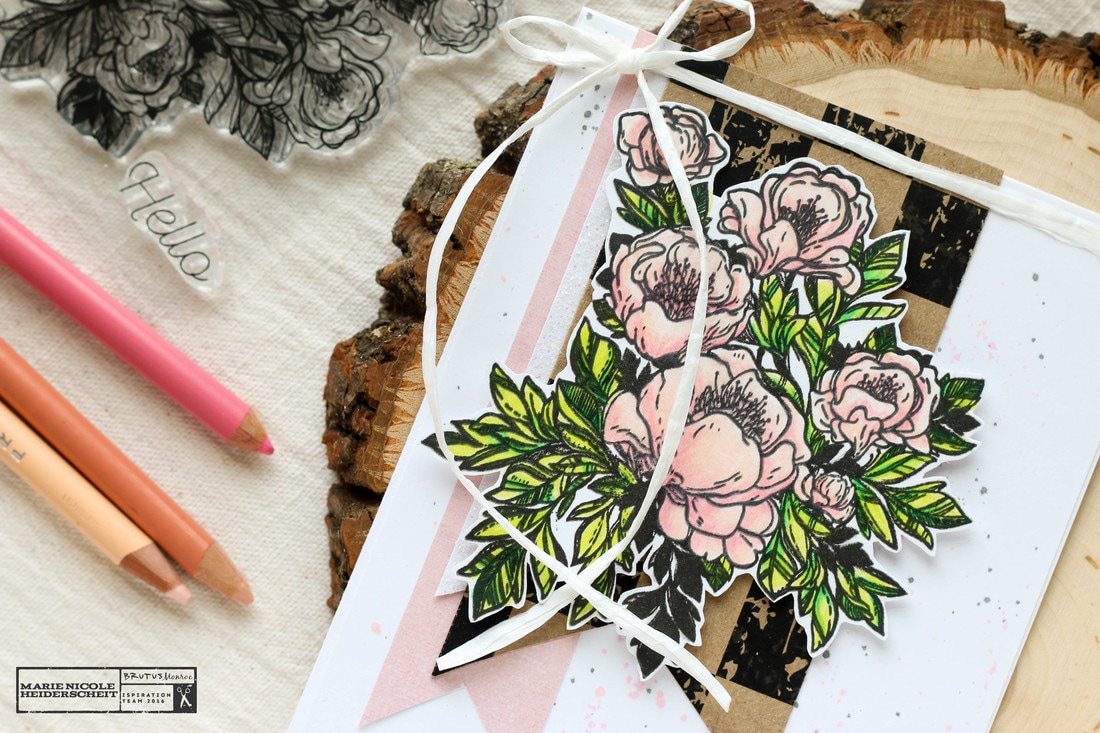
Stunning, yet simple!
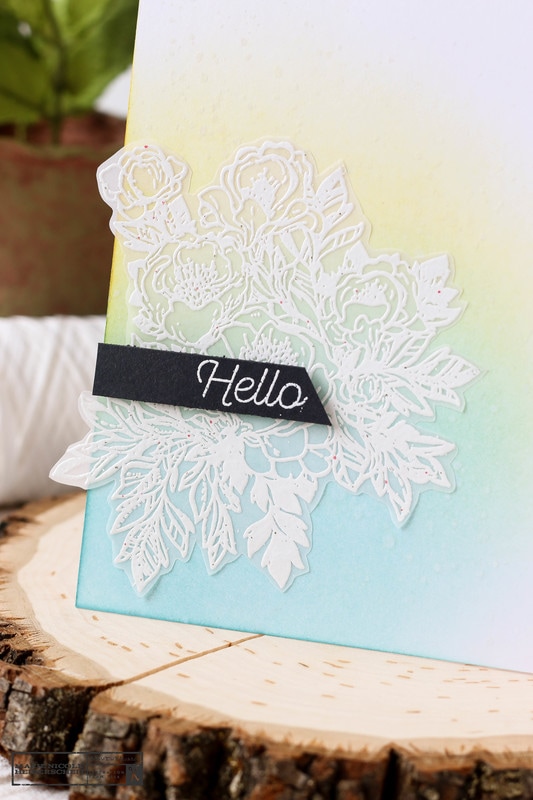
Next, I wanted to make another clean and simple card but with a little different spin on the florals. This time, the stamp was stamped using some Versamark ink and then embossed in white embossing powder. After the vellum was cooled, I fussy cut it out and set it aside while I prepared the background. Using some light Distress Inks, Squeezed Lemon and Tumbled Glass, I blended on some soft spotlight colors and then glued the vellum flowers over it. Lastly, I used one of the sentiment stamps from the set and added a simple black strip of cardstock with the sentiment on it over the florals. 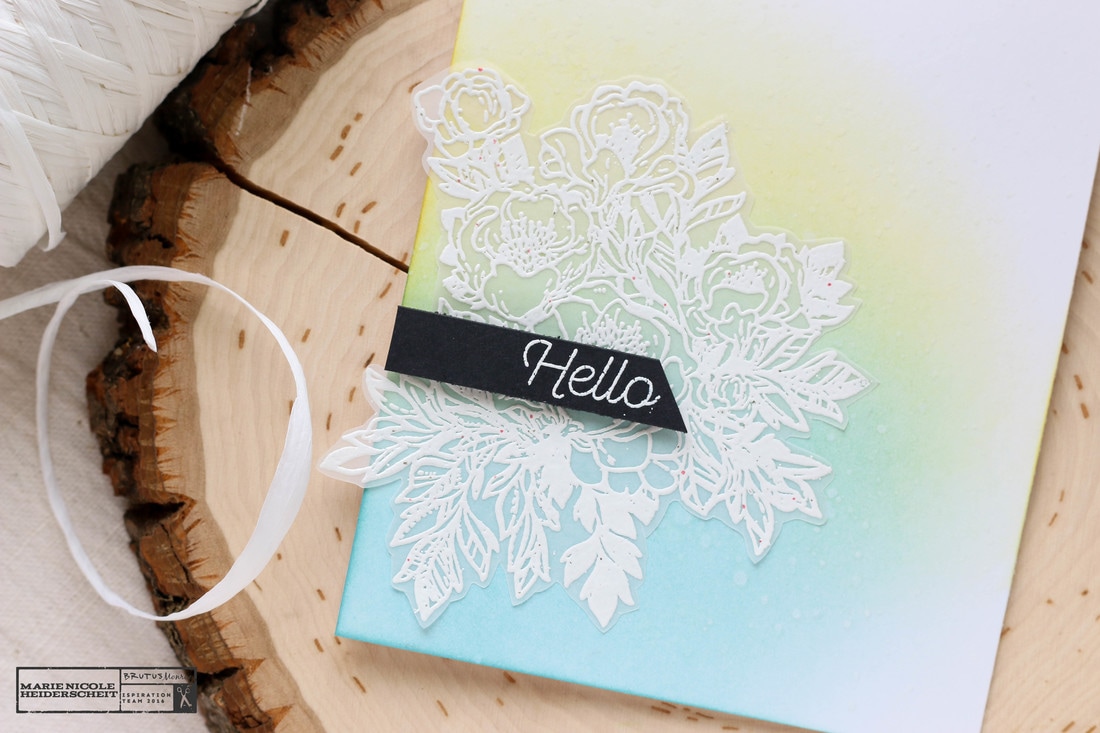

That's it for now! Hope you enjoyed this look at this gorgeous stamp set from Brutus Monroe! Im sure you will see this stamp on more projects in the future!
Thanks for stopping by, and happy crafting!
More from Marie Nicole...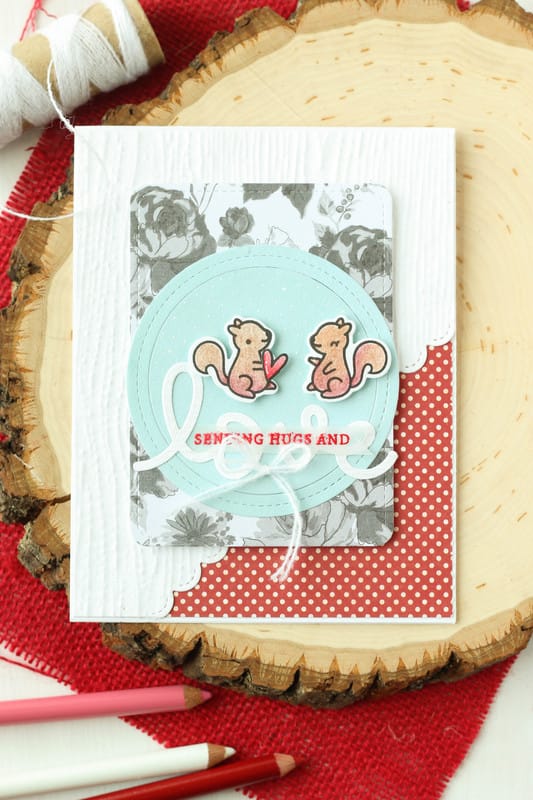
Did you get any fun crafting supplies for Christmas? I received a few items this year. The cute little squirrels on this card are from Lawn Fawn's Cheery Christmas stamp set. I stamped them out with Versafine Black ink and then colored them in with my new Prismacolor pencils. I have to say, I am LOVING these new pencils for coloring my stamped images. I am not that great at watercoloring, especially on regular cardstock. I dont like when the paper warps when you add water to it. These pencils blend great and work on my cheap cardstock. I used the coordinating dies from the stamp set to die cut the squirrels and the little heart. Then, I used Lawn Fawn's Stitched Circle Frame Dies to cut out the circle from some blue paper. I adhered that down to some floral paper that I also die cut, using the Stitched Journaling Card die from Lawn Fawn, as well. All my papers I pulled from my scrap bin. I am trying my best to use up scraps! I then cut the background white paper on an angle with the Stitched Border dies, and ahdered it over some red polka dot paper that peeks out on the bottom right corner. I then added the sentiment, the squirrels, and some white twine to the front, and placed the whole stitched journal die cut piece to the front of the card with foam adhesive. Cute, easy card that has a Valentine's Day feel to it, without being too overly red and white. 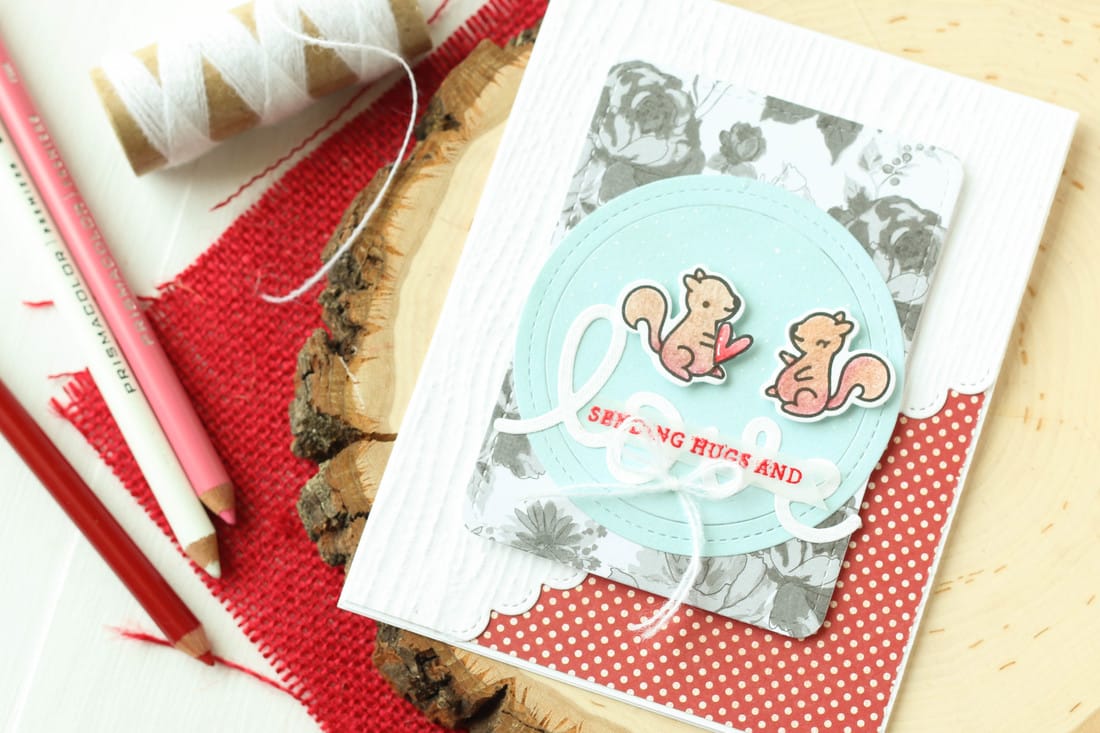
Thanks for checking out my card today! I have been slacking on making YouTube videos lately with the business of the holidays, but I hope to get back into it soon! If you are interested in some of the items I used on this card, I've included some links below. Happy Crafting!!
Check out these other fun posts!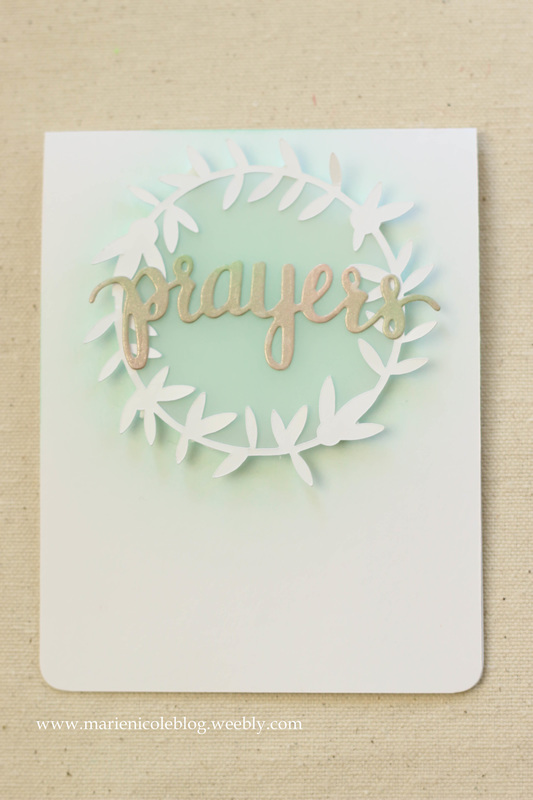
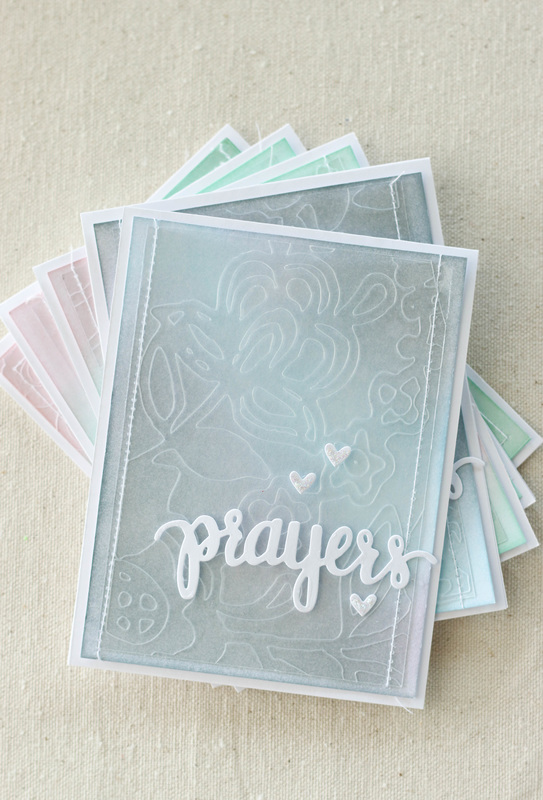
Hello! I have a simple card to share with you today. I have this "Prayers" stamp set from Simon Says Stamp, and I have been absolutely loving it. It is perfect for sympathy and encouragement type cards.
With sympathy cards I feel like you want them simple, classy, and definitely not depressing. I feel this card fits the bill. I started by taking some Cracked Pistachio Distress Ink and lightly applying it to my white cardstock base. I only wanted the color in one spot near the top. Then, I took this beautiful vine frame die cut that I cut using my Cricut and I cut a piece of vellum to fit. I glued the vellum to the back of the frame using Aleene's Tack It glue. For the "Prayers" die, I first took a strip of white cardstock and sprayed it with Tattered Angels' glimmer mists, The colors I used were Mint Julip, Wedding Pink, and I also added a few splatters of their Chalkboard paint in Chalk White. When that was dry, I die cut the word "prayers" and adhered it over the vellum using Aleene's again. Then I took the whole vellum piece and put some tiny foam adhesive pieces on the back to adhere it to the base. That completed the card! It was so simple so I ended up making two. I may even make a few more to complete a set of them. 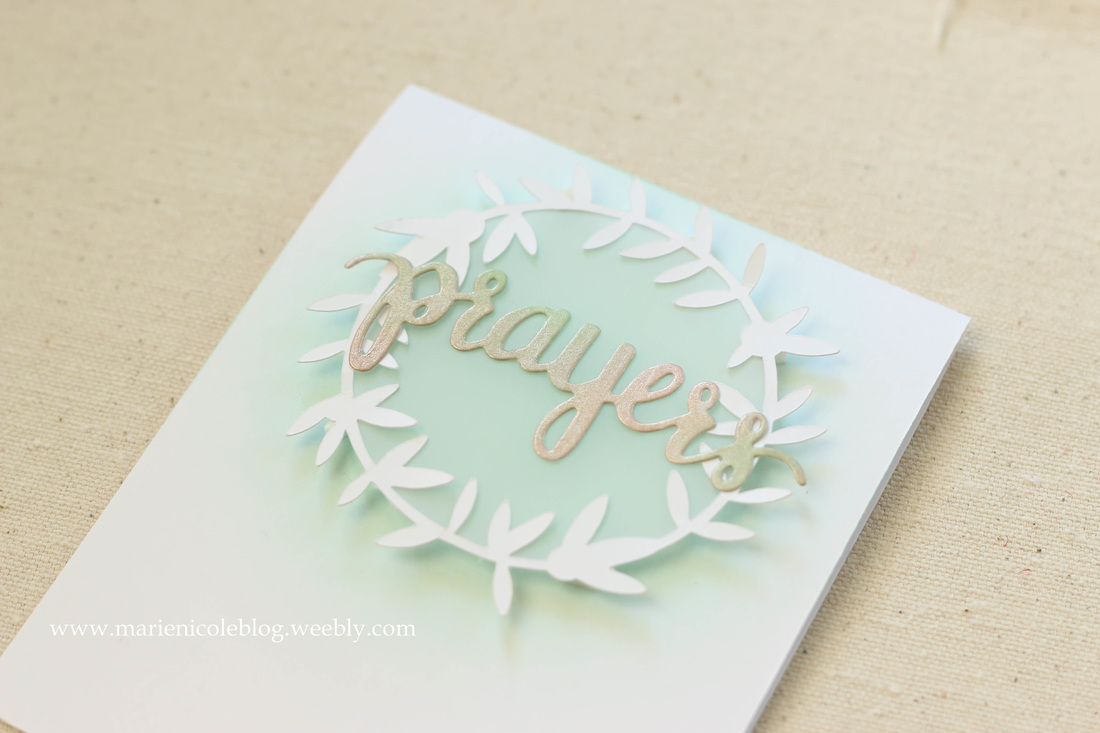
Thank you so much for taking the time to stop by!
If you are interested in the products I used, I have put together some links to them below!
I'm also linking this up with Simon Says Stamp's Monday challenge!
The challenge is to Leap Into the Unknown, and since this is my first time working with vellum, I'd say it fits! 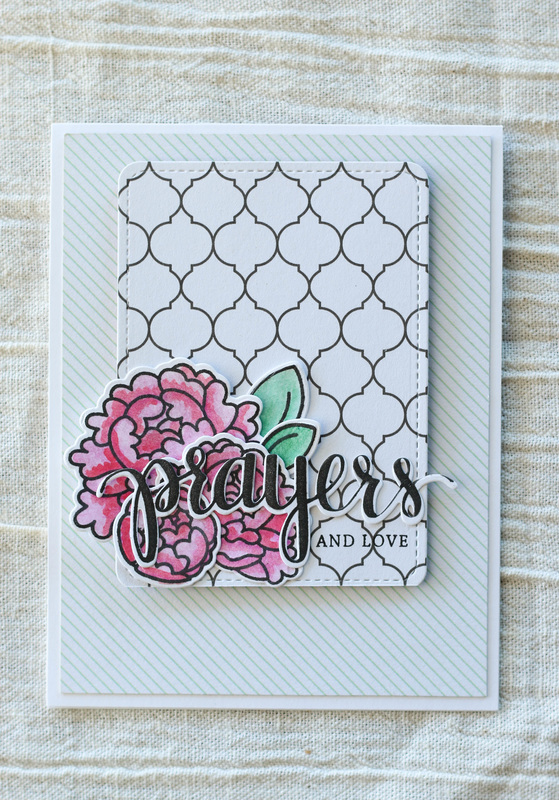
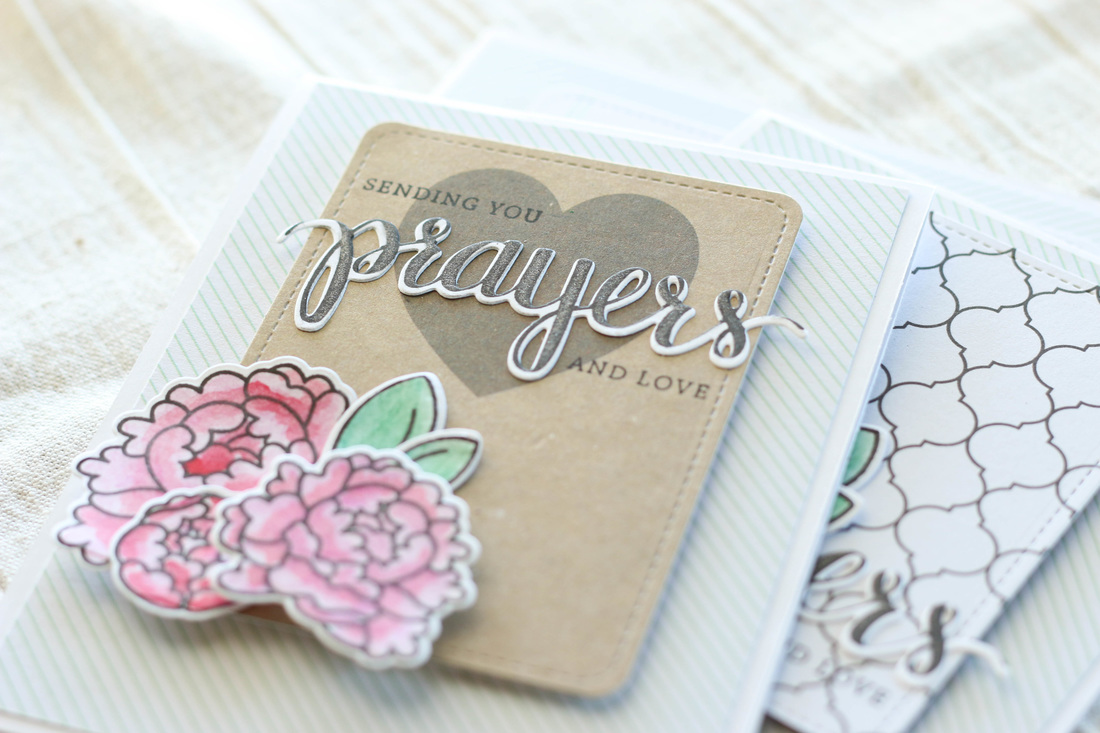
I've been busy working on some cards to send out to the Lasting Hearts Card Drive. I just got them in the mail this morning, and this is the last set that I managed to put together.

I started with stamping out all the peonies and leaves. These flowers are from Avery Elle's stamp set, Peonies. Its an absolutely gorgeous set. After they were all stamped out, I colored them with my watercolor pencils, and then blended the colors using my waterbrush. I then used the coordinating dies and ran them through my Sizzix to die cut all the little pieces.
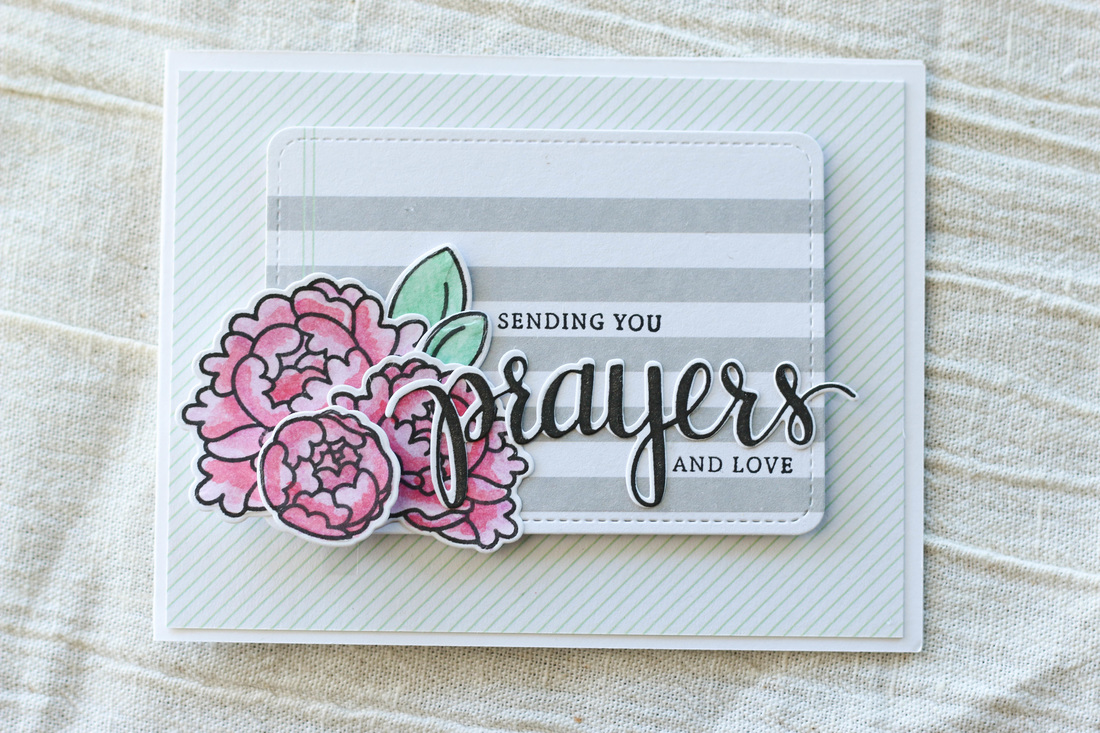
My next step was to stamp and die cut the word "Prayers" with my Prayers stamp set from Simon Says Stamp. After they were cut, I added some Wink of Stella to give it a little shimmer.
Then, I cut out three note cards using my Lawn Fawn Stitched Journaling Card die set. I adhered the cards down on some green striped background paper using some craft foam to help give some dimension. Then I glued on the peonies, leaves, and "Prayers" dies. Lastly, I used some of the mix and match sentiments from the "Prayers" stamp set to add a few more words around the die. 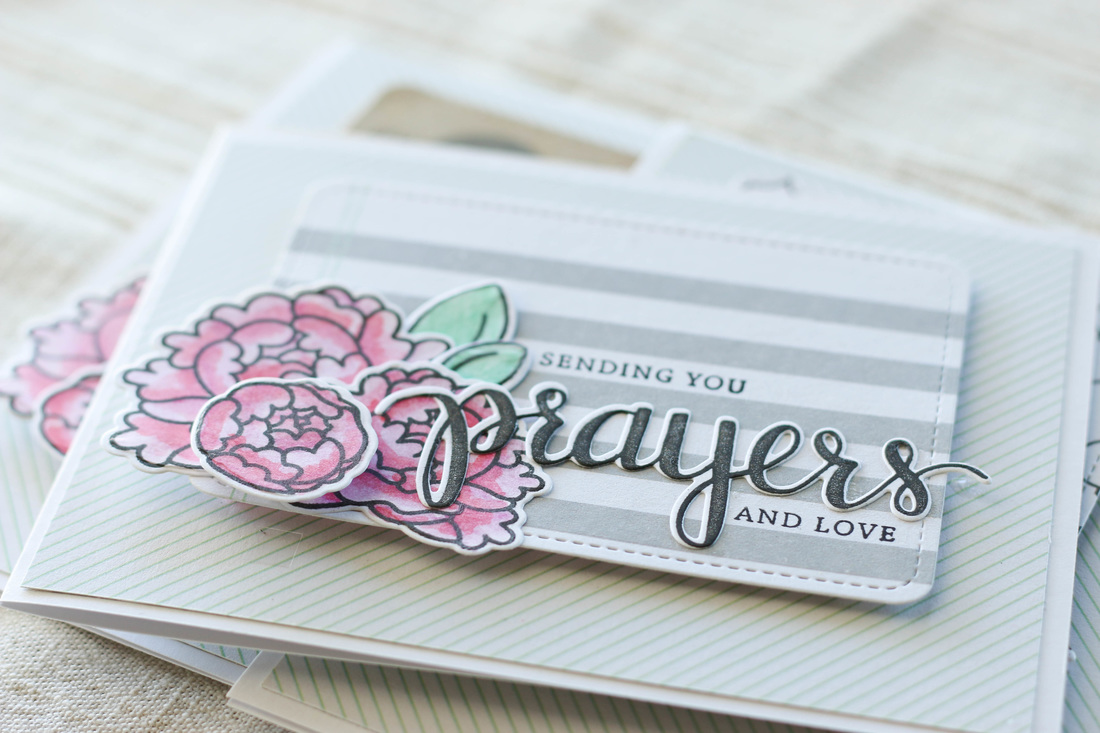
I find sometimes that keeping my cards simple really brings the focus to the sentiment, which is what I was going for here. These cards are going to such a sweet cause and I really want them to be an encouragement to the recipients.
Check out some fun products I used!
I am also linking this project up to:
Simon Says Stamp's Wednesday Challenge! Simon Says Stamps Monday Challenge! 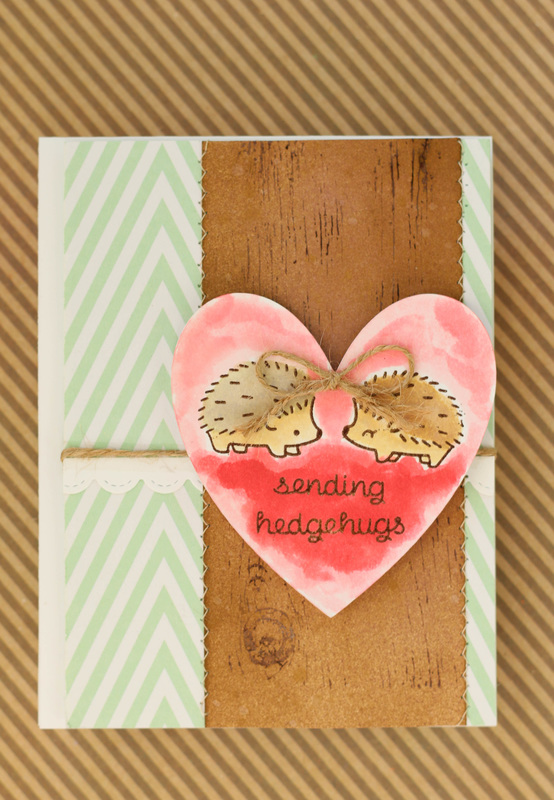
Sharing a quick, cute card with you today!
This one was made using Lawn Fawn's Hedgehugs stamp set. I stamped and embossed the hedgehogs and the sentiment with brown embossing powder, and then colored them in with Distress Ink. For the red watercoloring around them, I used some watered-down Tattered Angels Glimmer Mist in Lobster red. The woodgrain panel was stamped with my Heidi Swapp Woodgrain Background stamp. I used Tattered Angel's Java Glimmer Glaze on the stamp. The Glimmer Glaze acts as a resist, so even when you add color over it, like I did here, it still shows up and doesn't get lost in the color. I added some Distress Ink over the stamped area, and also spritzed it with some Kraft Glimmer Mist. I took my woodgrain panel over to the sewing machine and sewed down the edges onto my striped background paper. Then, using Lawn Fawn's Stitched Scalloped border die, I added a cute scalloped border and some twine. The heart with the sentiment I adhered down with foam adhesive, and added a twine bow to finish it off. 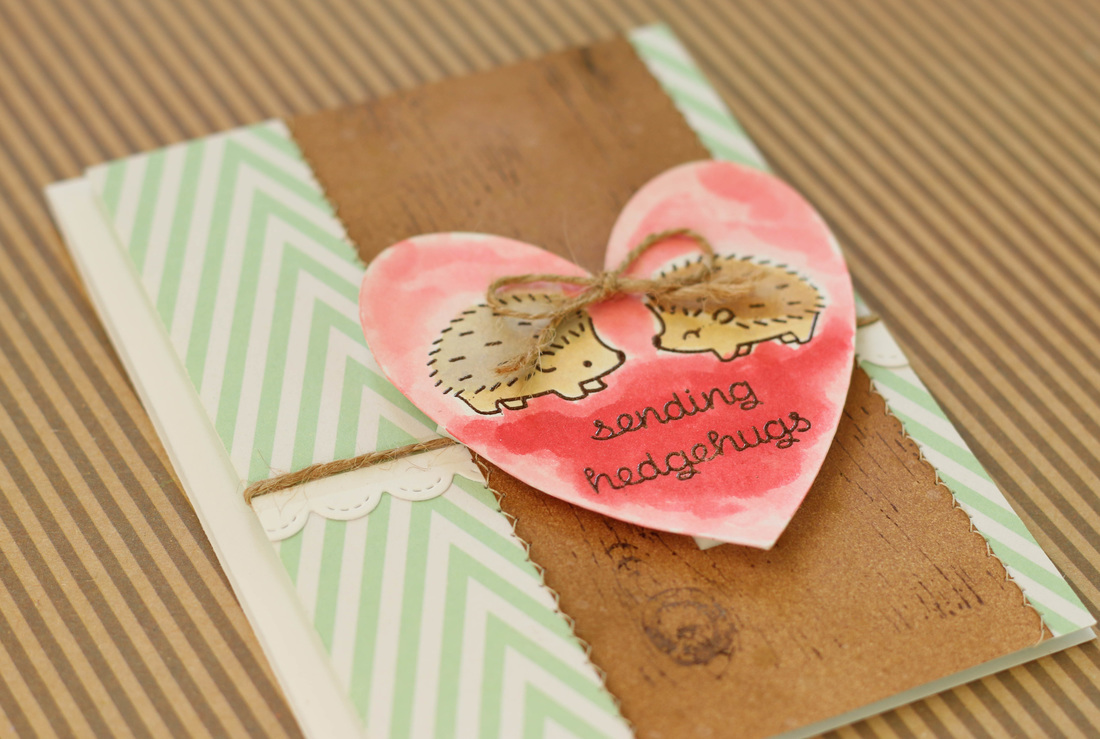
Check out some fun products I used!

I haven't worked with acetate a whole lot, but I picked up a pack of it on sale a while ago. I decided I wanted to try to run it through my Cricut with a beautiful floral design and see if I could create my own stencil.
It would have worked, but I didn't know until later after I researched it a little that I need a deep cut blade to cut all the way through my acetate. So I was left with a sheet of acetate that was partially cut. The design on it was beautiful, but it definitely would not work for a stencil. I decided instead to try to make a set of cards out of it. The etched effect that the acetate had looked amazing over a Distress Inked background. 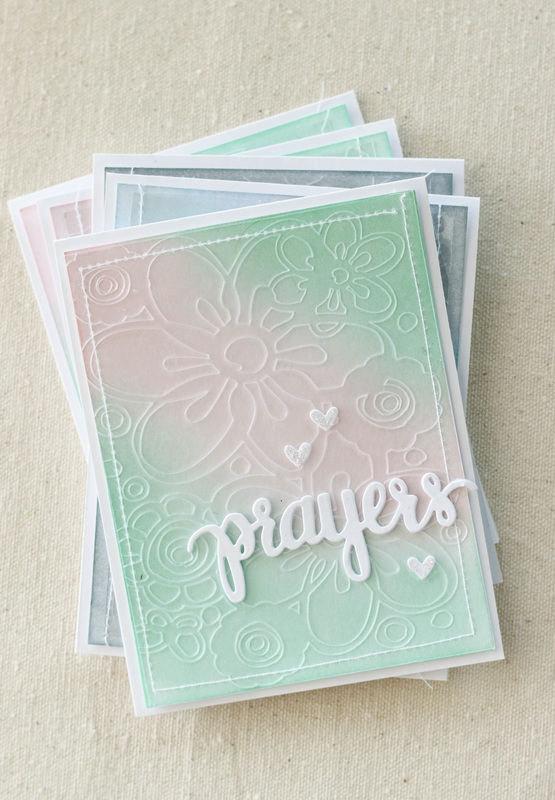
For the first card you see above, I used a combination of Story Sky, Tumbled Glass, and Milled Lavender. For the second, I used Cracked Pistachio (a new favorite, this color is GORGEOUS!) and Spun Sugar. After I had the background colors applied, I took some Tattered Angels' Glimmer Mist in Pearl and just spritzed on some shimmer.
To attach the acetate, I ran it through my sewing machine. I didn't want any adhesive showing through, and I love the look of stitching on cards. For the sentiment, I used Simon Says Stamp's "Prayers" stamp set and die cut the word prayers. I also die cut a few tiny hearts as well. 
I usually leave the inside of my cards blank, but I wanted to add a special something to these cards. I used some of the mix and match sentiments from the Prayers stamp set to create the inside message.
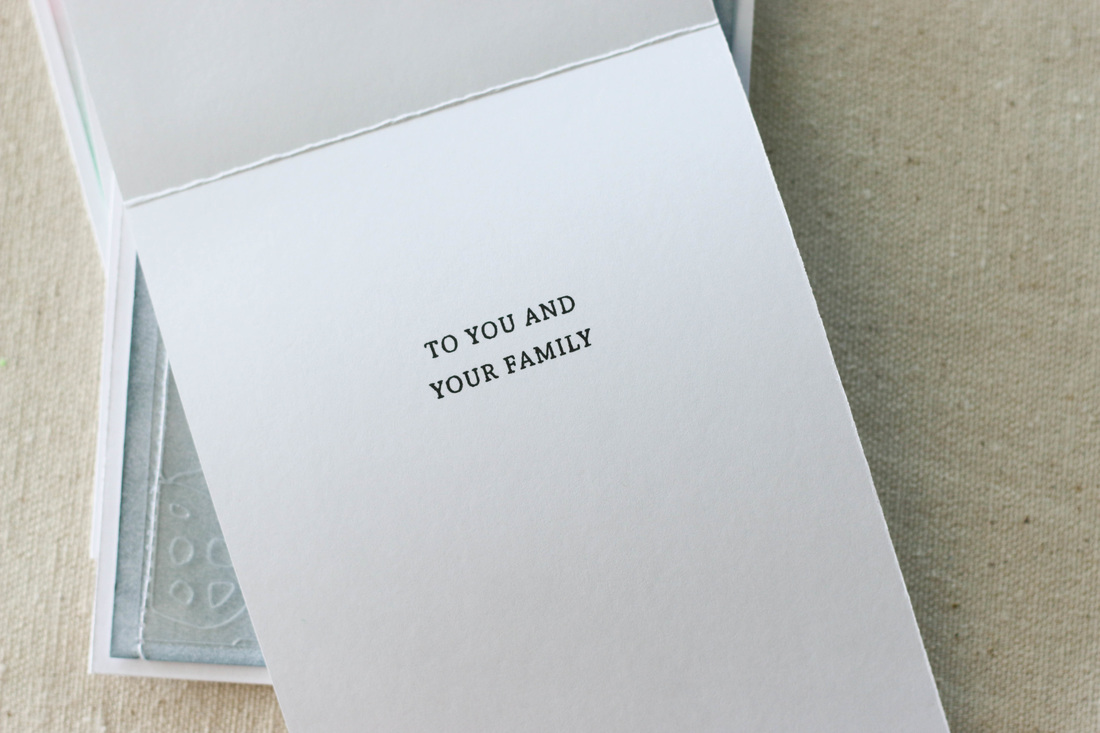
These cards I will be sending out to theLasting Hearts Card Drive. It's an amazingly sweet organization that is seeking to offer healing support to families that have suffered miscarriage and infant loss. I encourage you to follow the link and learn more about it!
Check out some fun products I used!
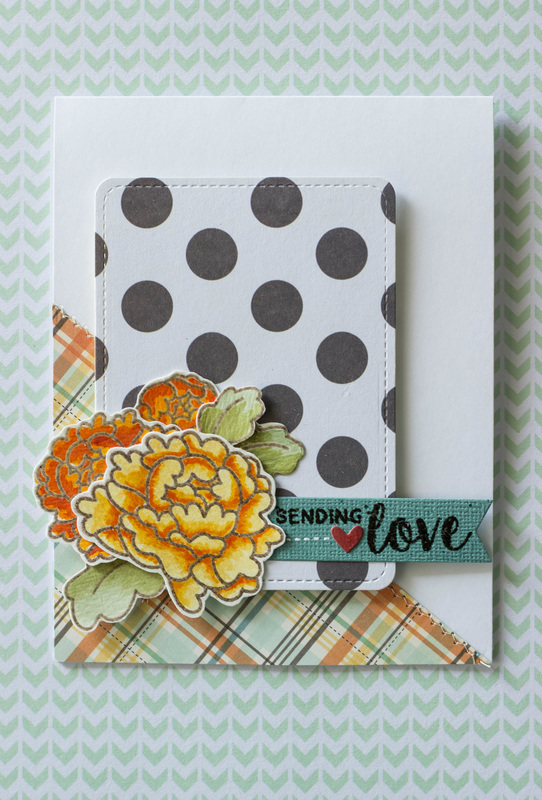 I've been having a lot of fun with Avery Elle's Peony stamp set lately. I stamped it out on watercolor paper and colored it in with my water brush and Distress Inks. I decided to go with a fall-ish color scheme, so lots of orange, yellow, and some browns. I've also discovered that I love the combination of orange and teal together!! I added a little bit of teal with the banner that the sentiment is stamped and embossed on. The colors coordinate beautifully with the plaid paper I used from Witch Hazel's 6x6 paper pad, October Afternoon. I cut the paper on an angle and also ran it through my sewing machine for a little extra texture and detail. Then, my polka dot stitched note card is popped up on some craft foam for some dimension. This stamp set also has an amazing selection of sentiments that you can mix and match to send cards for any occasion. This one will be going to a special friend to let them know I'm thinking of them. Linking this project up with: Simon Says Stamp's Monday Challenge! 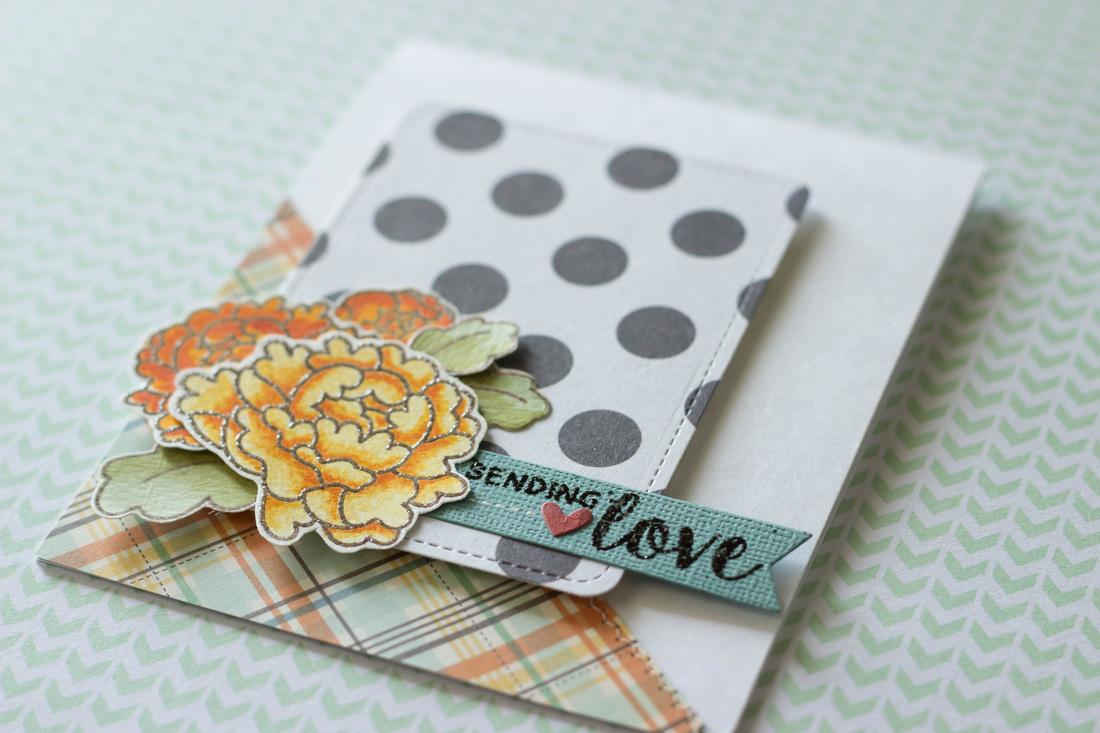 |

Pin it!

AuthorSo glad you found me! This blog is my little space where I can share bits about my life and my latest crafting projects (mostly handmade cards). My goal is to share, inspire, and to be a positive presence in the creative community. 

Find me on Instagram!Archives
January 2018
Categories
All
Link Love
 

|


 RSS Feed
