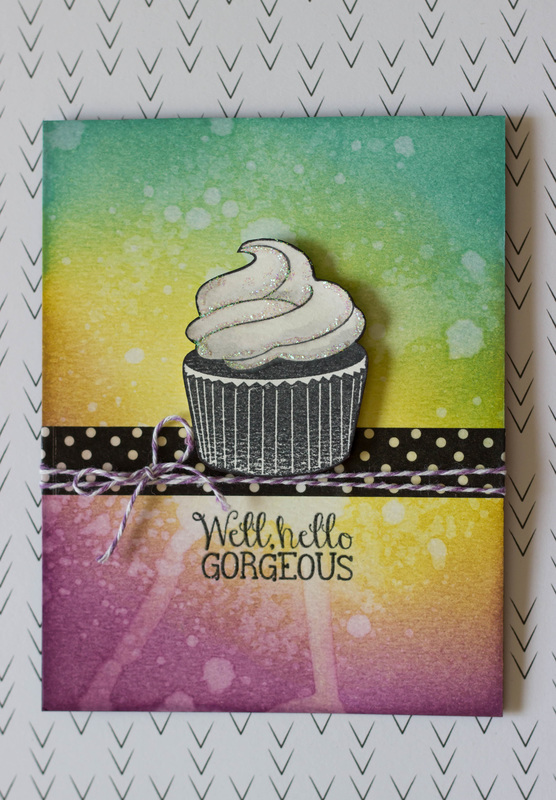
 I'm sure I've said it before, but I'll say it again... I love my Distress Inks!! I used them for the background of this card. Started with the darker colors at the ends and then blended them together with a lighter color in the middle. Then, to add some texture and interest, I splattered some water on it.
I stamped the cupcake in black, and kept the colors very bland. I figured since the background was so bright and colorful, the contrast with a more muted cupcake would be nice. The rest of the card is very simple, as well. Just some polka dot washi tape and a little purple baker's twine. I stamped and embossed the sentiment and added a little bit of stickled to finish it off. Im linking this card up with: Simon Says Stamp's Monday Challenge!
2 Comments
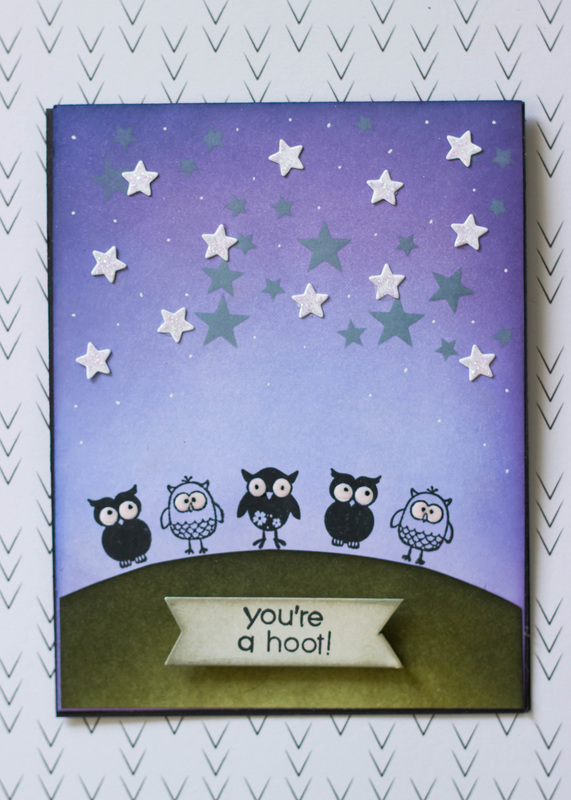 I had a lot of fun putting this card together. I've been practicing with my Distress Inks a lot lately, and trying to improve my blending. I thought I'd try to create a starry night sky. I blended a few shades of purples together, starting with the lightest shade at the bottom and working my way up, ending with the darkest shade at the top. Then, on top of the night sky, I stenciled in some dark stars with Heidi Swapp's Confetti Stencil. Then, I cut a curved piece of cardstock for the grassy hill, and used some darker greens to ink that up as well. I stamped the little owls in black on top of the grass. With my Sizzix I cut out some little white stars and adhered them up in the sky as well, finishing them off with some stickles. I used my white gel pen to add some dots in the sky, as well as coloring in the owls' eyes just to make them pop. Finally, I added some Glossy Accents to the owls' eyes, and popped the sentiment up with some foam squares. I love how all the different elements came together to make a totally different style of card than I'm used to making!! Im linking this card up with: Simon Says Stamp's Wednesday Challenge Simon Says Stamp's Work It Wednesday 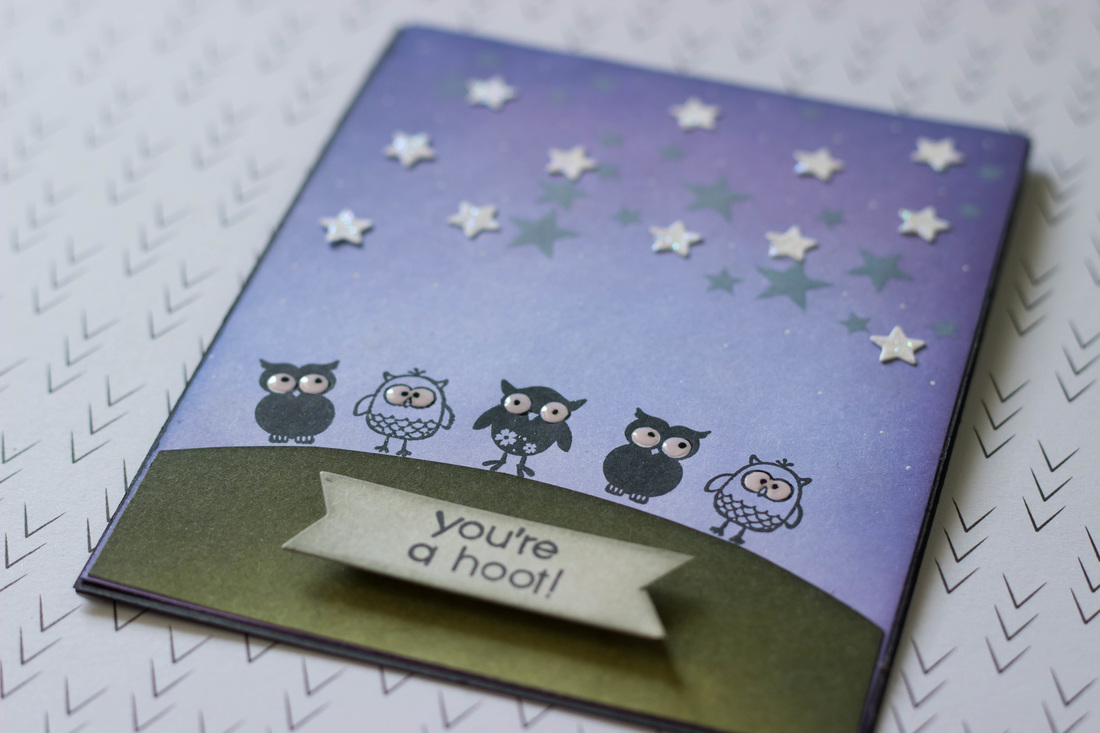  Hello, and happy Monday! I created this card over the weekend using one of my favorite stamp sets. The little skunk and his sentiment are just too adorable! I started by blending some of my Distress Inks on some watercolor paper. Then, I used a heart stamp dipped in water and stamped it over the Distress Ink to create the background. I also added a few dots with my white gel pen. They can be hard to see but I think it adds some texture. I cut the scalloped borders with my Sizzix, and adhered them to the bottom of the background panel. Then, embossed the card front and put the pieces together. I adhered the skunk with some foam dots, and added some Stickles to his tail and tummy. A little bakers twine finished it off. I'm linking this project up with: Simon Says Stamp's Monday Challenge! 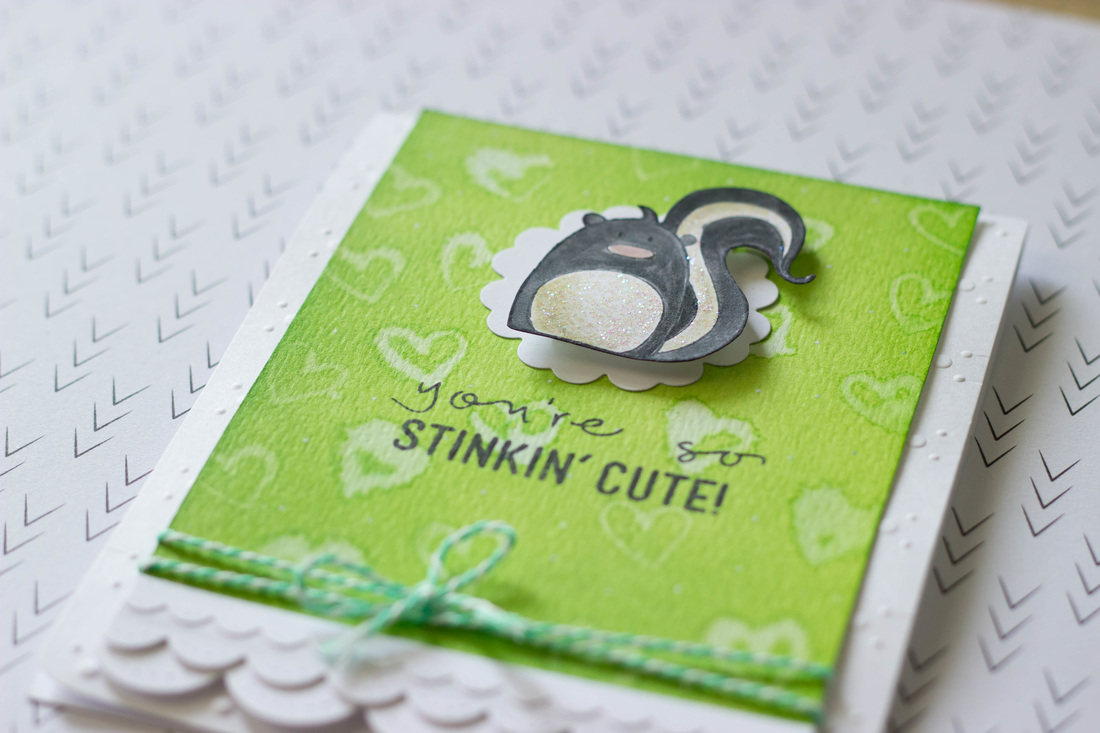 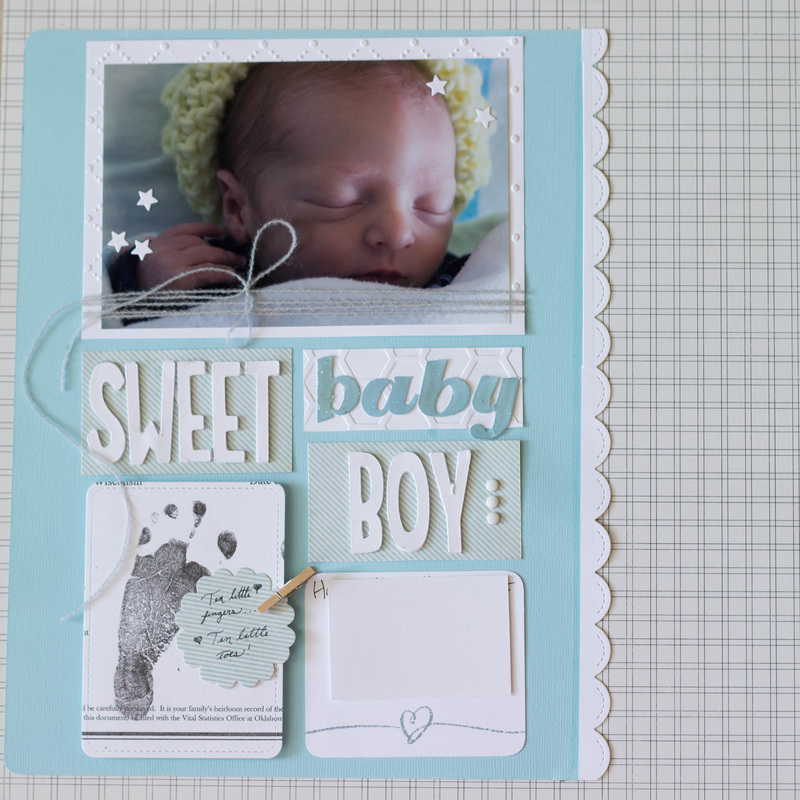 I realize Im going a little backwards here, showing Hayden's 2 and 3 month pages before this one, but it had to be done. I finally got around it actually taking a picture of this one to share.
I used my Cricut to cut out the lettering for "sweet" and "boy", and then used my Sizzix to die cut the scalloped border and the stars, and also emboss a few bits of background paper. I wanted to keep the colors very light so its pretty much just white and light blue. I photocopied his little footprint and cut it out with my stitched border die on my Sizzix as well. Added a few embellishments here and there and it was done! This picture of Hayden is one of my favorites. He was a fresh little newborn in the hospital at this time. Hard to believe he was so tiny! I'm linking this project to: Simon Says Stamp's Wednesday Challenge! 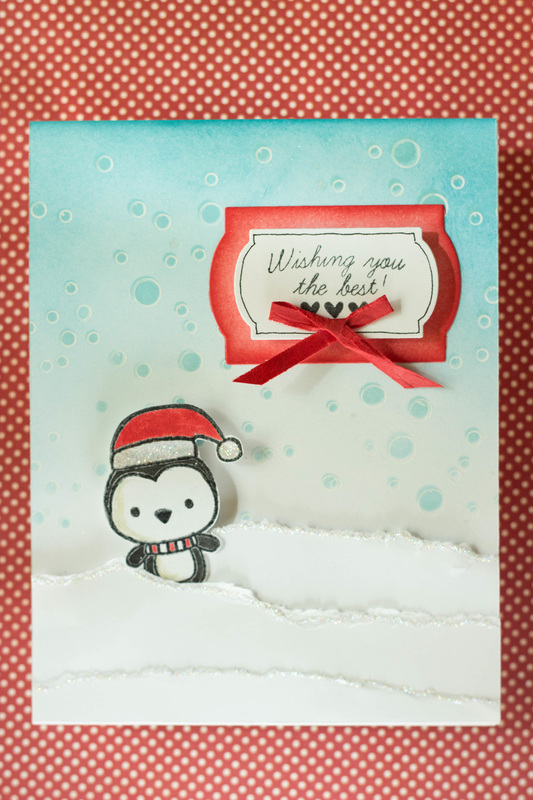 With the seasons changing (kinda, its still hot-ish here), it gets me thinking of making Christmas/ winter cards! This one was so fun to make. Also, the sentiment is kind of versatile, so you could send it out for Christmas or just for fun. I started with Distress Inking the background in Tumbled Glass. Then, using Heidi Swapp's Confetti stencil, I added the circles to create a snowy scene. I used a gel pen to outline the circles as well, just to help them stand out. For the snow, I just tore several pieces of white cardstock and layered them. I tucked our little penguin friend in between a few of the layers. He was stamped and embossed, then colored in with more Distress Ink. My sentiment was stamped as well, and layered on with a few labels I cut with my Sizzix. Finally, to finish it off, I added some Stickled to the tops of the snowbanks and to the penguin's hat. A little shimmer always looks good!! 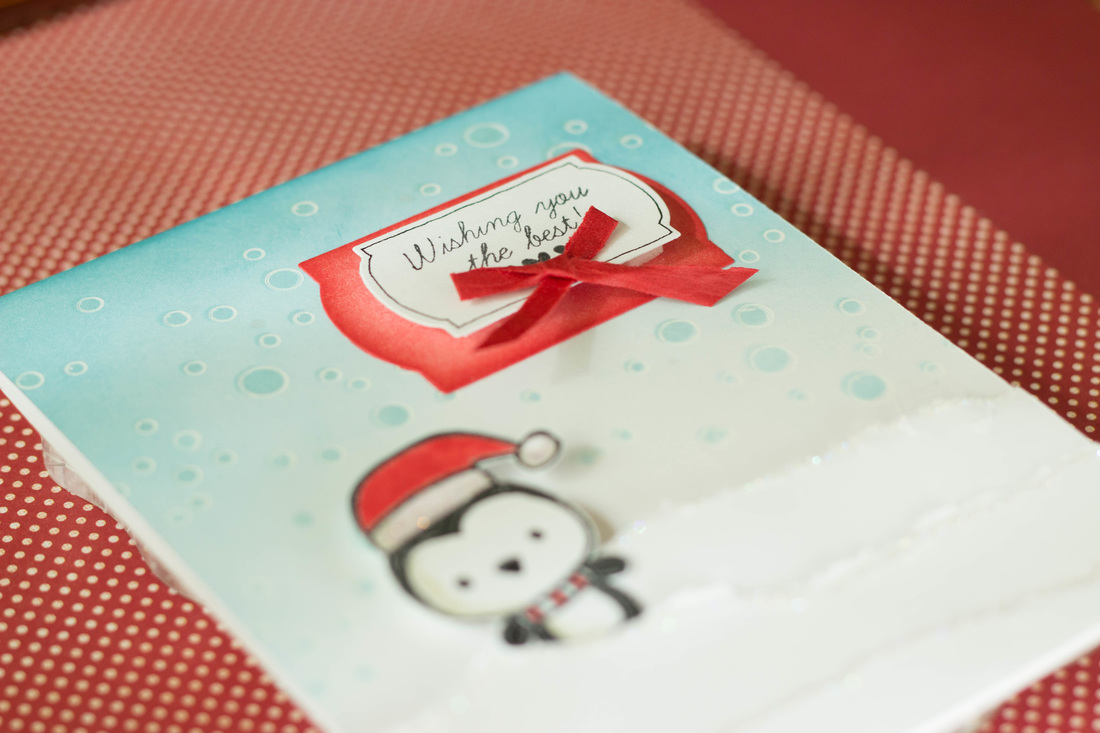 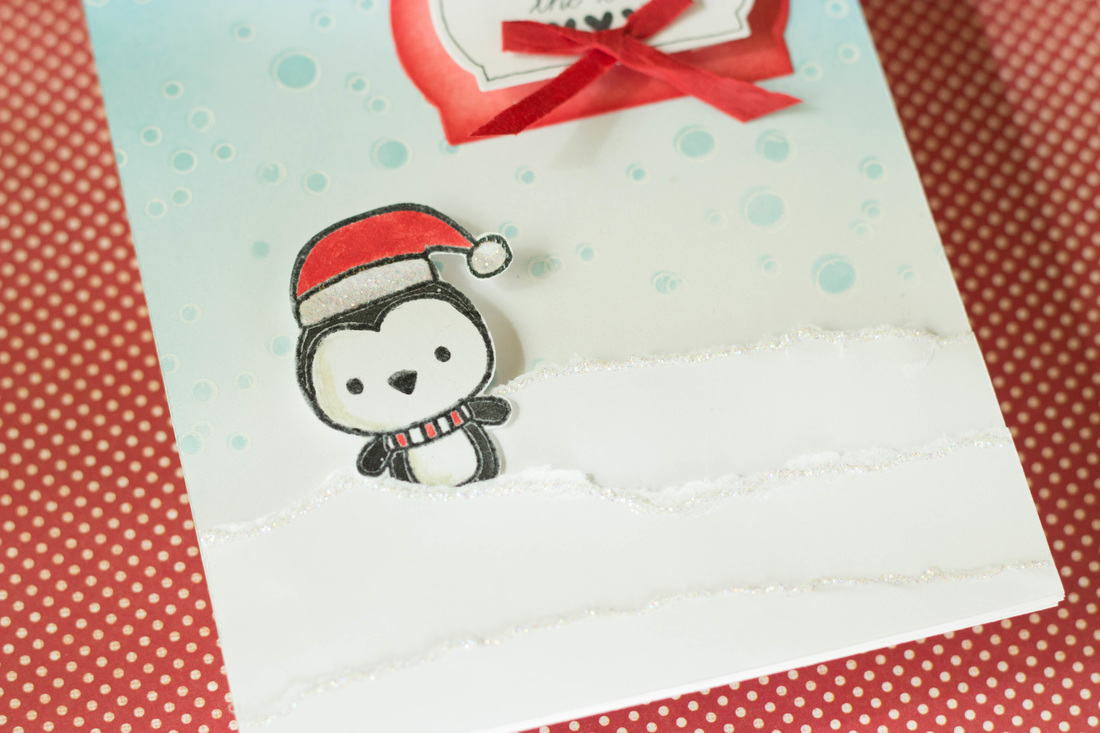 I'm linking this card up with:
Simon Says Stamp's Monday Challenge! They want to see what our favorite stamping techniques are! I have too many favorites to pick just one, but this card includes embossing. First time I saw heat embossing I thought it was magic, and I still love using that technique! 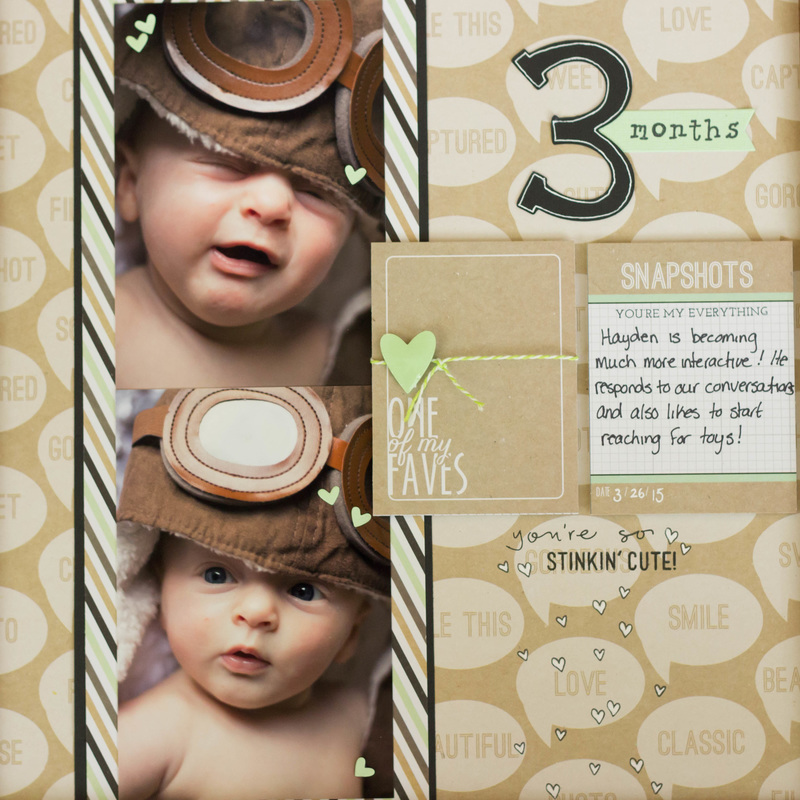 Finished another page for Hayden's scrapbook! It is, again, very simple but that is just how I work these days!! Im really liking this scrapbooking kit where everything is coordinated for me!!! I don't have to put a lot of time into worrying about finding the right color shades and what not. Most everything you see is from the kit, but I did add some Sizzix die cut hearts and a few stamps. 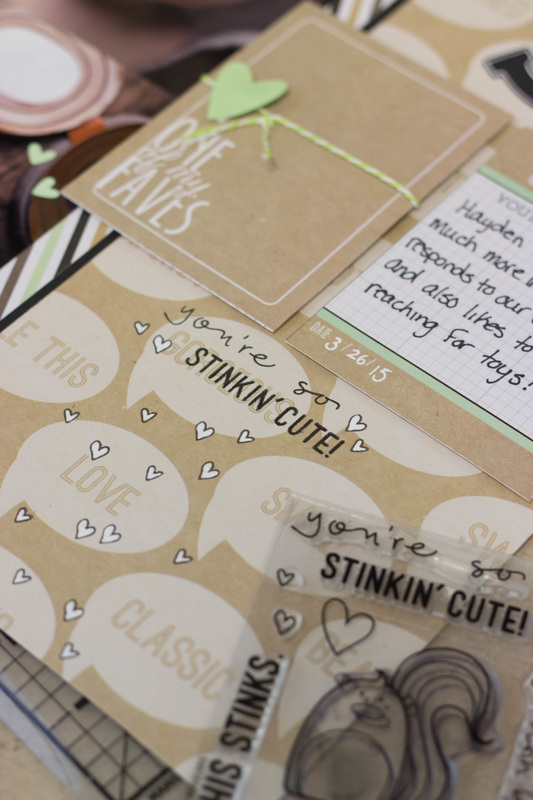 I just adore this little stamp set I got from Simon Says Stamp. The sentiment works great for Hayden's scrapbook page! I also stamped the little hearts all over and filled them in with a white gel pen so they would stand out more.
Linking this project up with: Simon Says Stamp's Monday Challenge Simon Says Stamp's Wednesday Challenge Word Art Wednesday 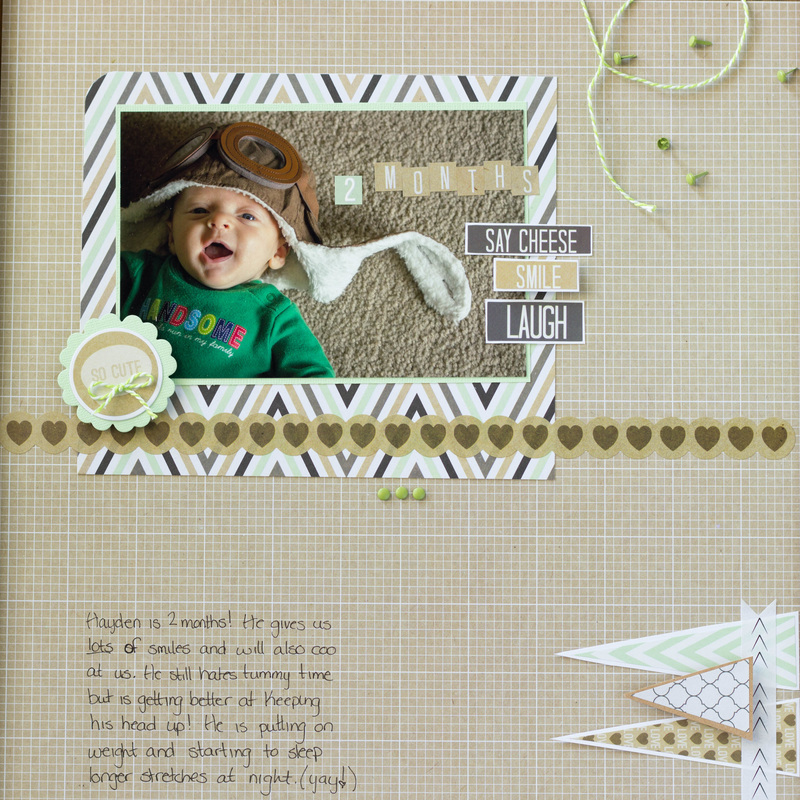 I'm making it a mission of mine to do a page a month for Hayden. So far I just finished month 2. Yes, I am that far behind! I have a little person that keeps my busy these days so scrapbooking has taken a back seat for the most part. There are some evenings and nap times, though, that I find myself with a little pocket of time that I can slowly work on a few of these projects. For this page I went super easy. I bought a scrapbook pack on sale at Hobby Lobby. You know, the kind where all the papers coordinate, there are tons of stickers and embellishments to choose from, and they even give you sample layouts! I basically just scrap-lifted the layout on the packet and adapted it to work for me. 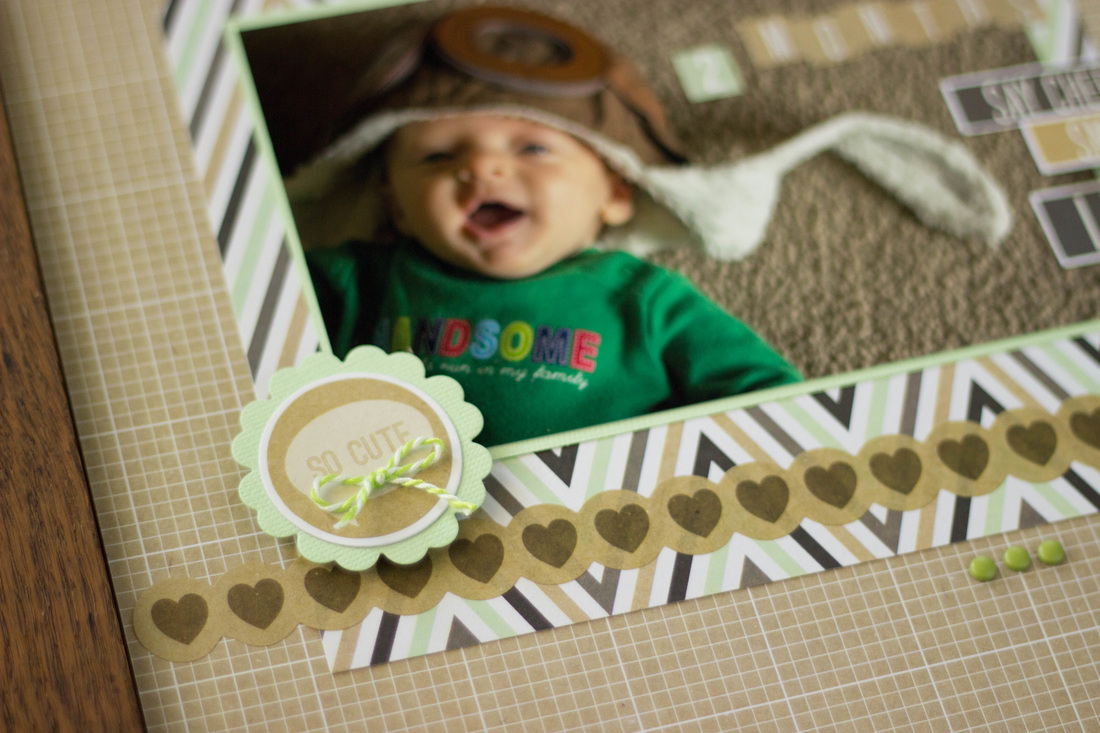 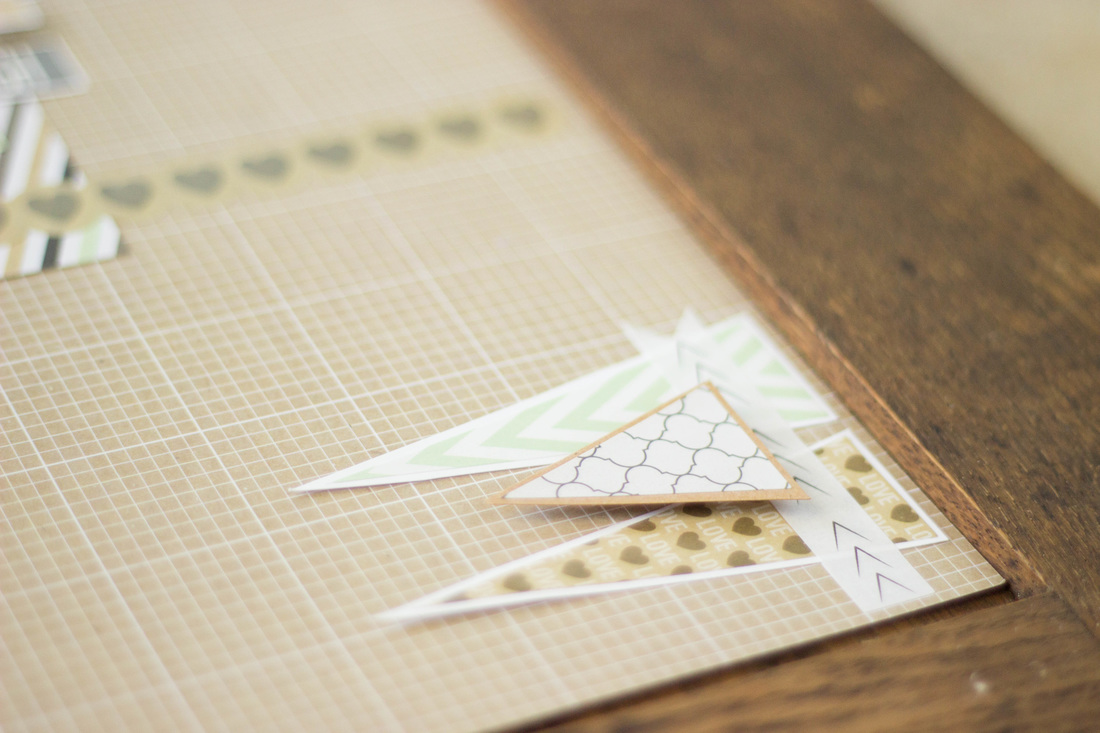 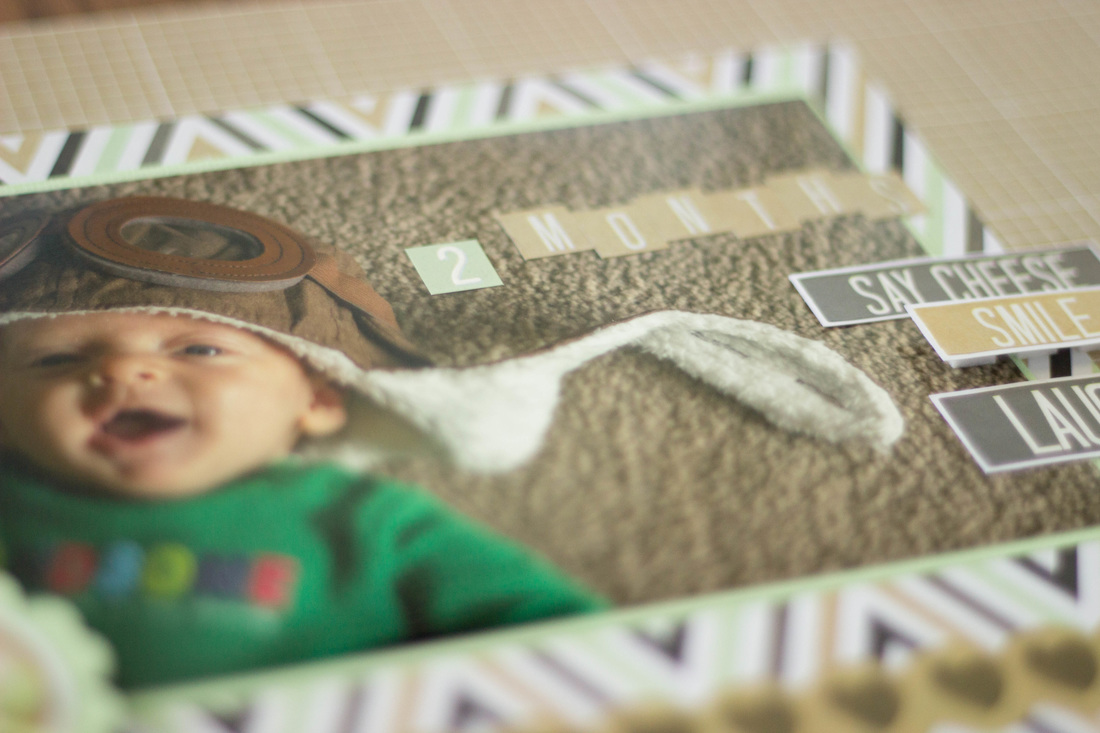 Super simple, quick scrapbook page. Just what I need these days!!
I'm also linking this project up with: Simon Says Stamp's Monday Challenge Simon Says Stamp's Wednesday Challenge Monday's challenge was to use a trio of colors, so my colors here were mostly green, brown and white. Wednesday's challenge was all about colors, as well! It's great when you can get two challenges into one project! |

Pin it!

AuthorSo glad you found me! This blog is my little space where I can share bits about my life and my latest crafting projects (mostly handmade cards). My goal is to share, inspire, and to be a positive presence in the creative community. 

Find me on Instagram!Archives
January 2018
Categories
All
Link Love
 

|
 RSS Feed
