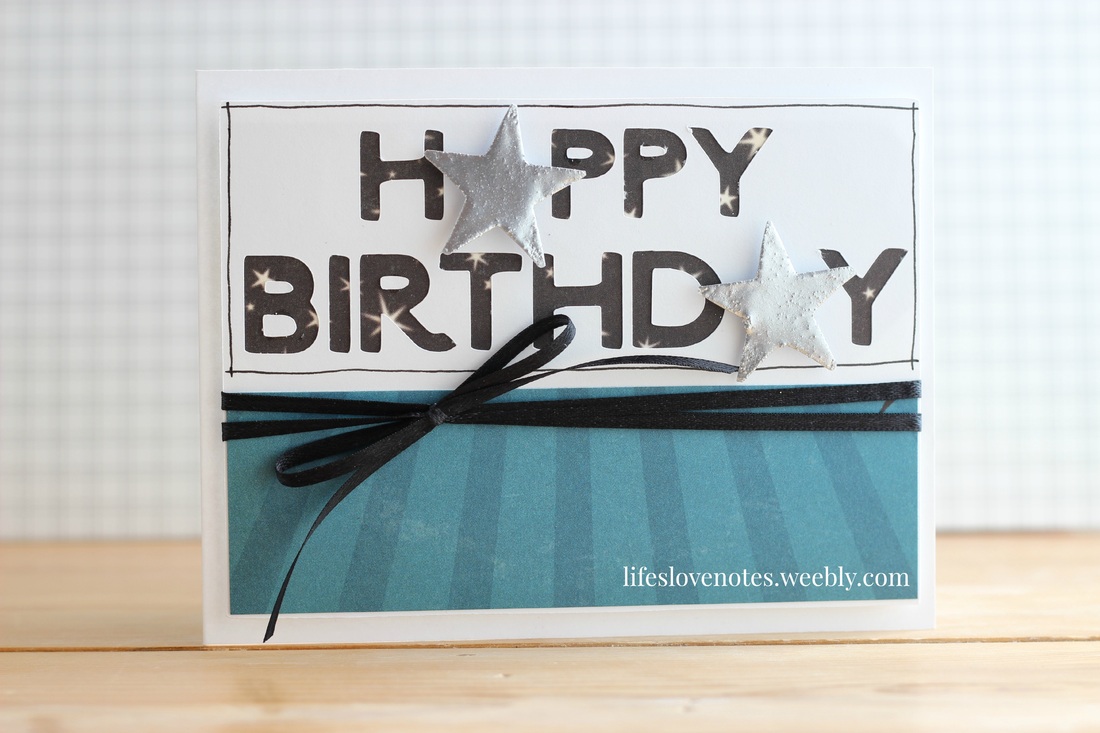
 Im always in need of more birthday cards to add to my stash. Seems like those are the cards I send out most often. So, for the challenges and card sites I am visiting this week, I am going to try to make my cards birthday cards. This first one I used the sketch from Operation Write Home for the layout. The "happy birthday" was cut using my Cricut and the Craft Room Basics Font. I used the cut-out for this card, but the next card I used the actual cut out letters. Great way to get more use out of your cuts- two cards with one Cricut cut! Anyway, I backed the letters with some patterned paper. Then I stamped and cut out the stars. I covered the stars in Versa Mark and then heat embossed them with some silver embossing powder. I actually coated the stars several times, trying to achieve a smoother finish. Obviously, I need more practice with that technique. 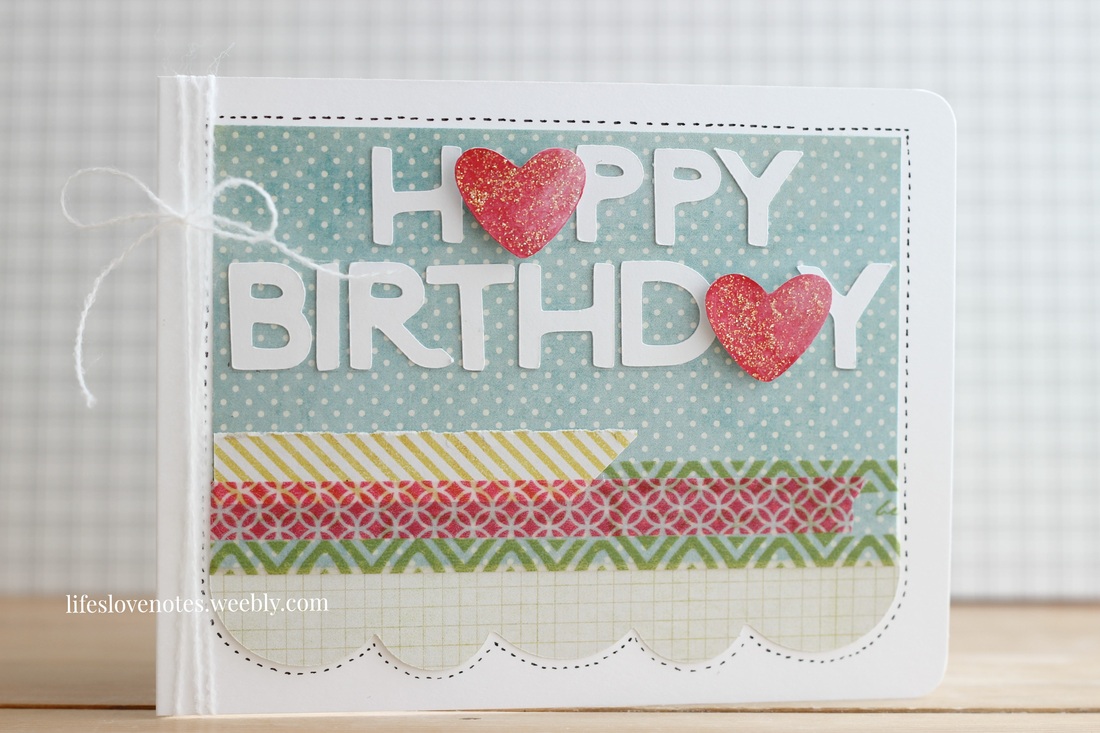 Here is the second card I made using the cut-outs from my Cricut. This time, I used hearts in the place of the "a". I watercolored the hearts and added some Diamond Stickles. I used five different patterns for this card. Simon Says Stamp's Monday challenge is to be inspired by the number 5 somehow. I just received a pack of patterned papers and some washi tape, so I threw them all together and I'm surprised how well they actually coordinate! I always seem to have problems pairing more than a few patterns. So those are a few of the cards for the week. Hope you enjoy! Some products I used:
1 Comment
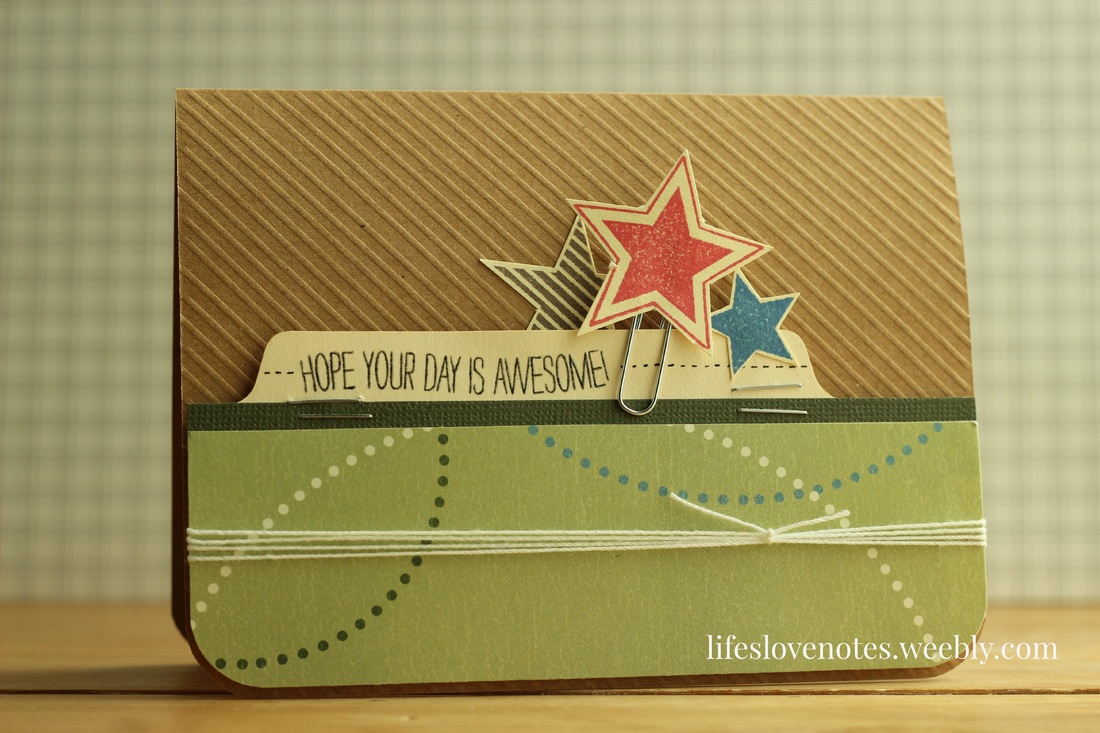 Operation Write Home has been focusing on masculine cards, which is great, because it seems a little more difficult to make a card a guy would want. Most guys just aren't into all the flowers and glitter like us ladies are. So I started with a little bit of patterned paper, since the new Work It Wednesday challenge is about using patterned papers. Then, I lined it with some green cardstock, and used the tab from a manilla file folder to stamp and emboss the sentiment on (don't tell the husband what I did to the folder, please!). The background just seemed like it needed something, but I didnt want to use more patterned paper and overwhelm the card. So I scored diagonal lines, and I really like the texture it gave to the card. Then, of course, I added some string. I also stamped and fussy cut several stars, one of which I glued to a paperclip with Glossy Accents. I also used a few staples. Who said office supplies couldn't be used for papercrafting? I have also linked this card to Simon Says Stamp's Wednesday challenge blog. Their theme is anything goes! Feel free to check out my Amazon store for products I frequently use and love! There's a link to it at the top of the page! 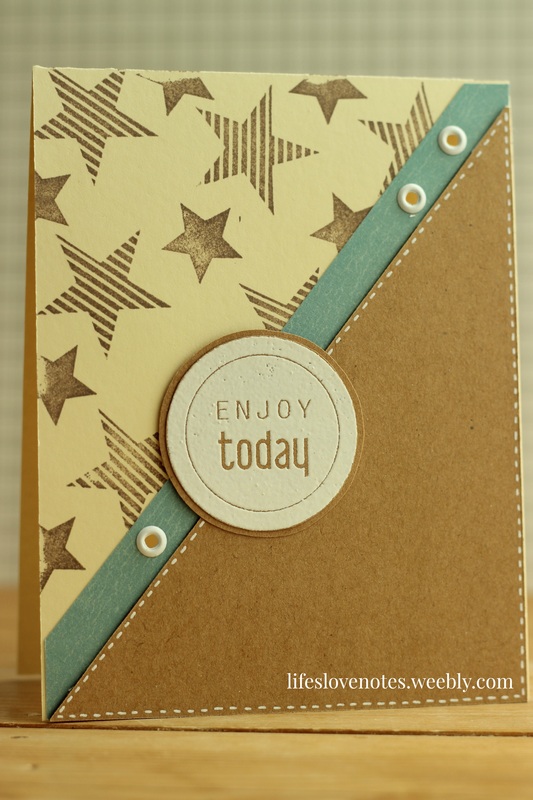 I used the sketch from OWH to create this card. I started by stamping stars on the background. Then, I cut a piece of kraft cardstock to cover the bottom right corner. I added a white dash line around the edge just to help it stand out a little more. I picked some blue cardstock for the middle strip. The sentiment was stamped and heat embossed with some white embossing powder. I added a few white eyelets for some embellishments 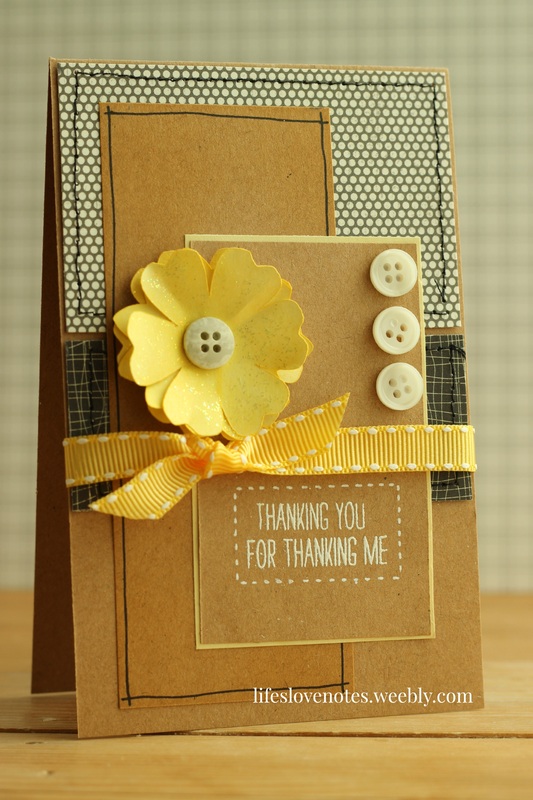 For this one, I used Mojo Monday's sketch. Its a tall and skinny card- I love the look of tall and skinnies. The two patterned papers on the background are from Witch Hazel's October Afternoon's paper pack. I used a kraft cardstock for the other papers. The sentiment is stamped and embossed in white. I cut out several layers of flowers with my Cricut and inked them yellow. I also added a little bit of Diamond Stickles to the flower. I finished off the card with a few buttons. This card is also being linked to Simon Says Stamp. Their theme is yellow. A few products I used:
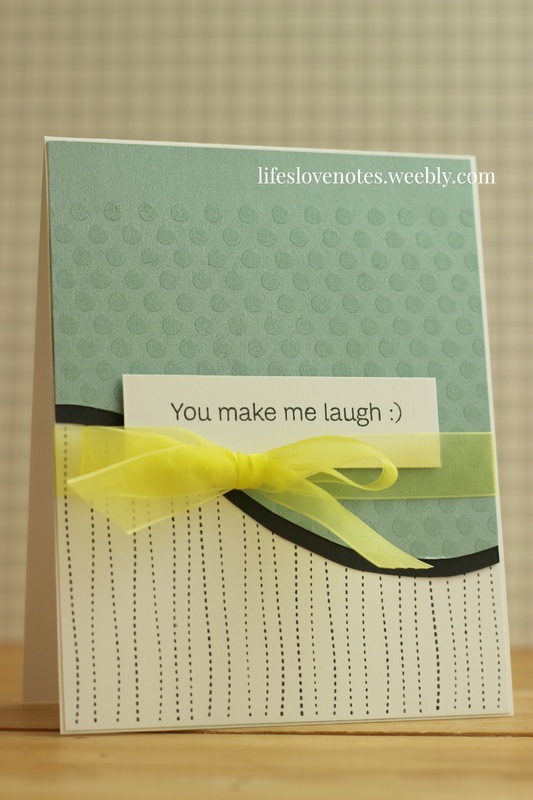 Simon Says Stamp's challenge today was to use a big stamp. The biggest stamp I have is a polka dot background stamp. I decided to stamp the polka dots in Versa Mark and emboss them with clear powder on this blue shimmery paper. I love how it turns out- it looks like water droplets. Then, I drew a curved line and cut it out, and then repeated that curve on black, just to give it a more defined edge. The bottom half I stamped with a dotted border stamp. I finished it off with some bright yellow-green ribbon, and a fun sentiment. 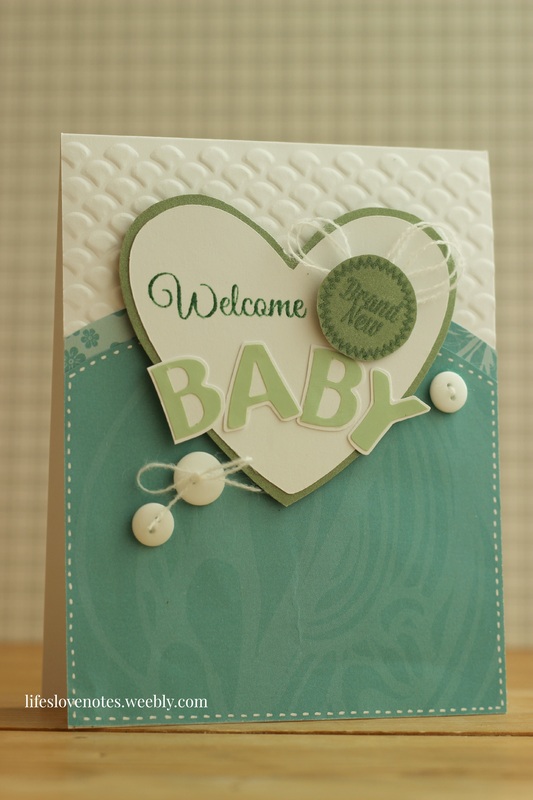 This next card I made for Avery Elle. Their challenge is to use these colors: 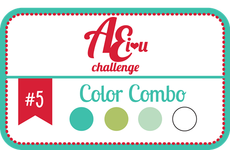 I searched through all my papers to find colors that closely matched and this is what I came up with. I started with my blue papers, drew a curve, and cut them out (seems to be a theme with me right now). Then I found the big heart die that I had cut out a while ago and it just seemed to fit perfectly on the card. I stamped on it using Avery Elle's "Oh, Baby!" stamp set, and also used some stickers for the word "baby". FYI: I have been asked if this is some kind of announcement, and I just want to clear the air here. ITS NOT. Moving on... The top portion of the card I dry embossed to give it some more texture. I like how it turned out!  Onto the last card of today! This one I made for Mojo Monday. I started using their card sketch and I think I veered off course a little, and came up with this. I stamped a number of birthday sentiments on the side with Versa Mark ink, just to leave a subtle watermark look. Then, I found some coordinating patterned paper for the other side. The stars were stamped and fussy-cut, and I stamped and clear embossed the sentiment. Kinda simple but I think it turned out pretty cute. I could see it being sent to either a boy or a girl. Some products I used:
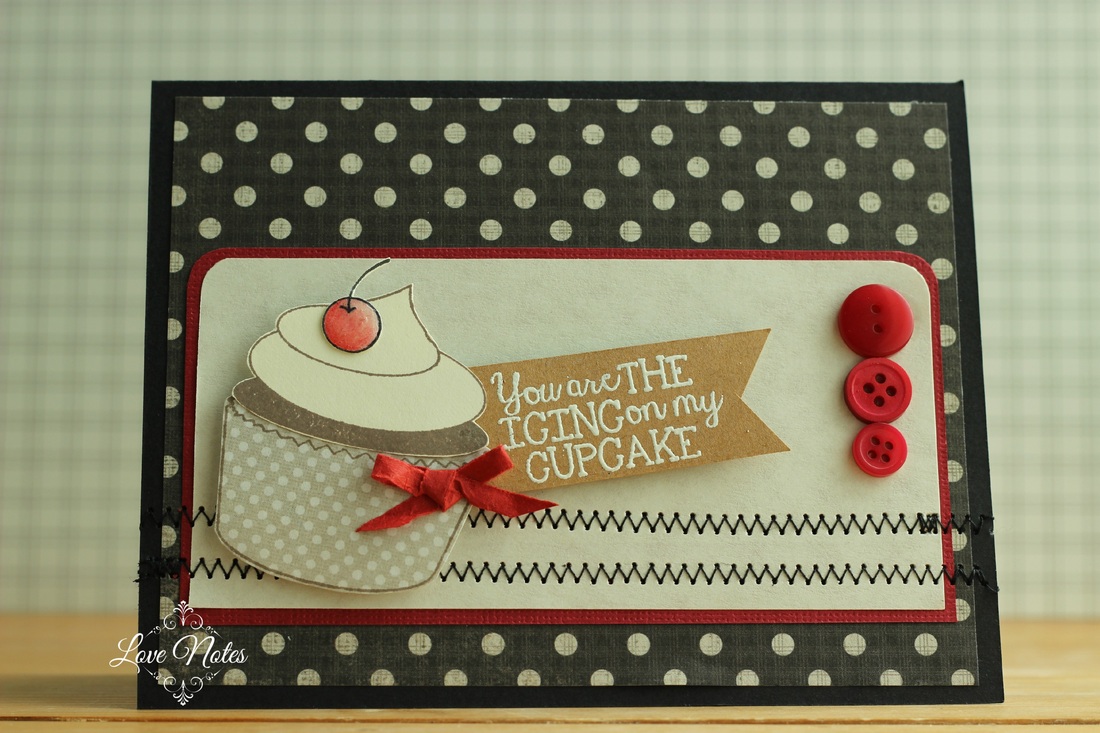 I just love it when I can use materials that I have had for a while. The little bow on the cupcake is some raffia that I've had forever (in fact I think I stole if from my mom when I moved out). Anyway, I started by stamping the cupcake in brown, and then adding the little bow and cherry. To the cherry I added some Glossy Accents. Then I stamped and embossed the sentiment in white. Before adhering the cupcake down, I ran the background papers through my sewing machine with a zig-zag stitch. I just love the look of stitching on a card. After all that, and when I got the cupcake on, I still felt like it needed something, so I added the three buttons on the right. This card I am linking up to Simon Says Stamp's Wednesday challenge blog. Their challenge was Easter or Sweet Treats. Obviously, I went with the sweet treats:) 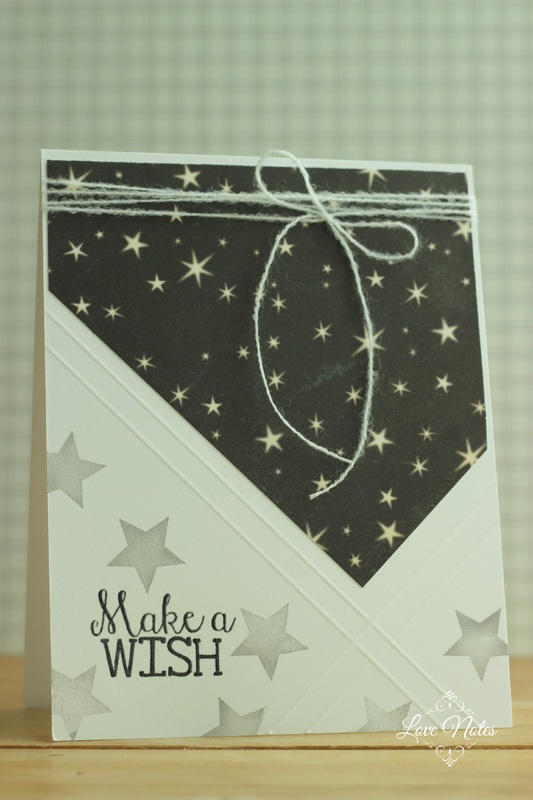 This next card is for OWH's Sunday Sketch Challenge. I kept it simple with just a bit of patterned paper and the sentiment. Then I stamped some silver stars on the bottom. I did a little bit of diagonal scoring as well. The design is flipped from the original sketch, but that's because I started scoring on the wrong side of the card. I had to fold it over so the raised part would be on the outside. So note to self: think about which side is the right side before scoring! A few products I used:
Well, I usually like to try to do two challenges in one card, but that didn't work this morning. Operation Write Home's challenge is to use circles on your card. Simon Says Stamp's challenge is to use glitter. I love glitter as much as the next girl, but there are rules about glitter when making cards for OWH. It's just not as easy to send cards to troops if they are covered in glitter. So, I made two cards. I need more birthday cards in my stockpile, so I decided to make a masculine and a feminine birthday card. 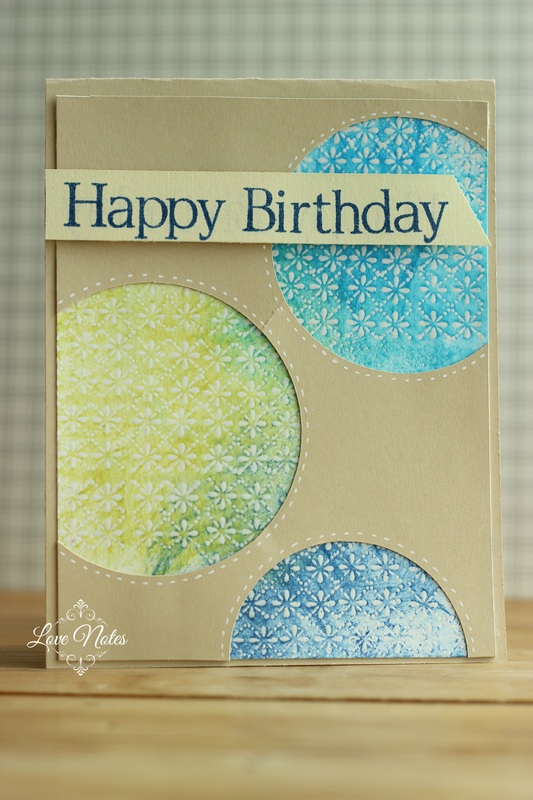 Here's my masculine card for OWH. I embossed the pattern in the circles with clear embossing powder, and then inked it up to create a resist. Then I cut the circle overlay with my Cricut, and added a few dash lines with my white gel pen to make them stand out a little more. 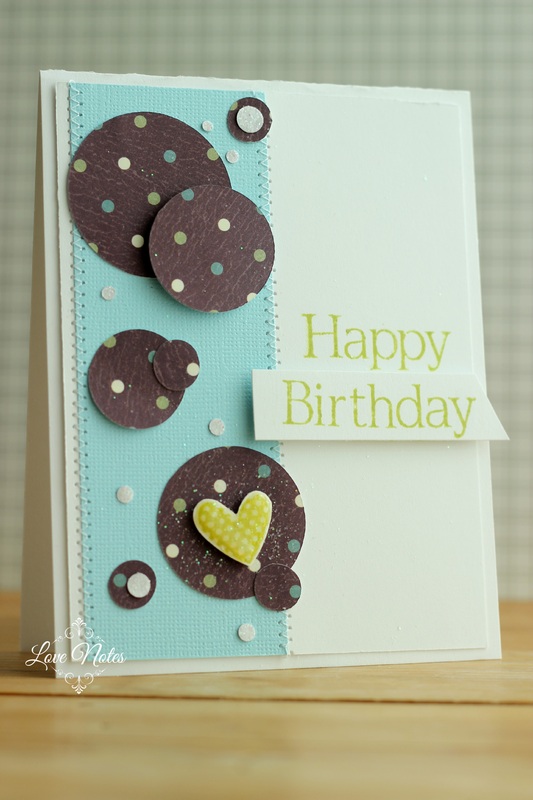 Here's my feminine card with glitter for Simon Says Stamp. I continued with the circle theme. The blue strip in the background I ran through my sewing machine. Then I cut the circles with my Cricut and glued them on. I used some glitter paper to punch the little white circles. The heart is stamped and fussy-cut, and I added some Glossy Accents and then sprinkled some glitter on it. I hope you can see it. Here's a closer look: 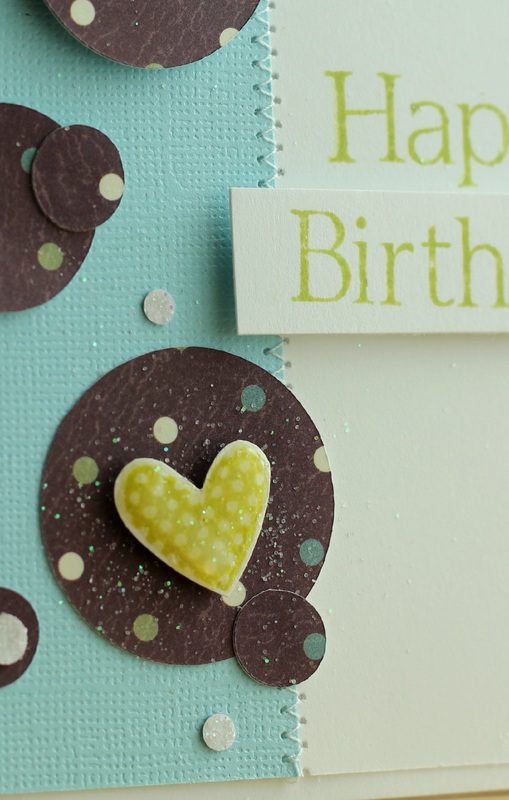 So, there you go! My Wednesday cards. Hope you enjoy! A few products I used:
 This card isn't linked to any specific sites or challenges, just a fun creation to share with you today. I've been dying to use this super cute paper with the stars on it since I got it. I saw it and right away I knew I wanted to hit a few of those stars with some glossy accents to make them stand out. I paired the starry paper with a few other coordinating ones, and I thought these little chipboard letters with glitter on them would also go just perfectly. The silver star embellishments were cut with my Cricut, and then I inked them up with Versa Mark ink and embossed them with some metallic silver powder. I love how they turned out! I also had to add a string bow, just because, well... that's what I do. :) I finished it off with some clear rhinestones. I love how shimmery it all is. Happy Friday! A few of the products I used:
I'm linking this one to two different challenge blogs today.
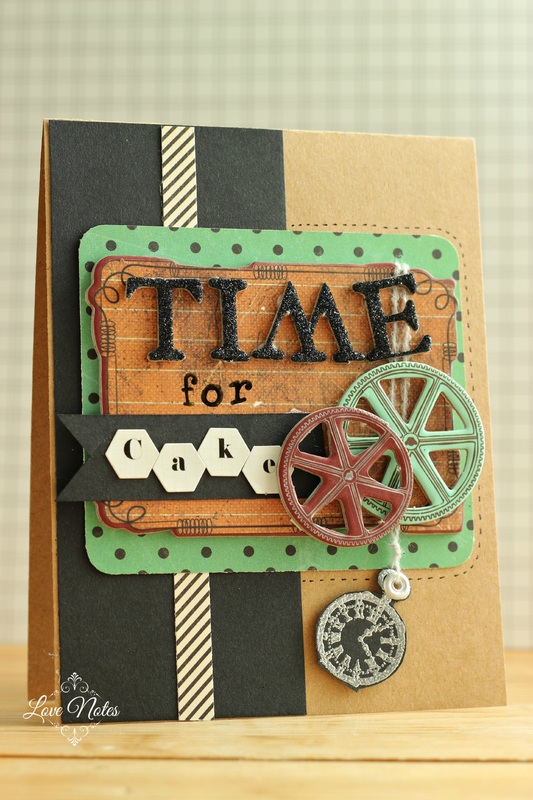
The first one is Mojo Monday. I used their sketch for the layout of this card. The inspiration for the clock theme is from Simon Says Stamp's Monday Challenge blog. Their challenge was to create a project with the theme of "Time". When I read the "Time" theme I immediately thought of these chipboard stickers I have. They were given to me, and when I first saw them I thought, "I have no idea how I'm ever going to use these". Now, I love them on this card. It's obviously a little bulky, so this card might be better off hand-delivered rather than sending in the mail. I started with my chipboard elements since I knew I wanted to use them and then I picked coordinating papers to go with. The little watch was stamped and heat embossed with some metallic silver embossing powder. I had some glittery chipboard letters as well that I used for the sentiment, and some stickers I used for the word "cake". I usually do a lot more stamping on my cards so this one is different for me just because the only stamping was the clock, and the word "for". Happy Monday! 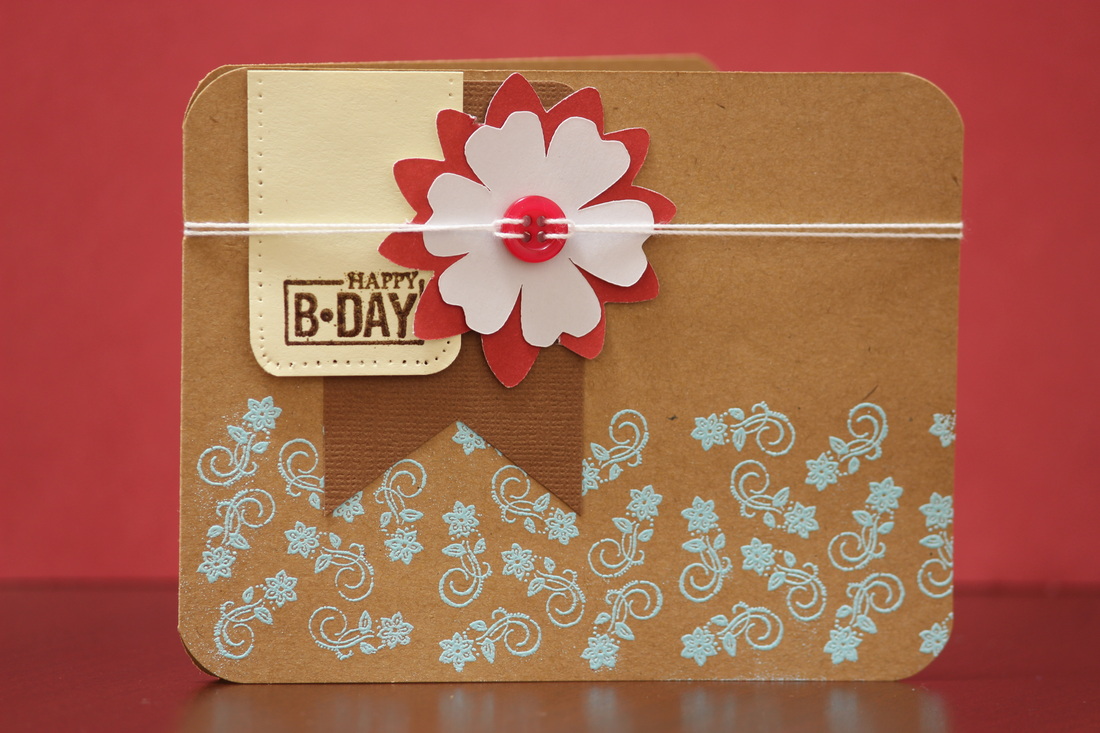 Can you tell I'm having fun with my new Crop-A-Dile Corner Chompers? We went to the craft store the other day to pick up fabric for a different project I am working on and saw the corner chompers on sale. Kaiwi told me to go for it.
All four corners are rounded, and I rounded the two corners on the sentiment banner. The background was stamped and heat embossed. I cut a few flowers with my Cricut and finished it off with a button. 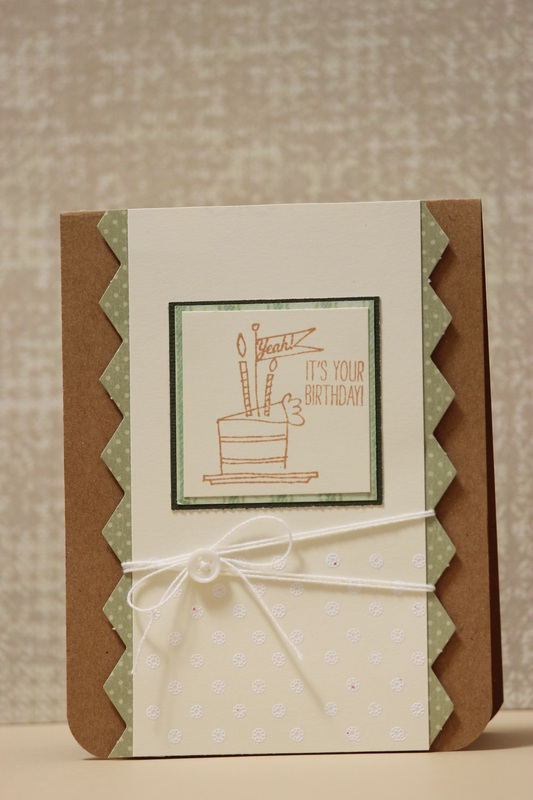 Birthday cards are the kind that I make most often. I never seem to have a big enough stash of them.
This one was fun to make. I found my background cardstock on sale so of course I had to pick it up. Most of the other papers I used came from my scrap bin. That's probably one reason I love making cards- they are fast, easy, and you don't have to use up all your paper. I did a little heat embossing on the bottom portion of the middle cardstock, and then rounded the bottom corners to finish it off. |

Pin it!

AuthorSo glad you found me! This blog is my little space where I can share bits about my life and my latest crafting projects (mostly handmade cards). My goal is to share, inspire, and to be a positive presence in the creative community. 

Find me on Instagram!Archives
January 2018
Categories
All
Link Love
 

|


 RSS Feed
