
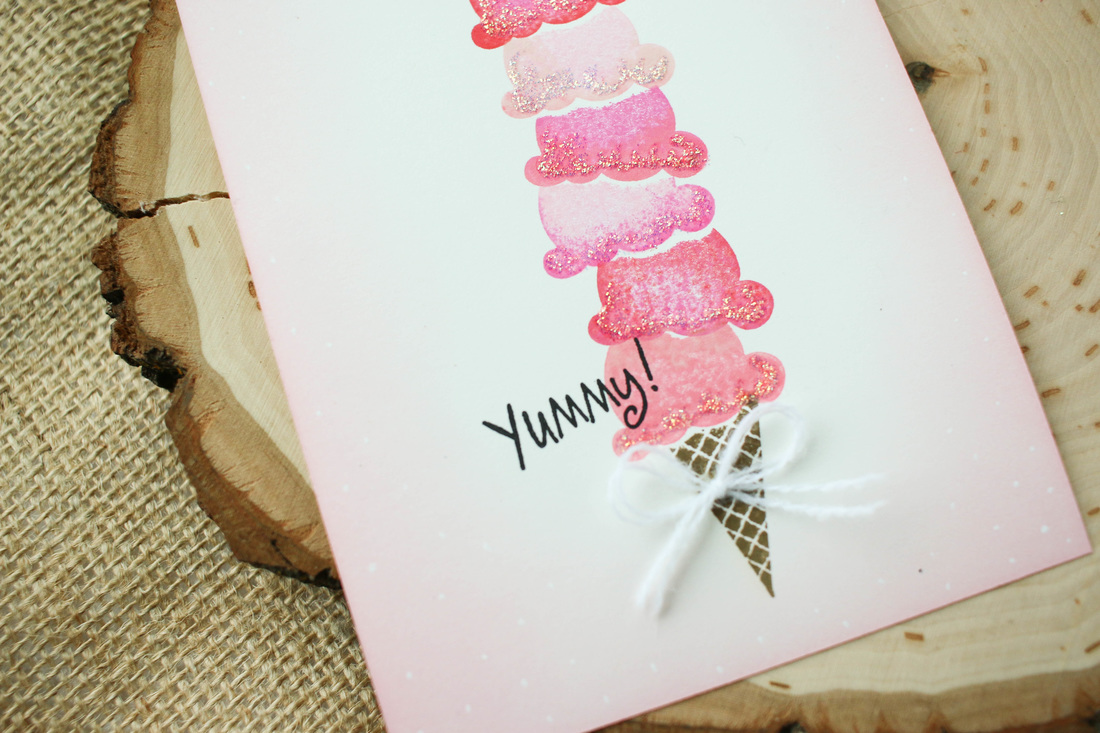
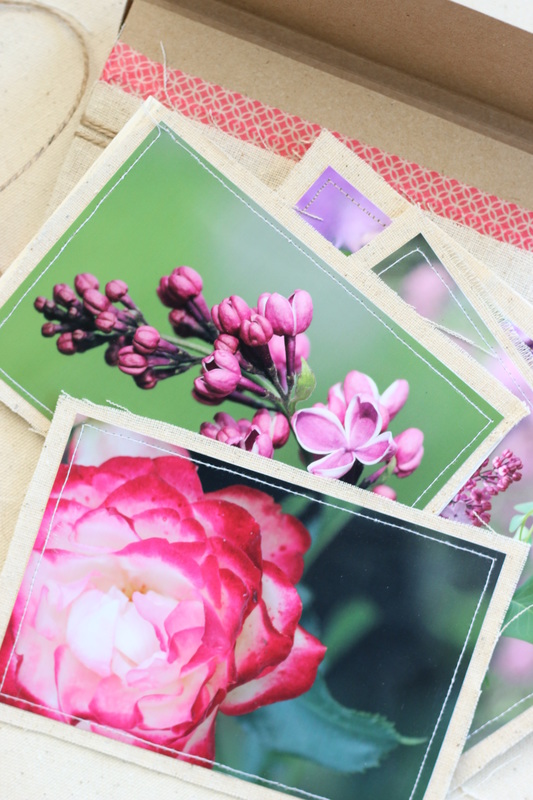
I have a pack ofCanvas Corp postcards and lately they have just been begging me to be decorated. I decided to go ahead and decorate them to send to my nieces and nephews.
I have a Stampin Up! ice cream cone stamp set that I thought would be fun to create a super tall ice cream cone with. I first stamped the ice cream scoops onto some post it note paper, then cut out the image to use for a mask. Each time I stamped a scoop, I covered it with the mask and then stamped another scoop over the top in order to stack the scoops on top of each other. Then, I used a bit of Distress Ink to ink around the edges. A little Versafine Black Onyx ink was perfect for stamping my sentiments with. To finish, I glued on a little bow and added some glittery Stickles to the pink postcard. 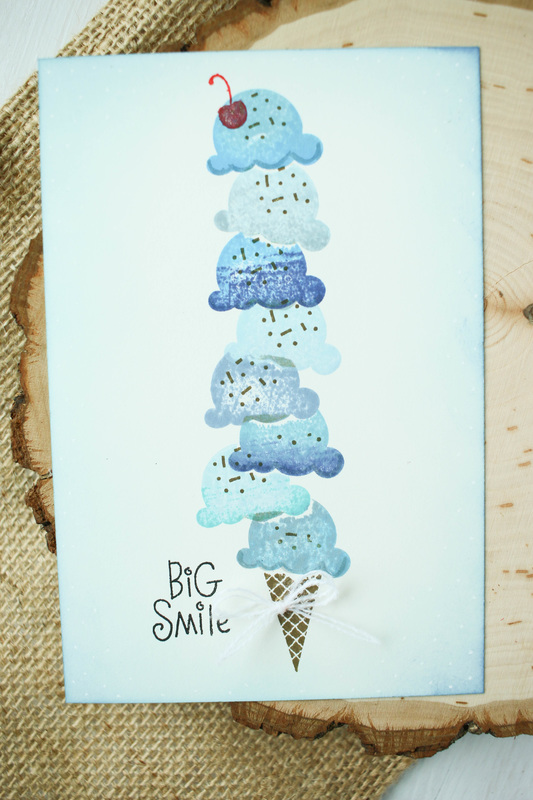
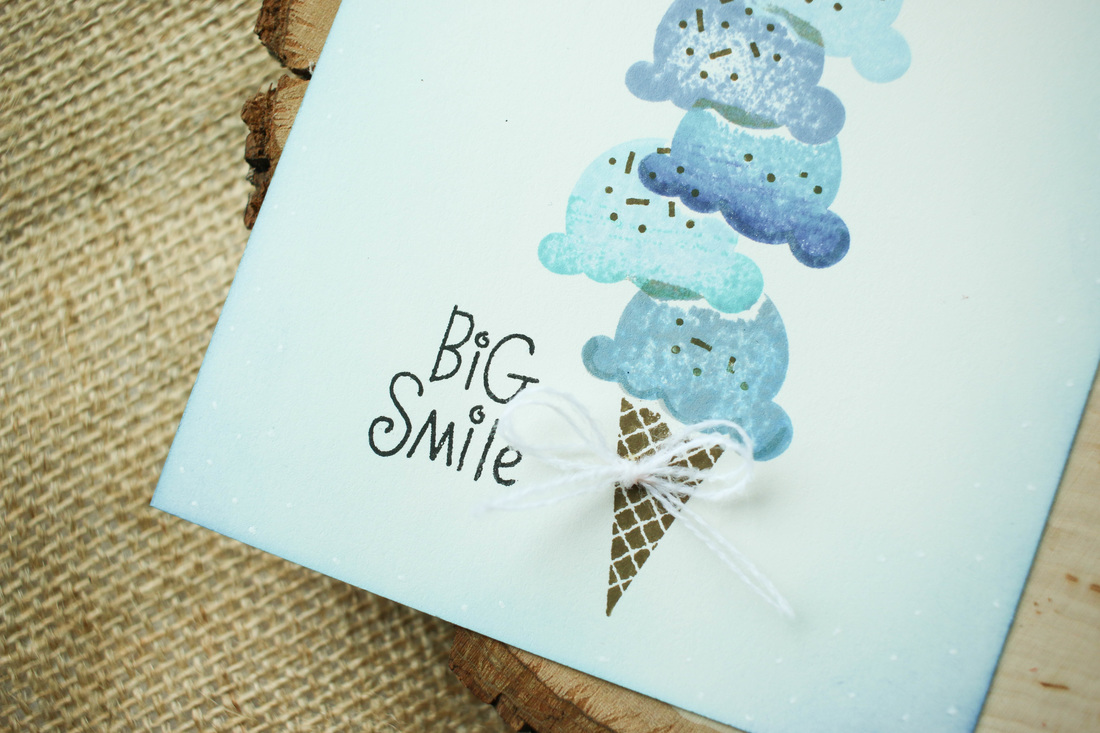
Canvas Corp postcards are 4x6 in size, and they are able to be sent through the mail like a regular postcard. I decided to put my postcards into an envelope to send them together. I also added in some cute die cuts that I thought the kids might like to play with. Super easy and cute! If you do ever decide to send a decorated postcard of your own, it might help to just ask your postal worker for some tips, and if it meets postal regulations. Im also linking this up with: Simon Says Stamp's Monday Challenge! Simon Says Stamp's Wednesday Challenge! Happy Crafting!
2 Comments
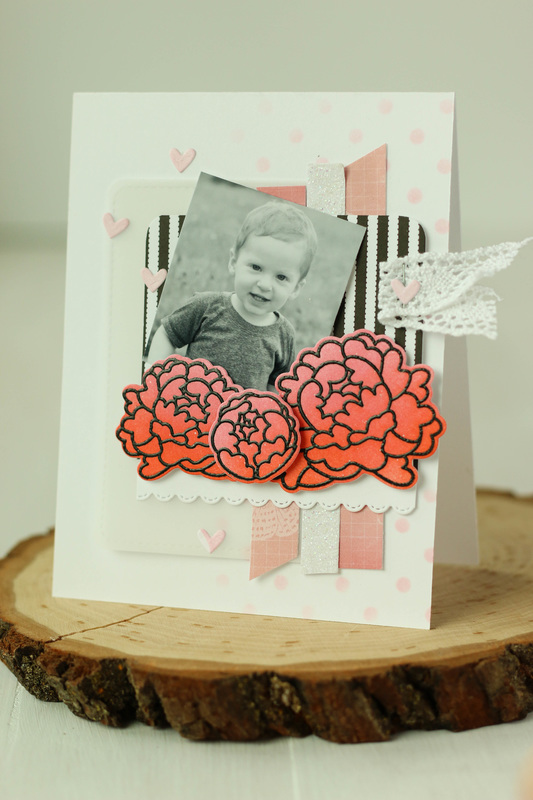
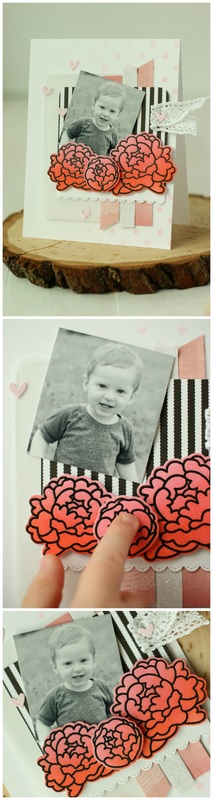
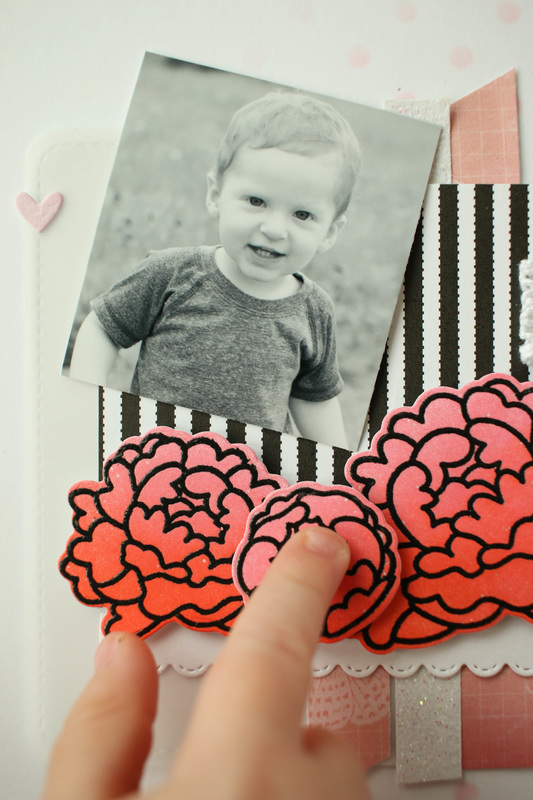
I love finding new ways to use my photographs. We seem to snap so many pictures and then leave them on our phones or our cameras. Why not print them off and use them in creative ways?
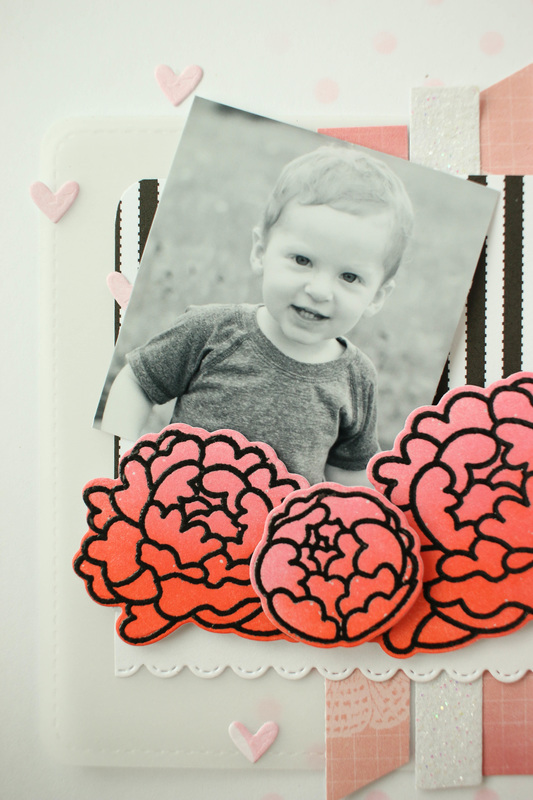
I've done scrapbooking,I've scrapped my photos in a frame, done canvases for my wall to display photos, but I have never used a photo on the front of a card until now! I've been using lots of little paper scraps from my scrap bin lately, so I continued that trend by using someRibbon Stripe paper from Canvas Corp. Then, I stamped, embossed, and colored in some peonies from Avery Elle's Peonies stamp set. I adhered the flowers to the ribbon stripe paper, and then added a scalloped border on the bottom. I stapled a bit of lace ribbon to the side, as well. 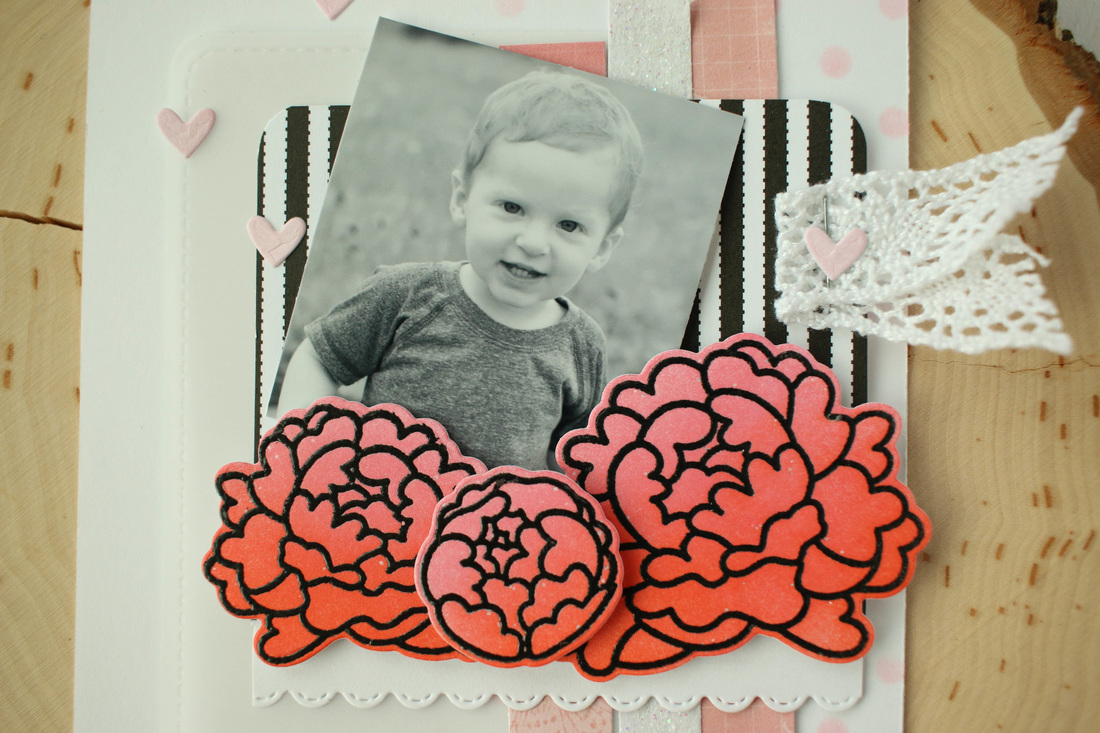
I wanted to do more layering in the background, so I found more scraps of paper and cut them into strips. I used some pink paper from my Mariposa matstack, and then a tiny bit of white glitter paper. I also cut a piece of vellum with my Stitched Journaling card die. I wanted to add a little more to the plain white background so I used a polka dot stencil from Heidi Swapp and added some dots with Spun Sugar Distress Ink. Then, I adhered everything down! To finish it off, I glued some tiny pink hearts here and there.
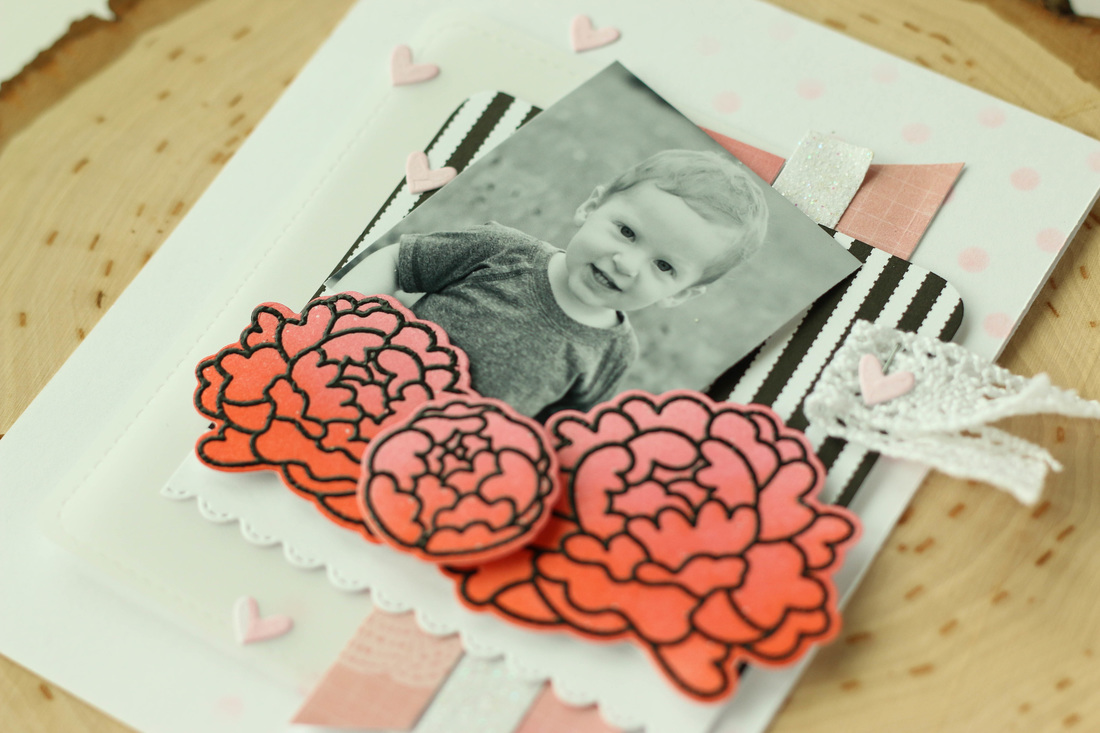
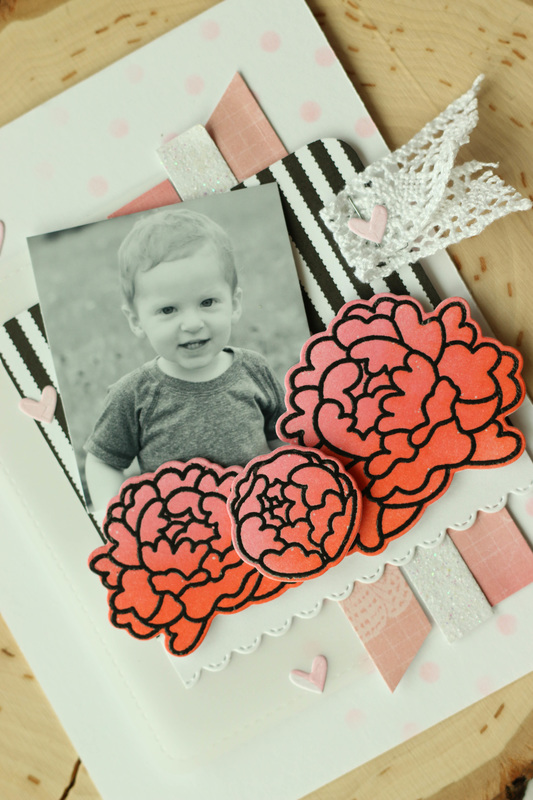
So don't be afraid to try a new way to use your photos! I think sending them this way on a card would be a wonderful way to send photos to grandparents, aunts, and uncles. I also managed to put together a quick video of this card. Enjoy!
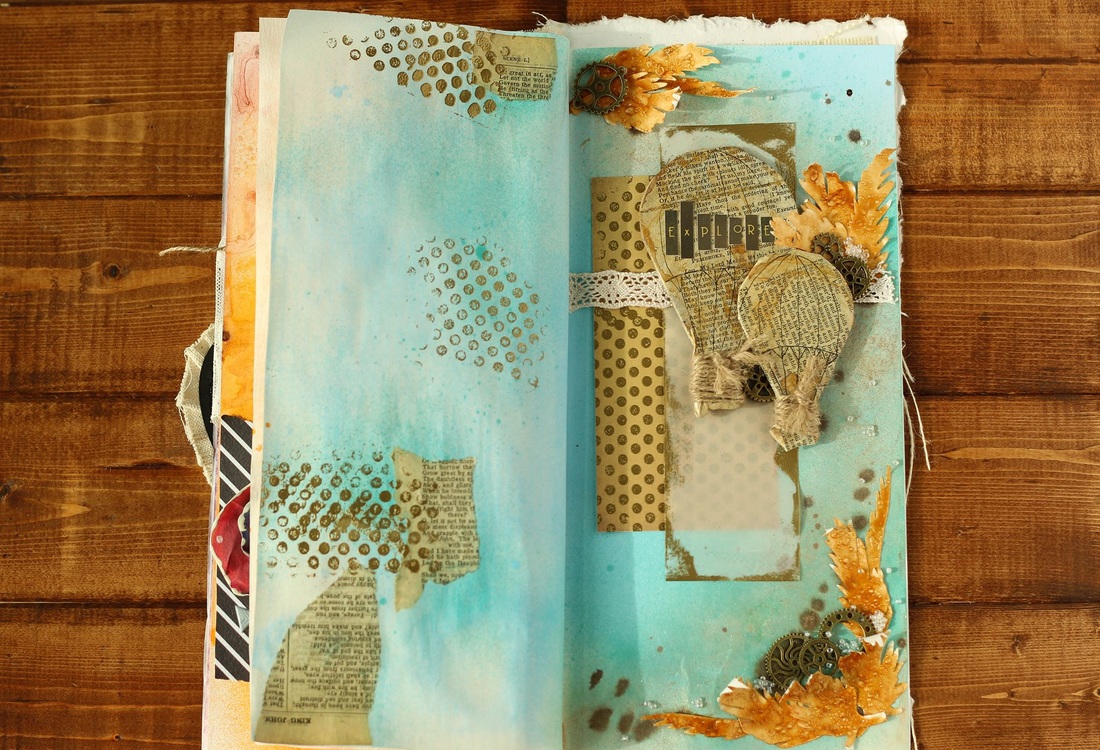
I really havent done a lot of mixed media journaling so I have been surprised at how much I've been enjoying this Recollections Mixed Media Journal. The pages are so fun to build on and work with. For this page I went with a fun, summery travel theme!
I wanted to use my Naturally Aged Weathered Copper Kit from Tattered Angels on this page, so I went ahead with those paints to build the background. Since there was a lot of gold shimmer in the paints, I decided to go with the gold theme, and I love the final result! 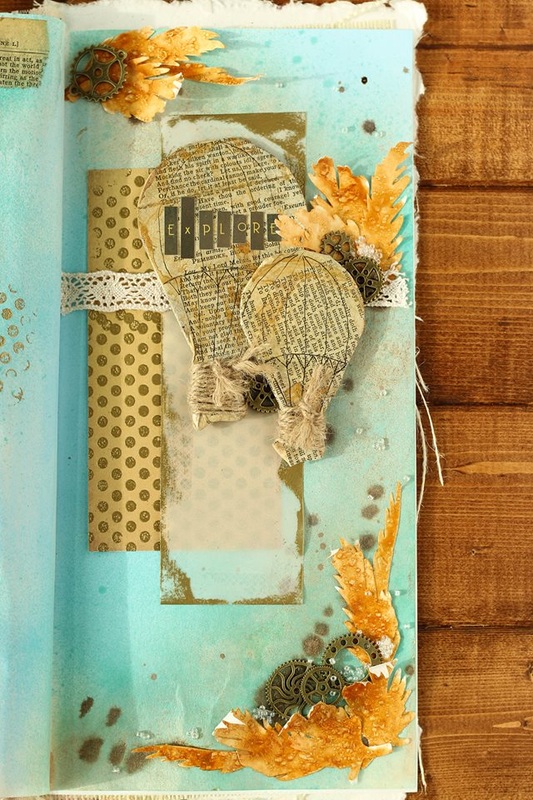
I used my Cricut and cut out a bunch of these paper feathers out of plain white cardstock. Then, I used a heavy layer of Camel Glimmer Glam over the feathers. I also created some bubbly texture on the feathers by holding my heat tool very close to the paint and letting it bubble up. This is a fun feature of the Glam paints- they react to the heat to add some gorgeous texture.
After the feathers were dry I glued them down using my Tombow glue stick. I left some of the edges unglued so they would curl up a little bit. 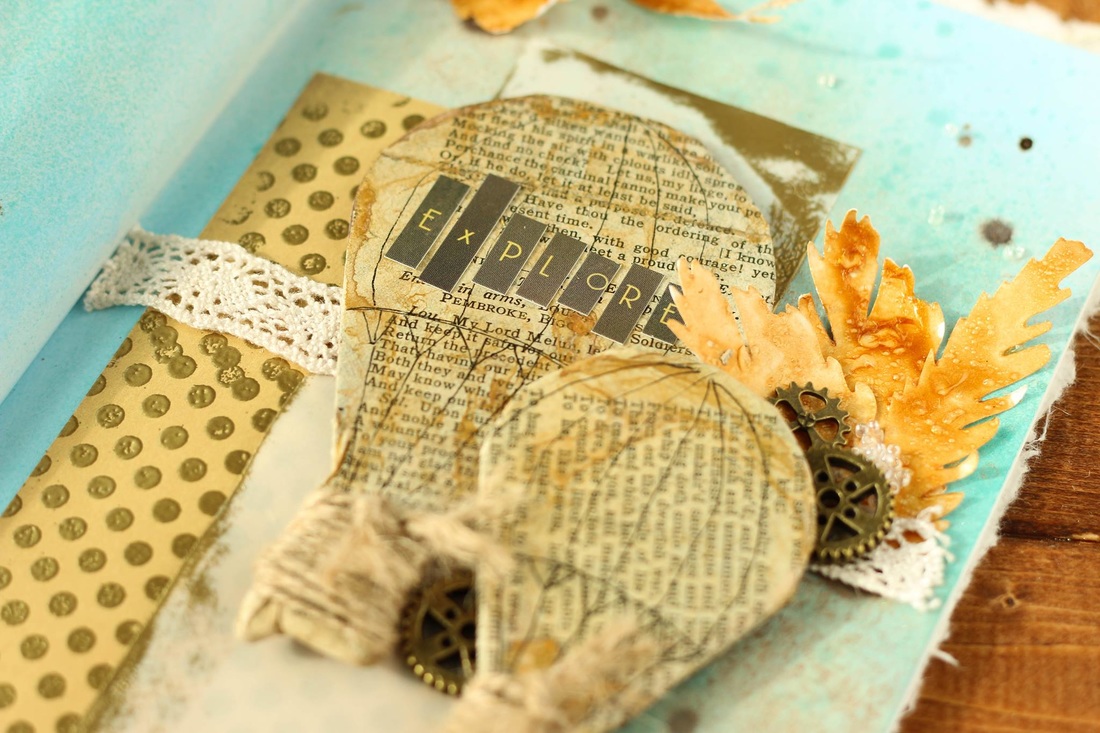
To create the vintage hot air balloons, I used some chipboard balloons from my stash and covered them with an old book page, sticking them down with Clear Glimmer Glam. Then, I sprayed Vintage Brass Glimmer mist over them and dried it, leaving some messy gold splatters on top. I wrapped the bottoms in twine and then drew on some lines to give them more of a hot air balloon look.
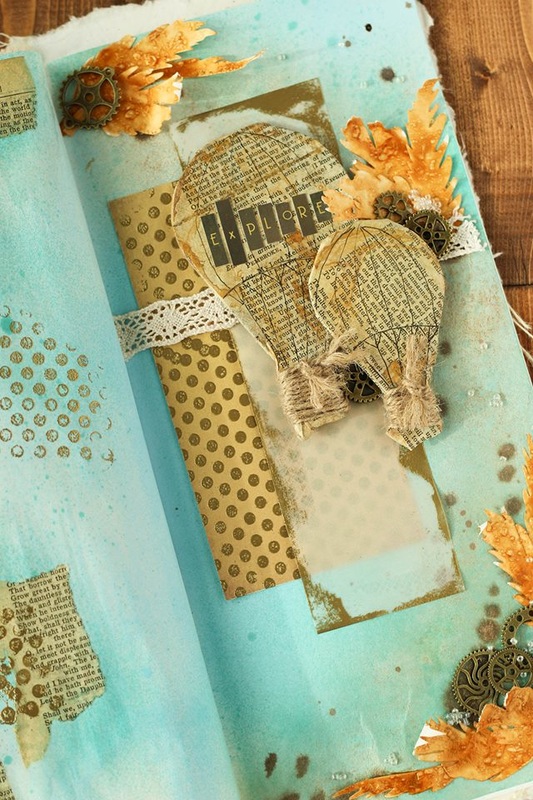
I layered some paper and vellum behind the balloons, and I also did some heat embossing on them with gold embossing powder. For some finishing embellishments, I added some metal gears and some clusters of clear, tiny beads here and there.
If you want to see the process of how all this came together, go ahead and watch the video I put together!
Thanks for stopping by and Happy Crafting!
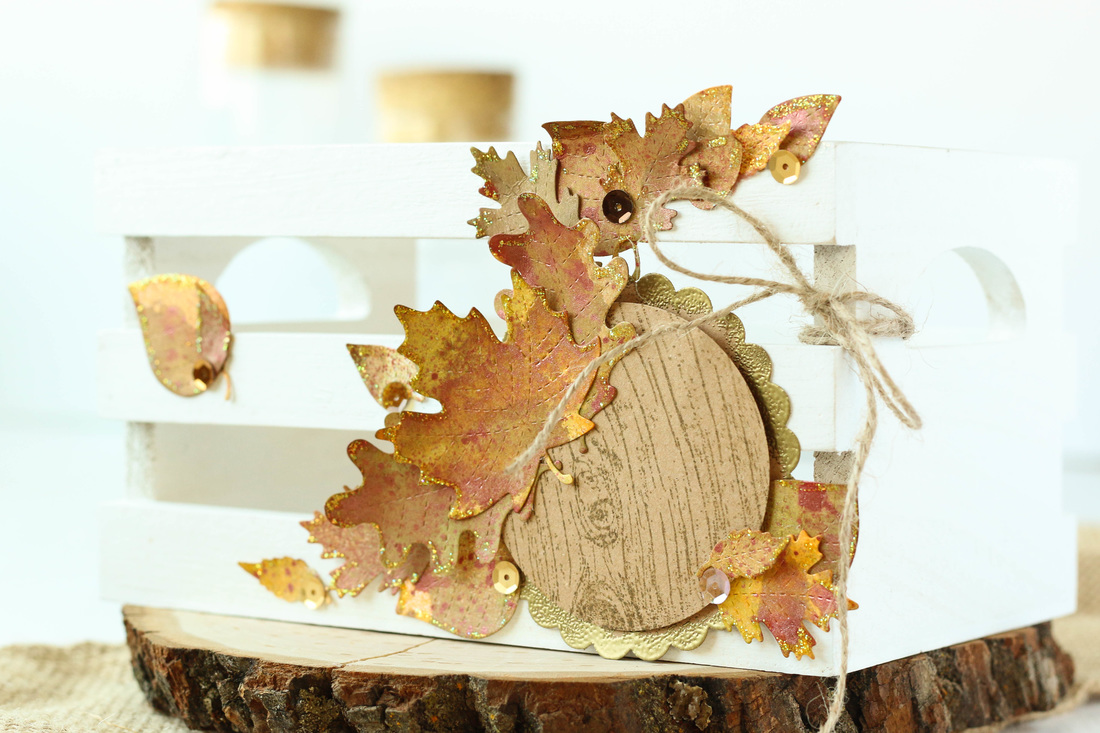
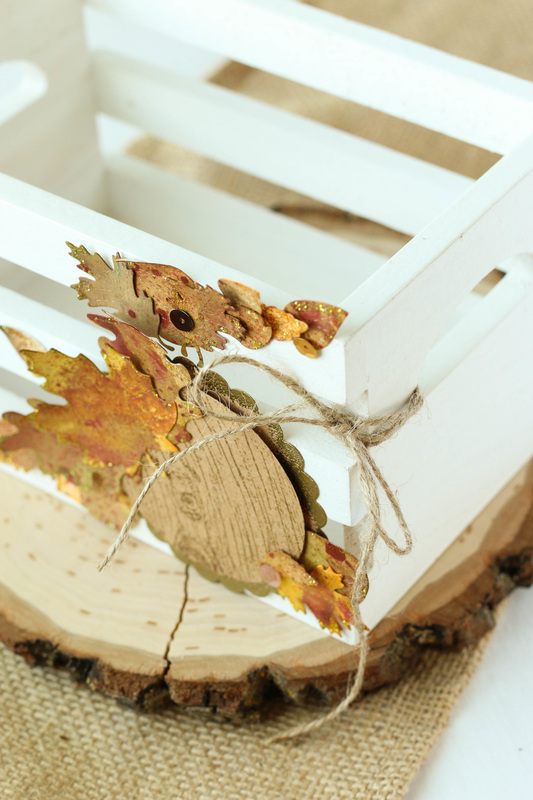
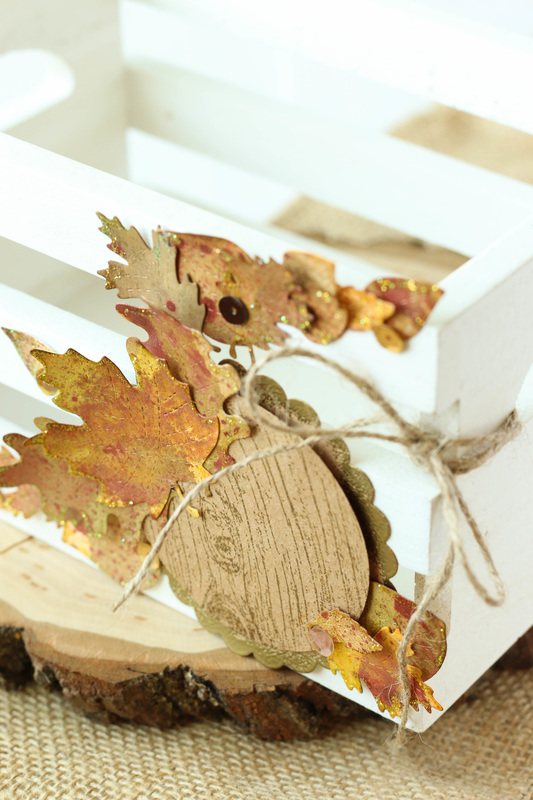
I don't know about you, but as soon as August rolls around each year I immediately jump to Autumn! Fall is my all time favorite season so I love decorating for it.
I have this little white 7 Gypsies crate that has so many fantastic uses. I've used it in the past for a S'mores Party, but I thought it was time for an update. I took my Stitched Leaves dies from Lawn Fawn and cut a ton of leaves from plain white paper. Then, using a number of fall colors from Tattered Angels, I misted the leaves with Glimmer Mists.
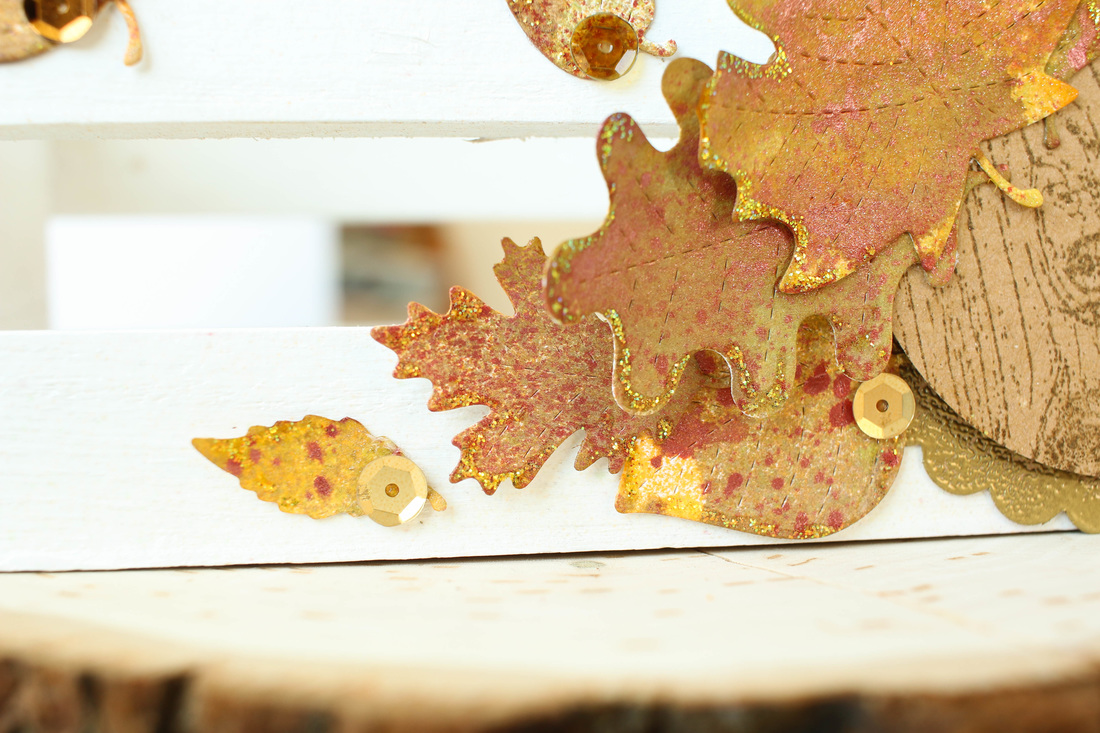
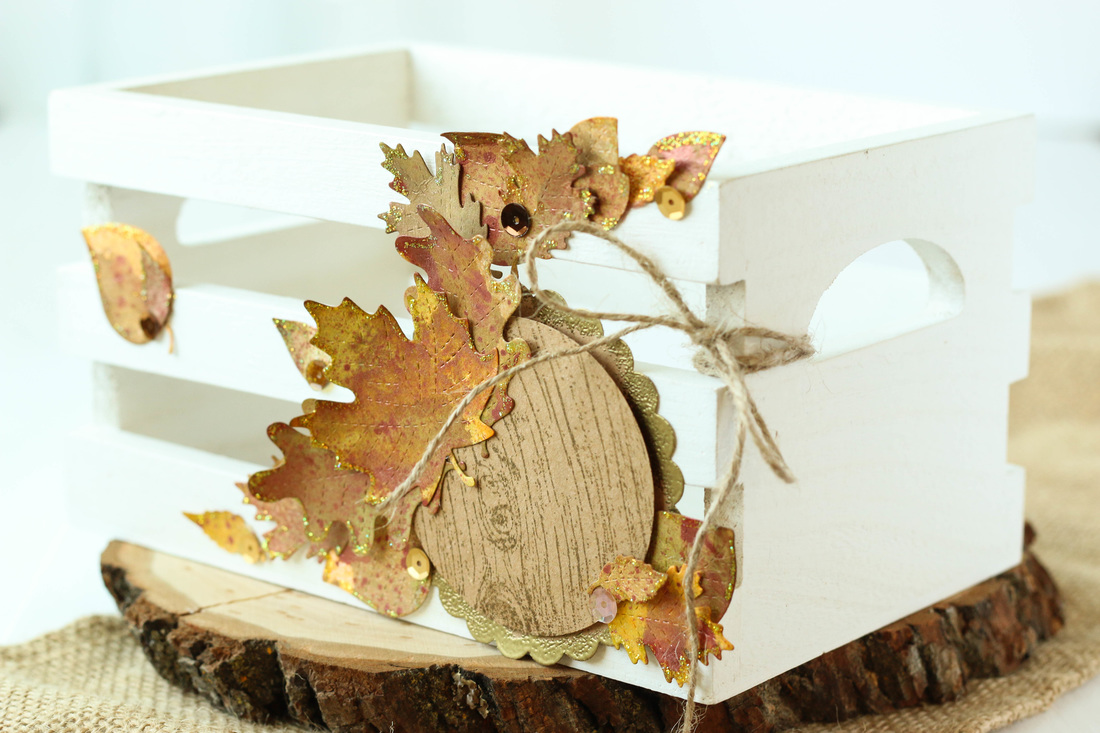
After my leaves were dry, I glued them onto the crate using some Tombow liquid glue. I also cut a circle and a scalloped circle to layer the leaves on. I stamped the front circle with a woodgrain stamp, and the scalloped circle I embossed the edges with gold embossing ink.
For a finishing touch, I added some gold sequins from Doodlebug and then tied some cord around the side. I don't actually know what I want to fill this crate with yet, but I'm sure I'll think of something! I made a little show-and-tell video just to give you a better idea of the process. Enjoy! Im also linking this project up with: Simon Says Stamp's Monday Challenge!
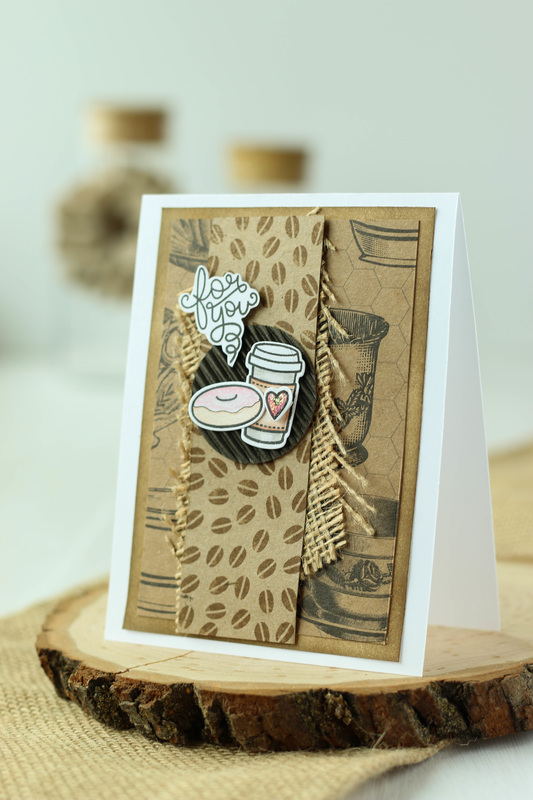 I just love Lawn Fawn stamps. They have such cute images and clever puns! I recently got their "Love You A Latte" stamp set and Im in love! Its full of cute little coffee and tea stamps. When I was looking through the stamps I immediately thought of Canvas Corp's Beans and Bags papers. I thought they'd go well together so I went ahead and matched them up! I built the background using a scrap of Beans and Bags papers. I also added a few other layers, including a piece that I Distress Inked to match, and a kraft piece that I stamped some little coffee beans on. I also added a scrap of burlap for some texture. 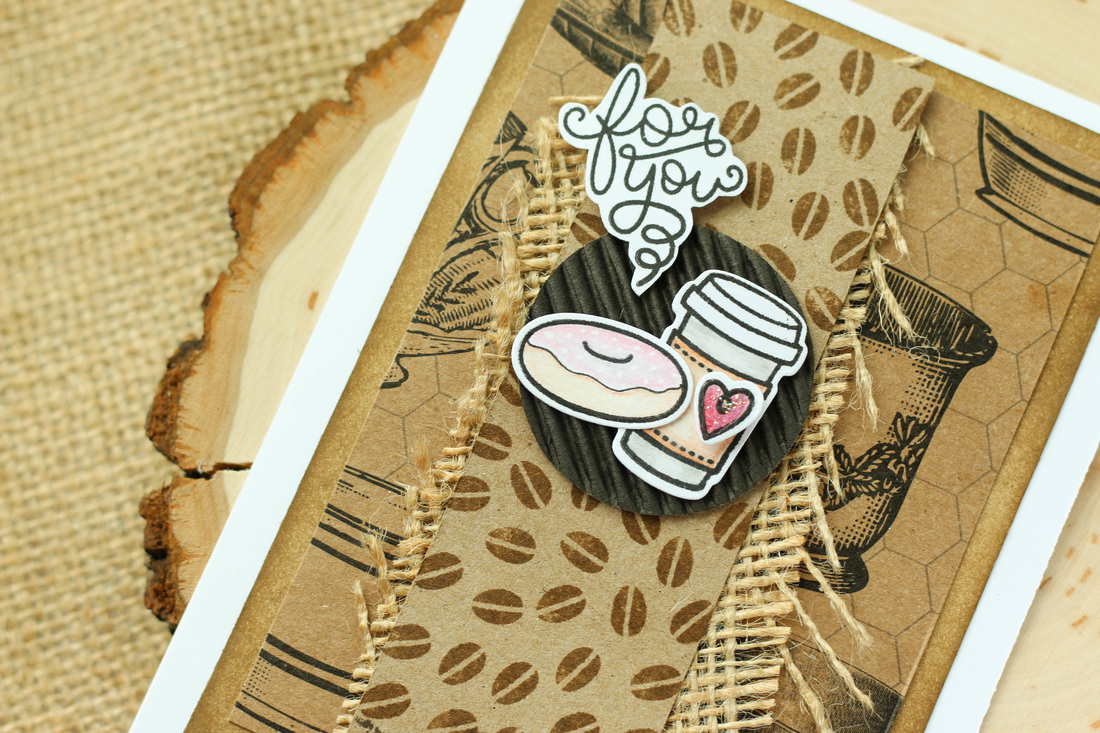 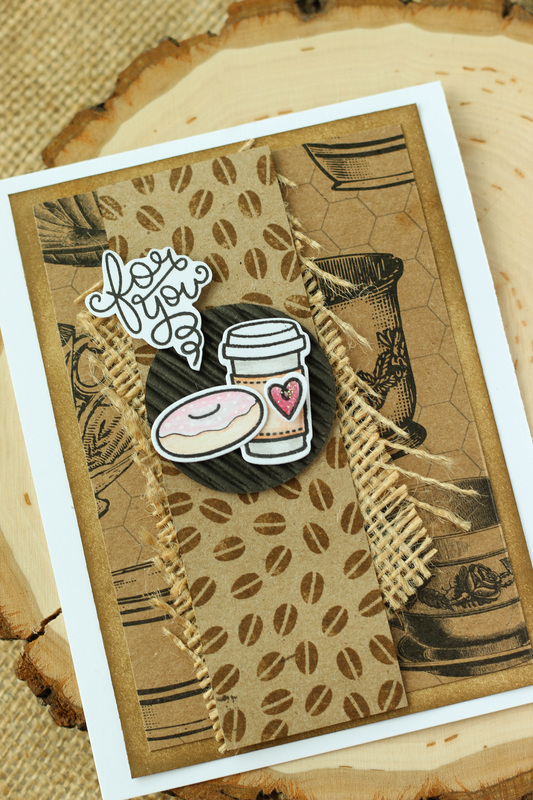 I also got the dies that coordinate with the stamps, so I stamped them out, colored them, and added them to the front of the card. I love how the background is so neutral, and then the stamps add a pop of brightness. I had some of the die cuts leftover that I wanted to use, so I went ahead and created a gift card holder out of Canvas Corp's mini bags, as well! 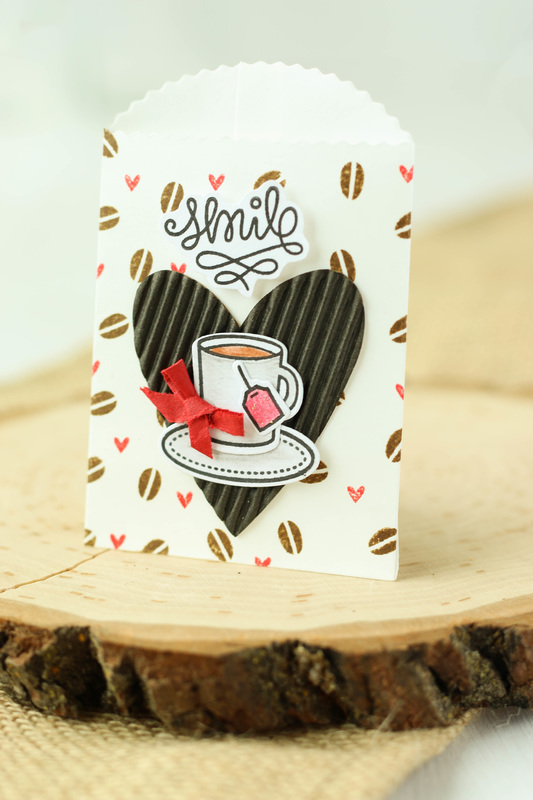 Its so fun to take a plain white palate and stamp a pattern on it! I used Distress Inks to stamp the hearts and coffee beans on the background. Then, I layered some E-Flute paper in Chocolate brown over the pattern. I die cut the E Flute into a heart. I thought at first that maybe the E Flute wouldnt work so well being dir cut, but it went through my Sizzix beautifully! I then just adhered the die cuts on top of the heart. It's so cute! I could see giving someone a gift card to their favorite coffee place in this bag. 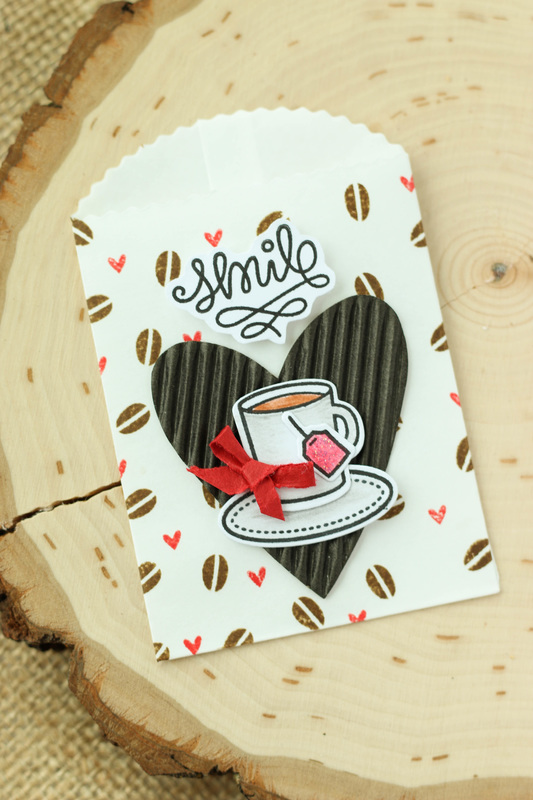 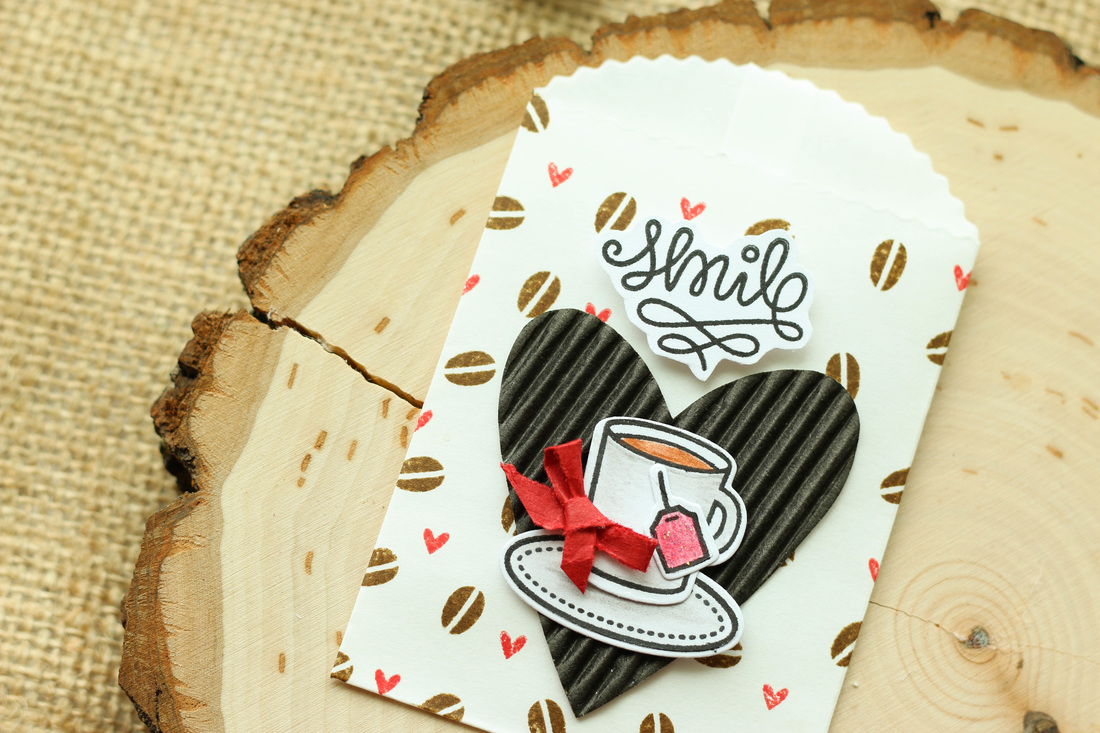 So don't be afraid to match up some of your favorite brands and craft with them side by side! You might find that Canvas Corp pairs beautifully with a lot of stamps and products from other companies! Happy Crafting!!! 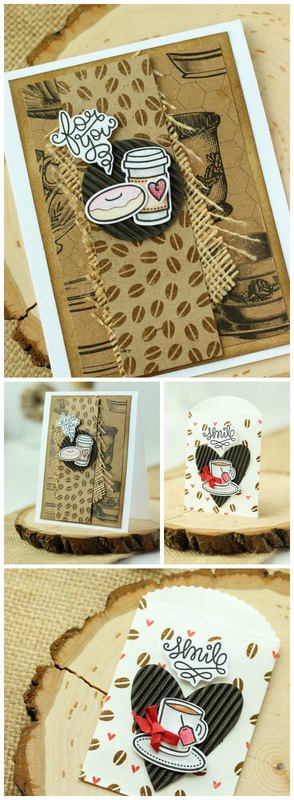
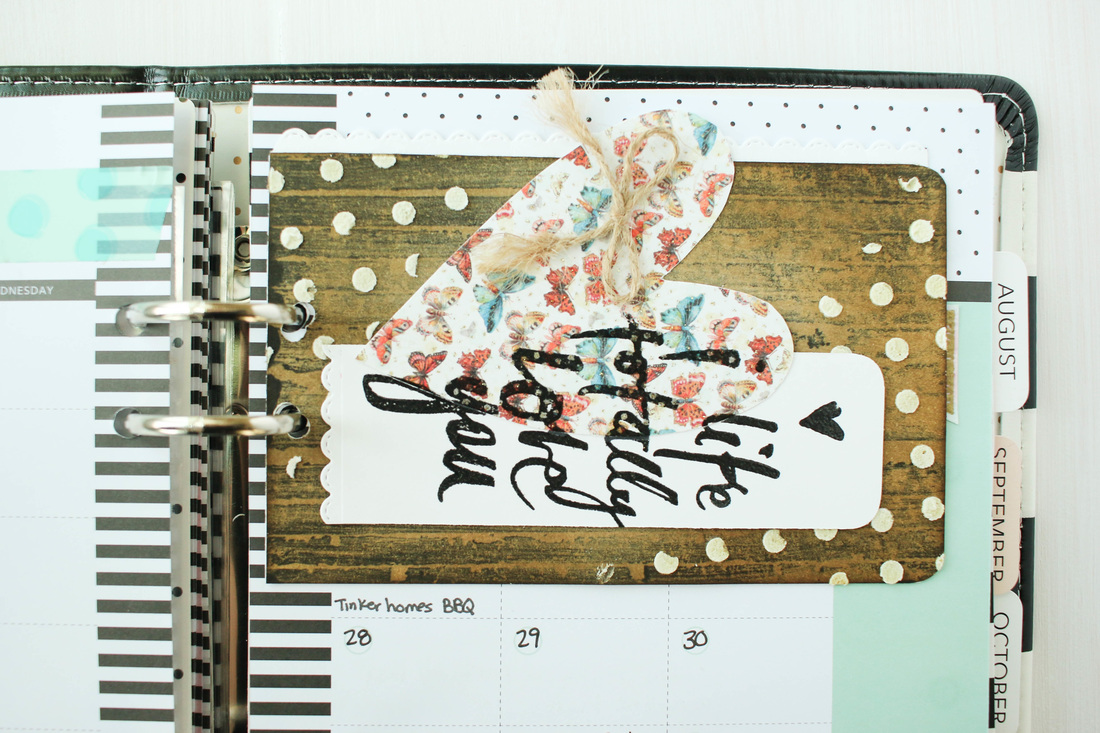
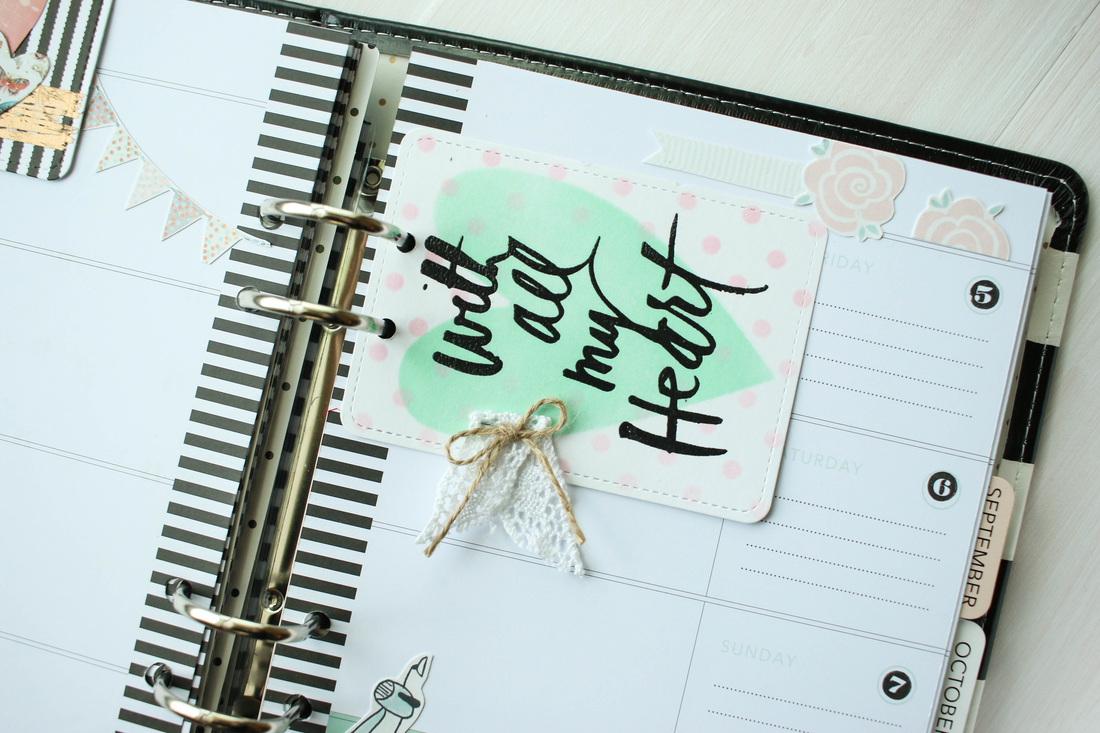
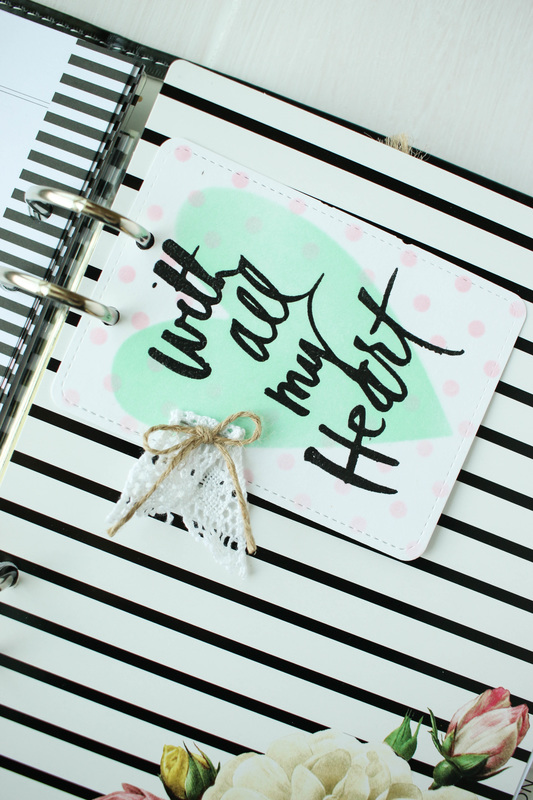
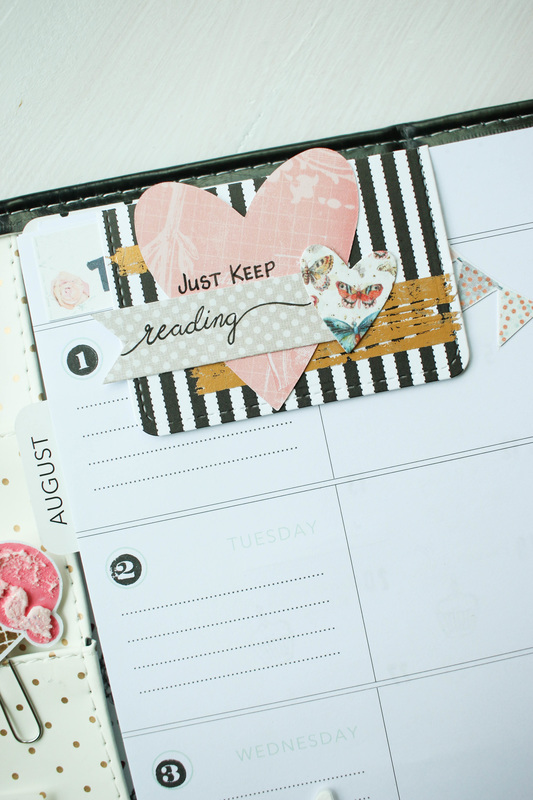
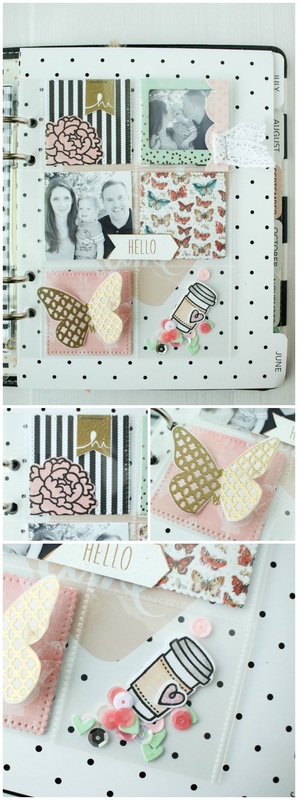
I'm fairly new to the planner world. I only just got my first planner, a Heidi Swapp Memory Planner, two months ago. I am loving it so far! I thought it would be a lot like regular scrapbooking, but turns out the feel is definitely a bit different!
Of course, there are no rules, you just plan, decorate, and share as you like, but here's a few things Ive been crushing on lately... Pocket Pages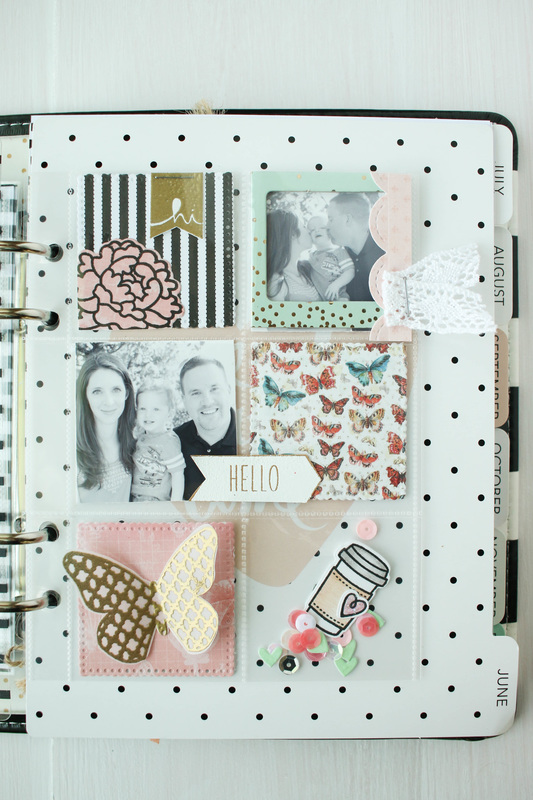
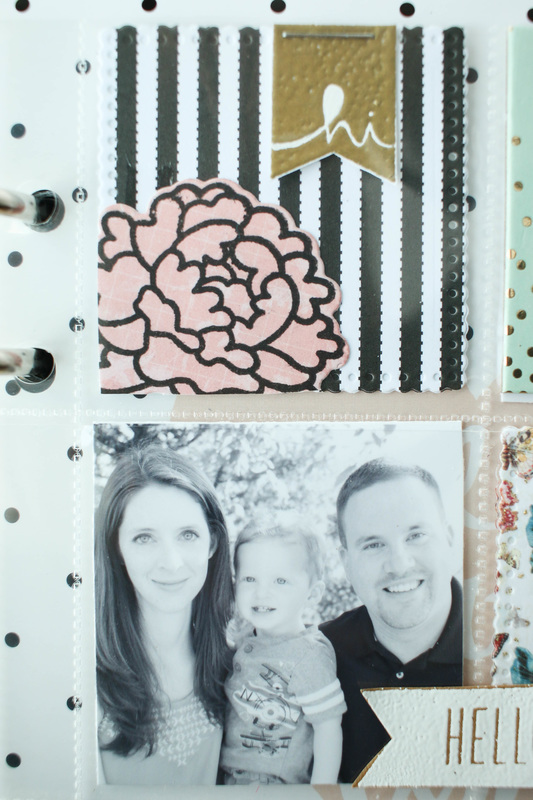
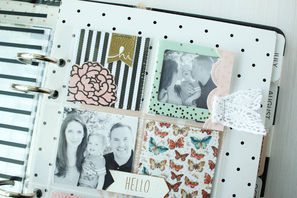
I have not done any Project Life or Pocket Letters, so the little pocket pages that come with the planner is a different format for me! I worked on this one and I was really pleased with how it came out!
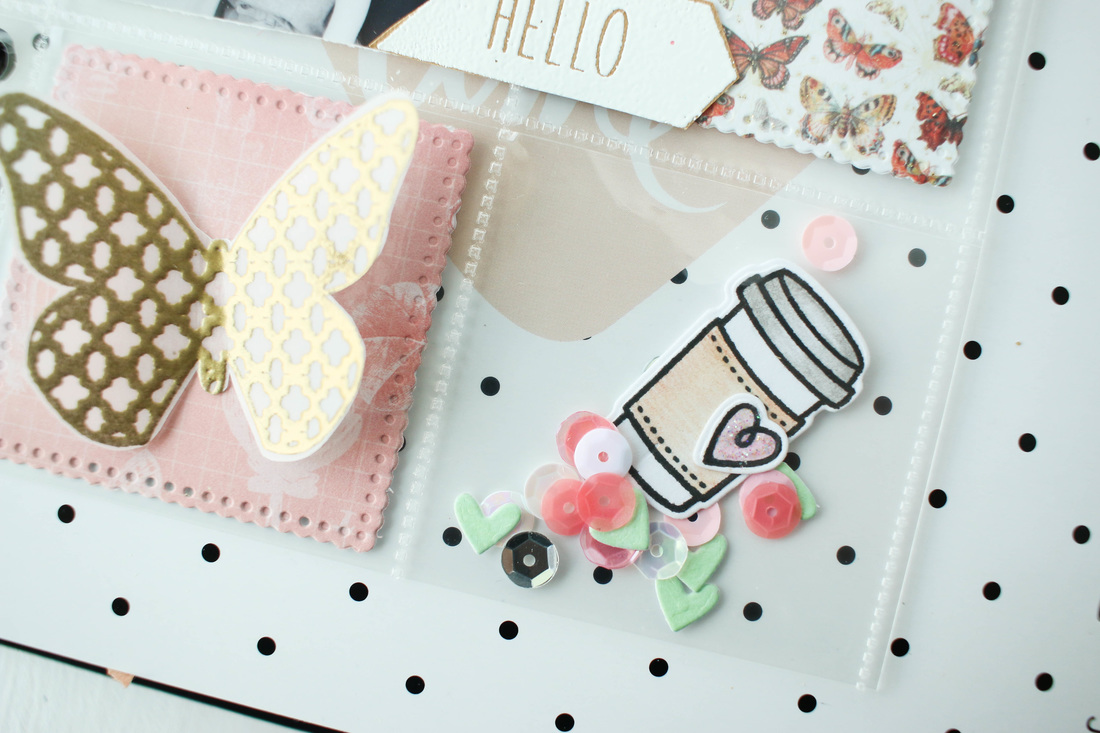
I used a bunch of papers from my scrap bin. Most of these papers you see here are from DCWV's Mariposa paper pad, but there are also a few papers from Canvas Corp, as well.
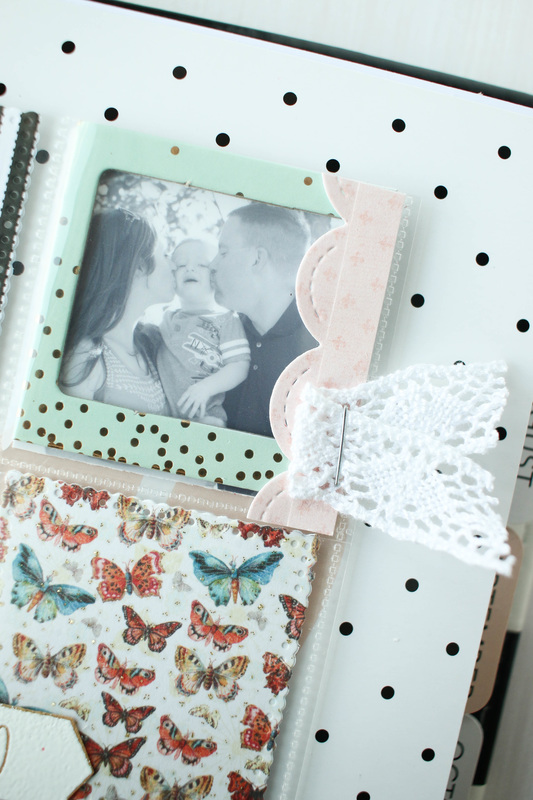
I also printed off some of our family photos in black and white to add to my pockets. I printed them wallet size, and then just cut them down to fit inside the 2x2 pockets. I chose to do them in black and white because I felt like that helped to give the whole page a unified look.
The upper right photo has a Heidi Swapp cardstock frame around it, as well. I just love it! The very bottom left pocket I turned into a shaker. I added some pink and white sequins, some tiny die cut hearts that I misted with Tattered Angels' Mint Julep Glimmer Mist, and a die cut coffee mug.
|


|
|
Bookmarks
|

|
So, bookmarks aren't planner specific, but that's great! They have multiple uses, and SO EASY to make!
The long skinny one you see is just a strip of scrap paper that I found, and cut a flag on the bottom of it. I stamped and embossed the sentiment in gold, and then added an eyelet and Canvas Corp cord on the top.
The other bookmark is a magnet bookmark. I got some Heidi Swapp magnet bookmarks and I love them! I decided to try to make my own. I used some Canvas Corp paper die cut it with a Lawn Fawn Journaling card die. I scored and folded it in half, and then adhered some magnets to the insides. Then, all you need to do is decorate it and clip it on your page!
So, that's what I have been up to lately in my planner. I'll add some links to some products that I used below.
Happy Crafting!
 |
 |
 |
 |
 |
 |
 |
 |
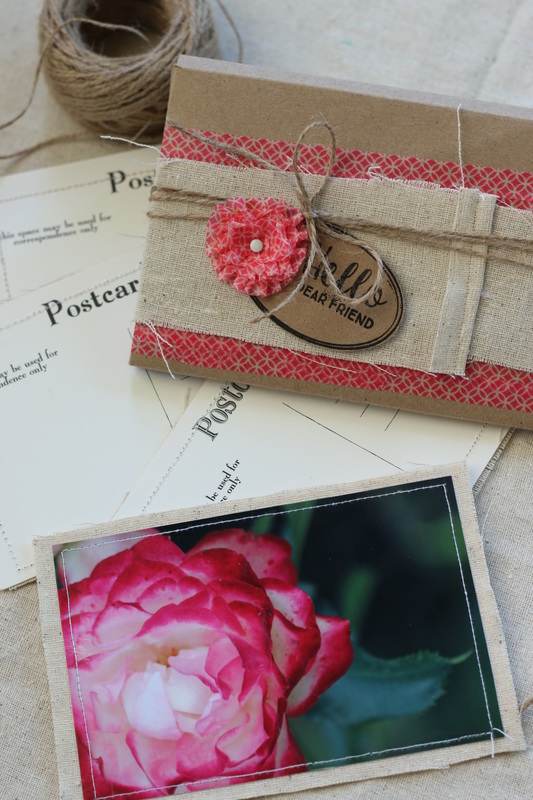
CCB has some fun postcards in their shop that I used for this project. I started out by cutting the postcards down to size from the 12x12 sheet (they also have precut postcards available, but this is what I had on hand). Then, I cut a piece of canvas fabric just a tad larger than the postcard. Then I adhered the canvas to the postcard and my photos to the canvas.
To add a border and to make sure all the layers stayed together, I also ran along the edges with my sewing machine. It's that easy!
To bring the whole set together I also made a fun little box to put them in. I have the whole process and instructions in this video.
Enjoy!
Happy Crafting!
 |
 |
 |
 |
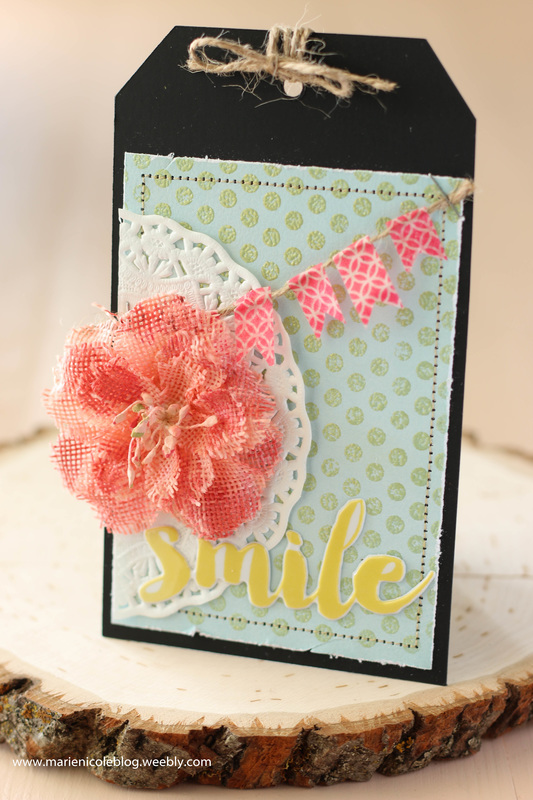
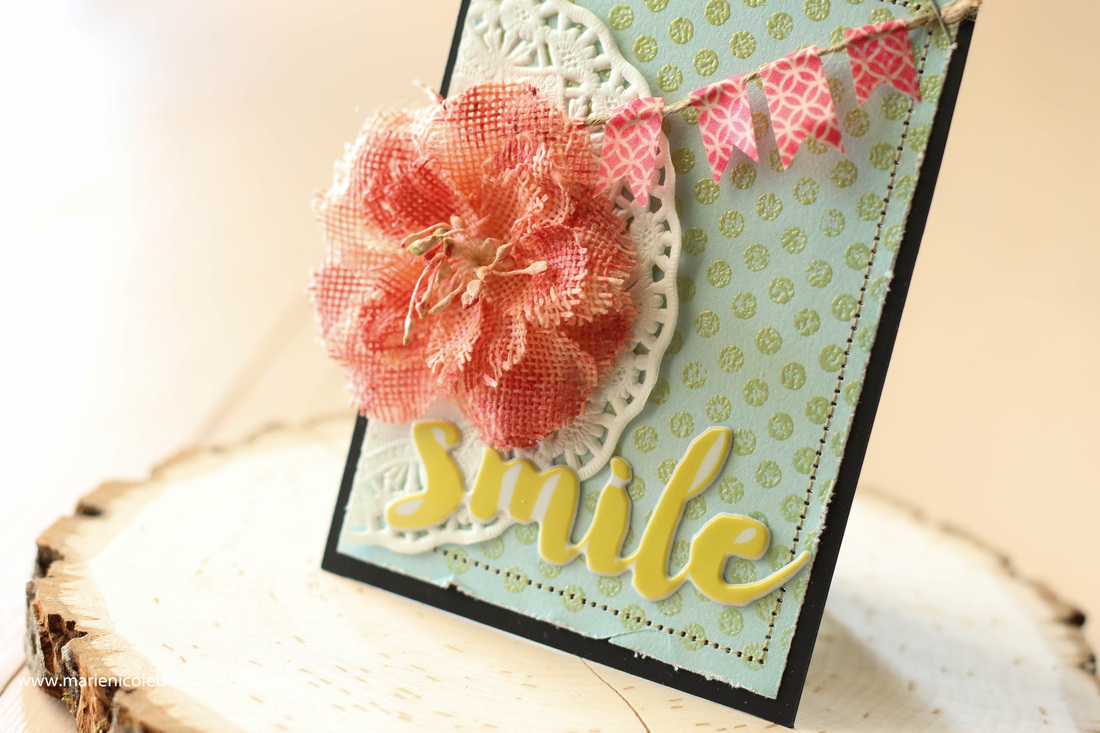
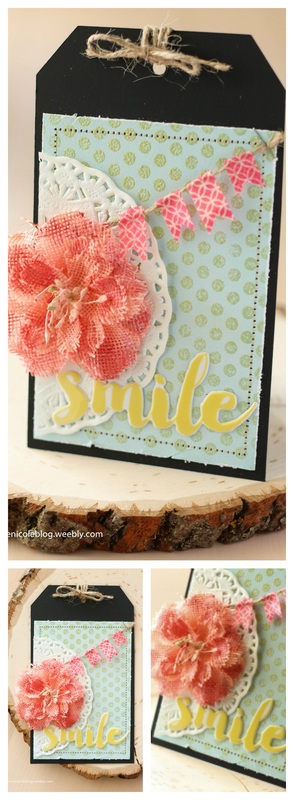
For this tag, I used some of CCB's Chalkstock. The first time I felt this paper I was in awe of how luxurious it felt. Its super thick and has such a smooth texture to it. Being chalkstock, you can write on it with chalk, but I chose to use it as the base for this tag.
I cut out a tag shape using my Cricut. This chalkstock is thicker than my regular cardstock, so I had to set the pressure on my machine a little deeper. Once my tag was cut, I went through my box of embellishments and picked out a few I liked. I ended up using some goodies by Fancy Pants Designs' Attwell collection.
I cut a little piece of light blue cardstock and embossed some polka dots on it. Now, for the yellow embossing, I actually mixed some PearlEx pigment with clear embossing powder. I had never done this technique before but it actually worked pretty well!
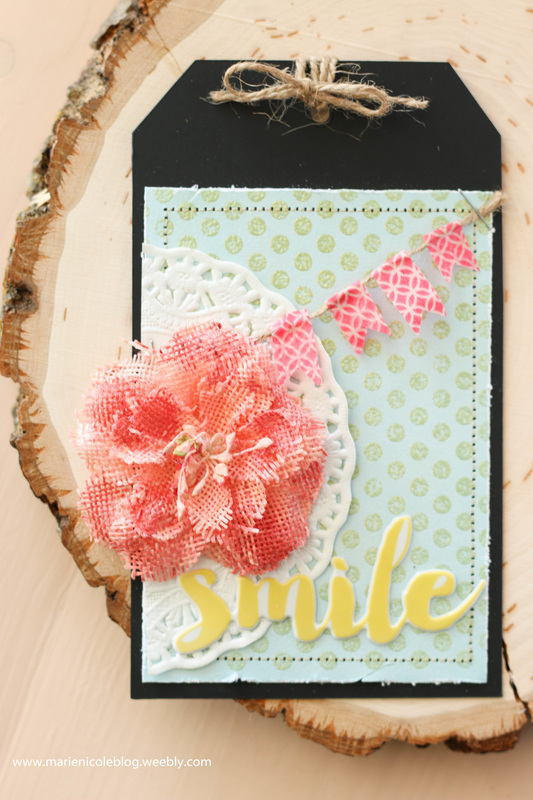
I added a little mini banner using some twine and washi tape.
Lastly, I used a flower from Petaloo and misted it using Tattered Angels Wedding Pink Glimmer Mist as well as a few splashes of Vintage Pink Glimmer Mist.
I stapled the banner down, and then glued on the flower, and that pretty much finished this tag!
Happy Crafting!
 |
 |
 |
 |
 |
|
 |
 |
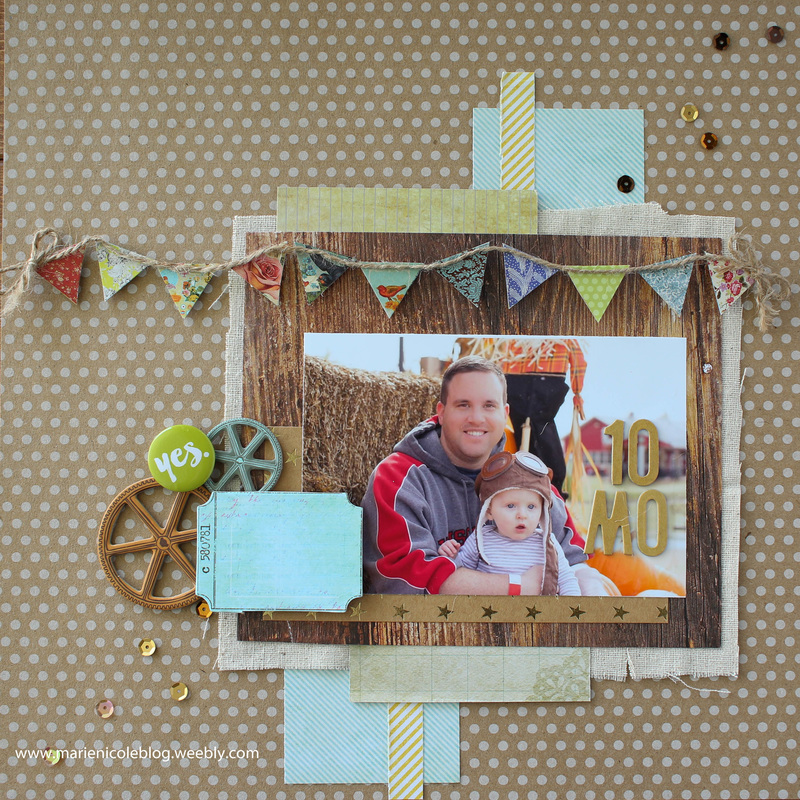
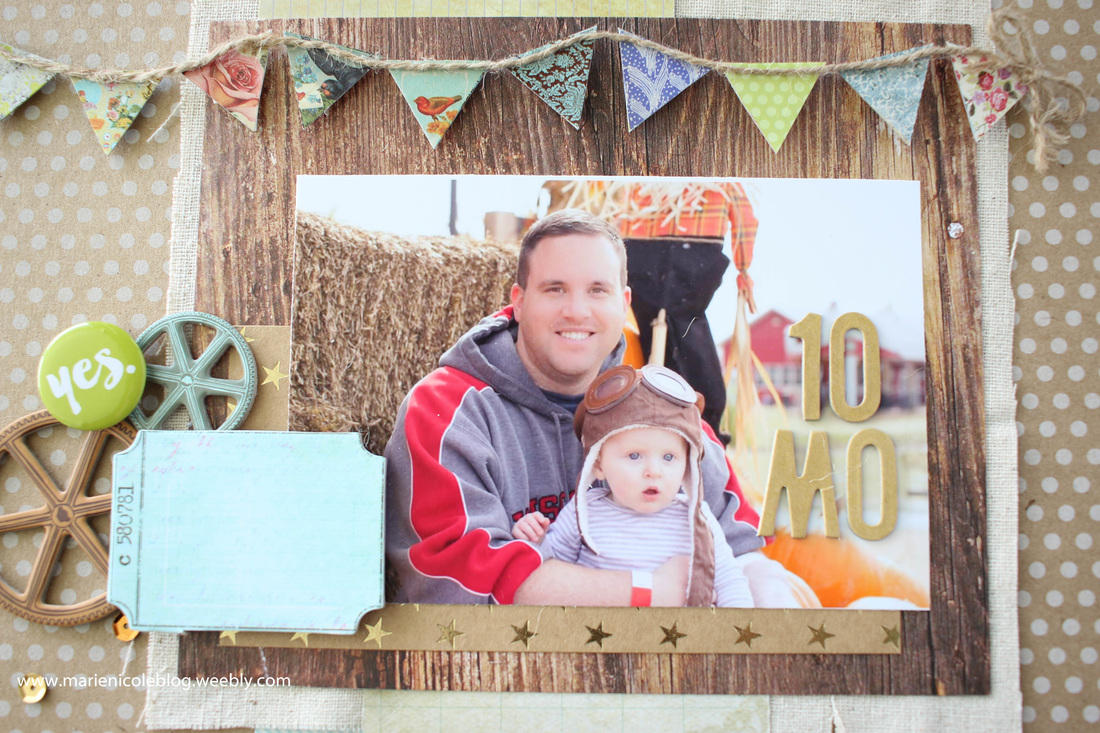
That's what I think to myself as I inch closer and closer to getting all 12 of Hayden's first year layouts done! We are done with 10, just 2 more!
It's taken longer than it should, but I feel its better to take my time and make memorable pages than to just try to rush them.
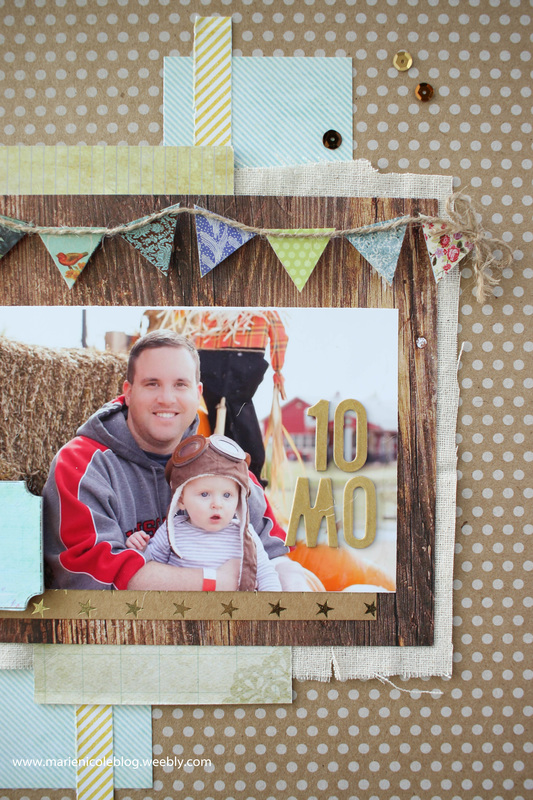
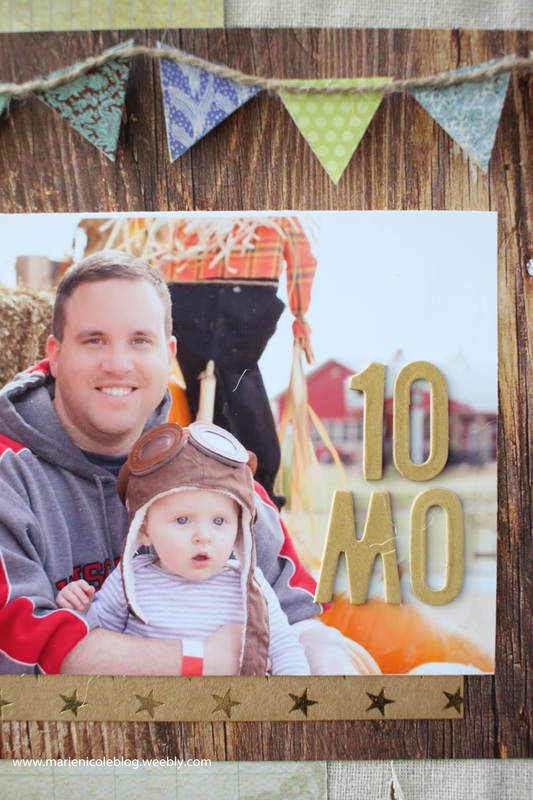
I wanted the page to look kind of fallish but it ended up looking more like an amusement park theme. Haha. No worries, I still like how it turned out
I used mostly scraps from my stash and a few embellishments here and there.
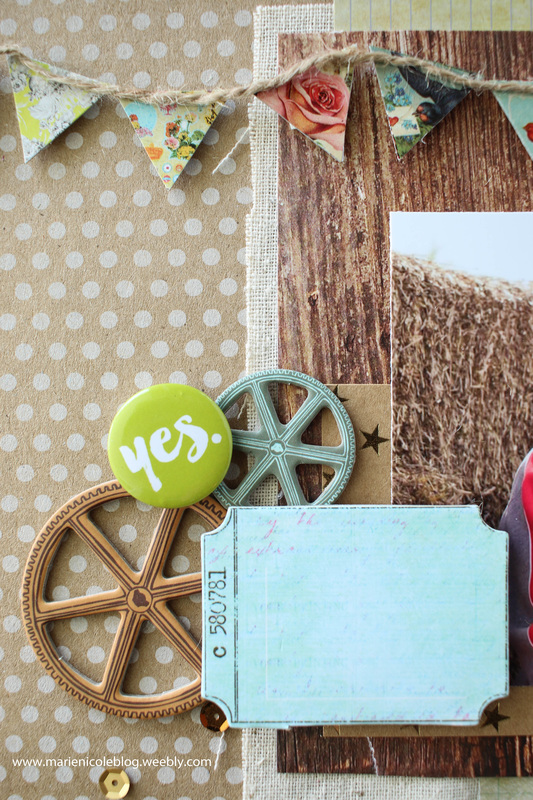
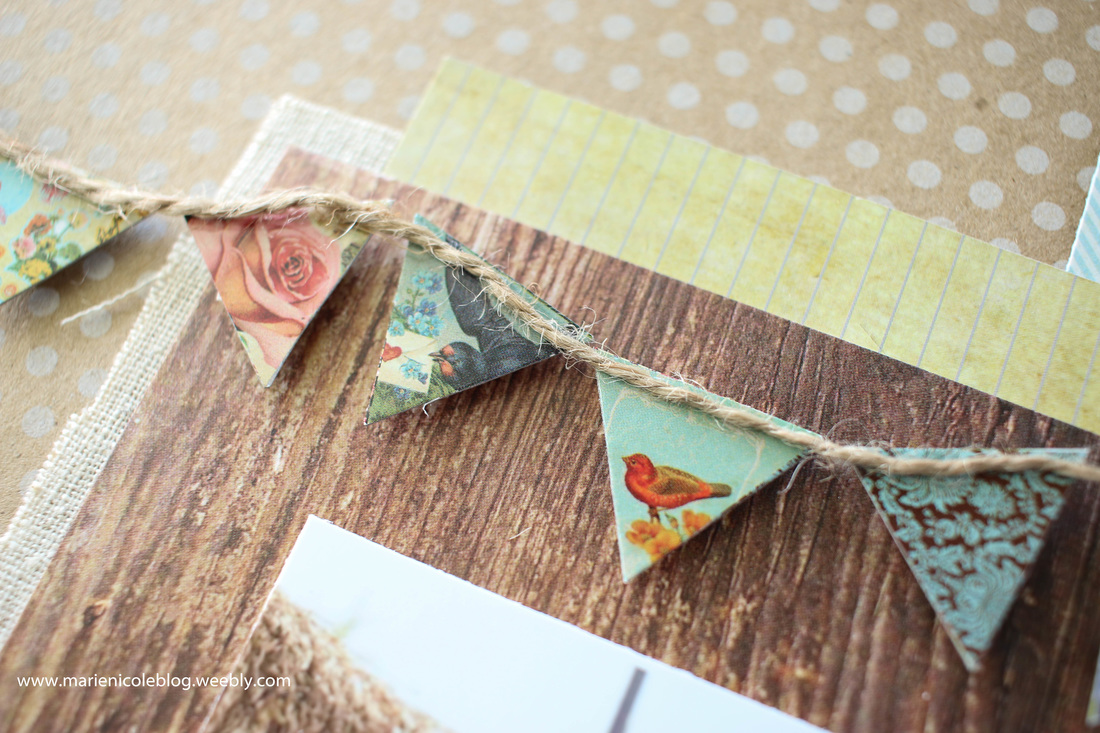
The little banner was created from the packaging from the chipboard pieces. I thought it was so clever how Prima included that little "bonus" into their package. Since I usually end up using the packaging in my projects anyway, this was perfect!
I also took a process video of how I put it all together.
Enjoy!
I wanted to share the items I received from these swaps, because I just can't bear to get these beautiful pieces and then put them away where no one will see them. That totally goes against what creating is about- SHARING!
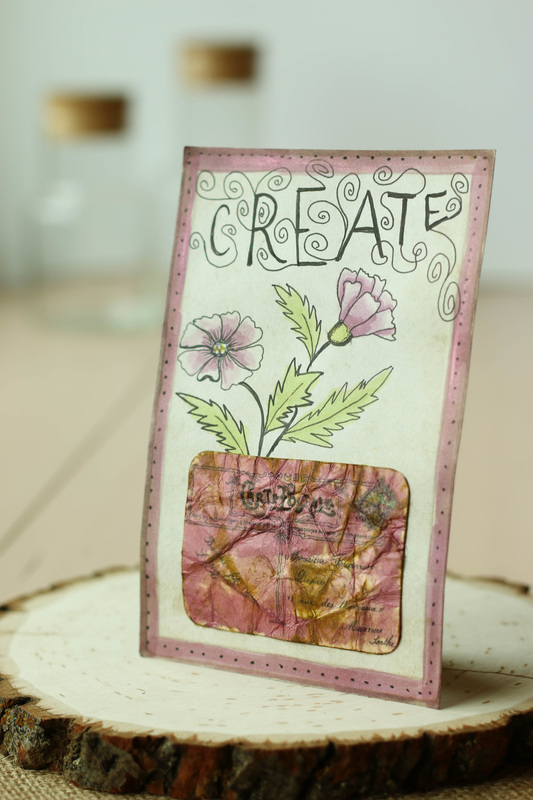
This first photo is my postcard that I received from Kim over at Craftisan Studios. When I first took this postcard out of the envelope I thought the flowers were a stamp that she colored in, but after reading her little note on the back, I learned that she drew it! Isn't it amazing? I wanted to get a good photo of it so you could see the lovely details she added.
Thanks so much, Kim!
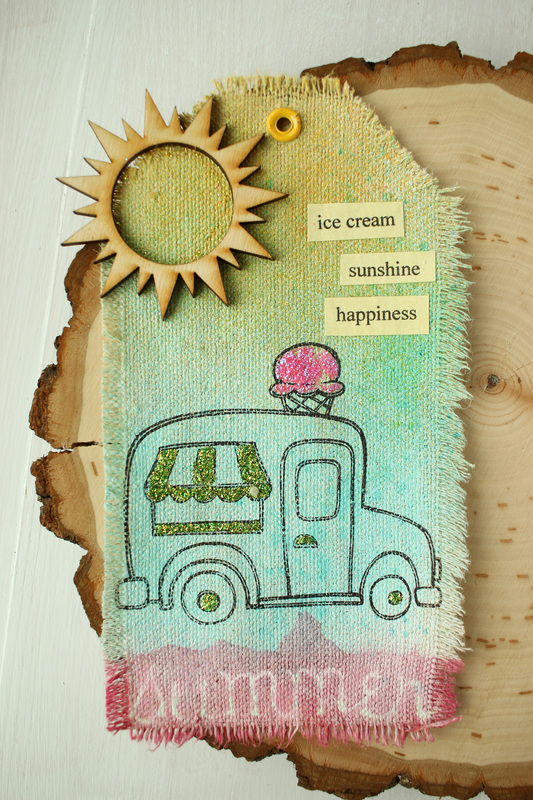
For the tag swap that I took part in, my swap buddy was Midge from Midge and Madge Mingle. She sent me this adorable little ice cream truck tag, and she explained that she used some Canvas Corp canvas fabric for the tag itself, and then added her embellishments on top.
Its so cute and summery!
I absolutely love getting to know more people in the crafting community and I look forward to future swaps! If you are interested in any CCB swaps, or are just looking for inspiration, giveaways, challenges, and more crafty fun, join the Canvas Corp Brands Collective group on Facebook.
See you there!


Author
So glad you found me! This blog is my little space where I can share bits about my life and my latest crafting projects (mostly handmade cards). My goal is to share, inspire, and to be a positive presence in the creative community.
Take a look around and stop by anytime!


Find me on Instagram!
Archives
January 2018
December 2017
November 2017
October 2017
September 2017
July 2017
June 2017
May 2017
April 2017
March 2017
February 2017
January 2017
December 2016
November 2016
October 2016
September 2016
August 2016
July 2016
June 2016
May 2016
April 2016
March 2016
February 2016
January 2016
December 2015
November 2015
October 2015
September 2015
August 2015
June 2015
December 2014
October 2014
July 2014
May 2014
April 2014
March 2014
February 2014
January 2014
Categories
All
Albums
All Cards
ATCs
Birthday Cards
Brutus Monroe
Canvas Corp Brands
Cards
Christmas
Christmas Cards
DIY
General Cards
Get Well Cards
Halloween
Home Decor
Love Cards
Mixed Media
Papercraft
Planner
Punny Cards
Scrapbooking
Shaker Cards
Special Occasion Cards
Summer And 4th Of July
Tags
Techniques
Thank You Cards
Toddler Art
Tombow
Tutorials
Watercolor
Link Love


 RSS Feed
