Tombow has teamed up with some amazing companies to bring you some fun inspiration in honor of National Scrapbook Day! This whole week I'll be sharing projects and fun products from some amazing craft and scrapping companies that include:
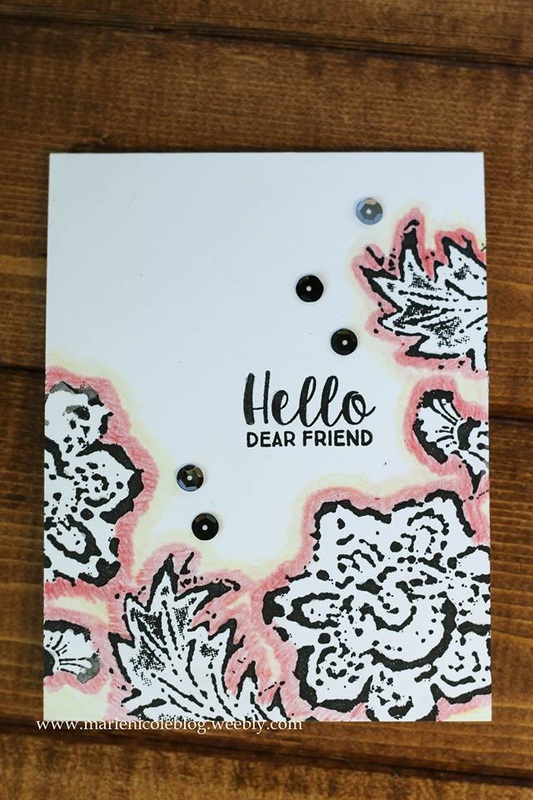
Tombow USA Graphic 45 Stampendous! Fancy Pants Designs Art Impressions Simple Stories Canvas Corp Brands For this card I used Stampendous! Fiesta Stamp set and added color using Tombow's Irojiten Tranquil Coloring Set. First I used the stamps to create a fun border around the bottom of this card. Then, I took Tombow's Crimson colored pencil, and their Straw Yellow colors to color around the outside of the stamped images. Then all that was left was to stamp the sentiment and add some black sequins! I did also brush on some silver Wink of Stella to add some shimmer. Thanks so much for stopping by!! I managed to put together a process video, so please watch and enjoy. Happy Crafting!!
Check out some fun products I used!
0 Comments
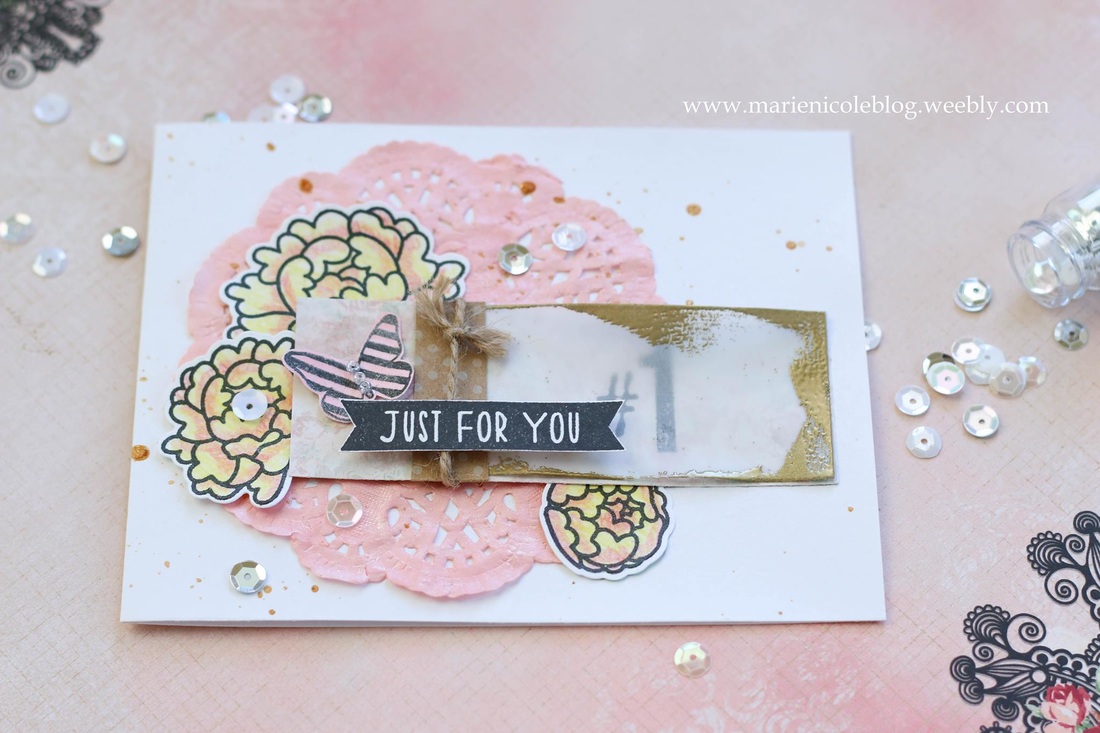
I made a quick video last week sharing how easy it is to color your stamped images with Tombow's color pencils. Today I'd like to share with you just how I used those stamped peonies!
First I took a paper doily and colored it using some Wedding Pink Glimmer Mist. You have to be careful with the doily while it is wet, though. The paper is so thin that it tears easily. I built the little tag in the center by taking a piece of floral paper and placing a piece of vellum over it that I embossed the edges with in gold. Then I tied a little bit of twine around and added a stamped butterfly which was also sprayed with Tattered Angels Mists. I stamped and added the "just for you" sentiment, adhering it down with some foam squares. I also took some Glimmer Glam in Camel and added some golden splatters to the background. After all things were in place, I arranged my colored flowers around the vellum tag, adhering them down with Tombow's Stamp Runner adhesive. To finish, I added some white sequins. 
Thanks for stopping by and happy crafting!
I'm linking this card up with:
Simon Says Stamp's Monday Challenge! 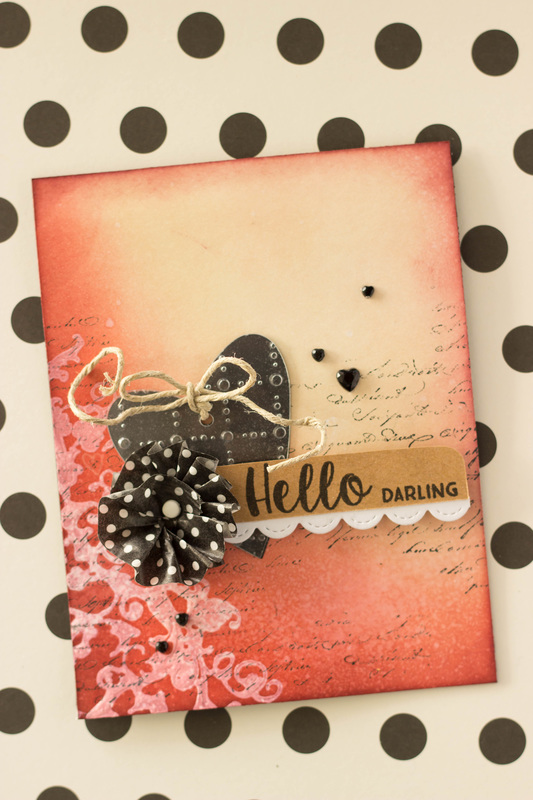
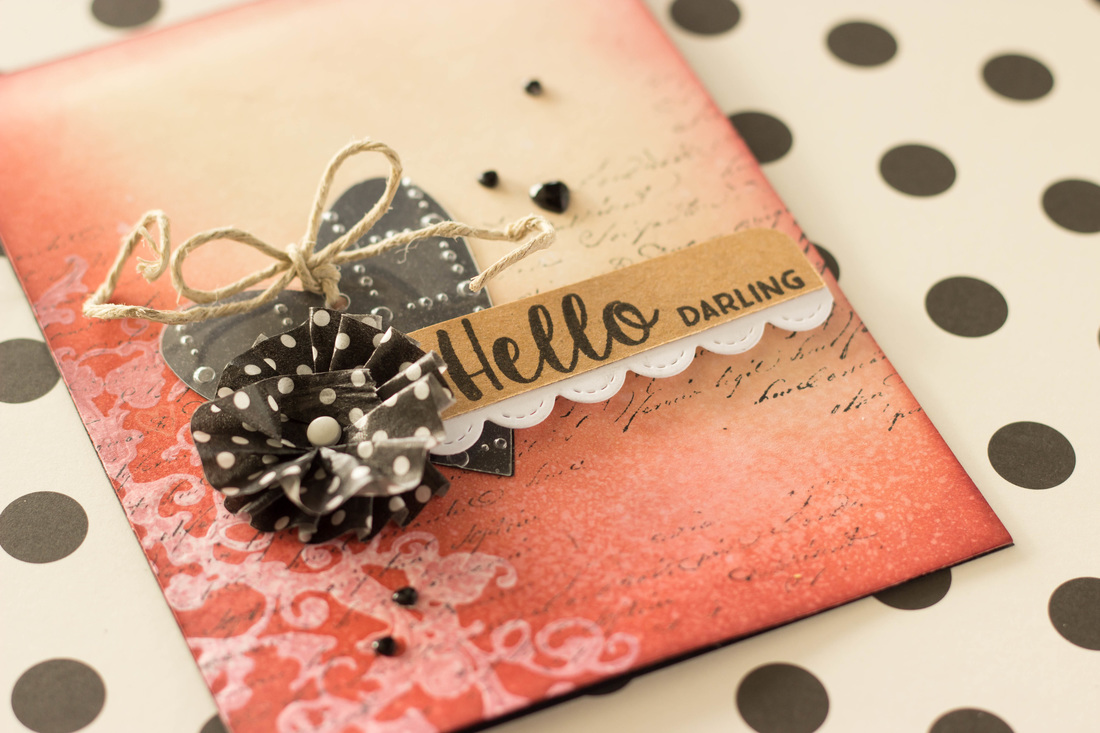
I have been playing around with gesso lately, and I did a little stamping with it on this card. You can see on the bottom left corner the scroll design that was stamped with gesso, and then over that I used several colors of Distress Inks to create a resist. After the ink was applied and blended, I stamped some scripted writing over the top of it, Then, to finish the background I spritzed it with some Tsukineko shimmer mist.
For the embellishments, I cut the heart first out of black cardstock, and then again out of acetate. The acetate I also ran through my Sizzix with an embossing folder to give it some texture. Then, I punched a hole at the top and tied some twine into a bow. The polka dot flower I made by ruffling some washi tape onto a carstock circle and then adding a brad in the center. My sentiment was stamped using Avery Elle's Peony stamp set. I also added a little scalloped border from a die from Lawn Fawn. I absolutely LOVE this die set. I have used it many times and it always looks fantastic! My sentiment was then adhered with foam adhesive to give it some dimension. For a finishing touch, I added some black heart rhinestones. Here's some fun products I used!

I tried a new technique with this card. I used my Heidi Swapp woodgrain background stamp to stamp some white gesso, and then after it was dry, I blended in some Distress Inks to color it. It created a resist effect that I really like. Ill have to practice this technique more in the future.
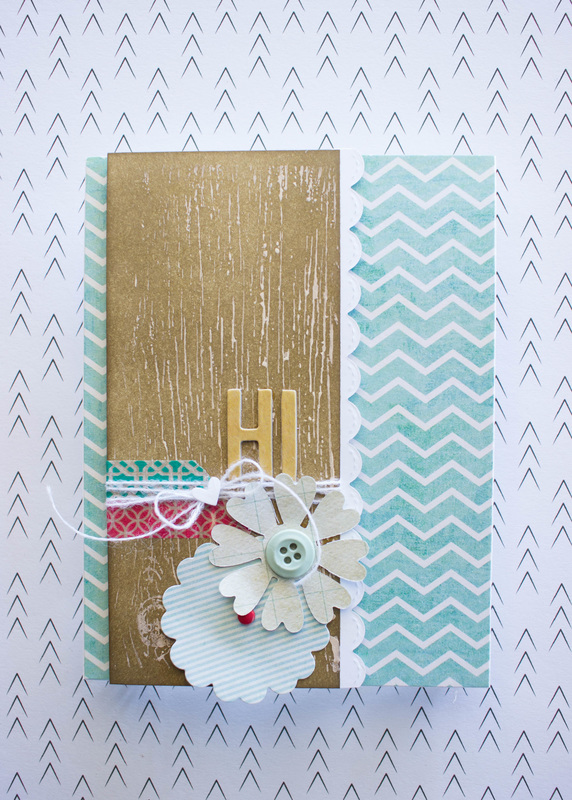
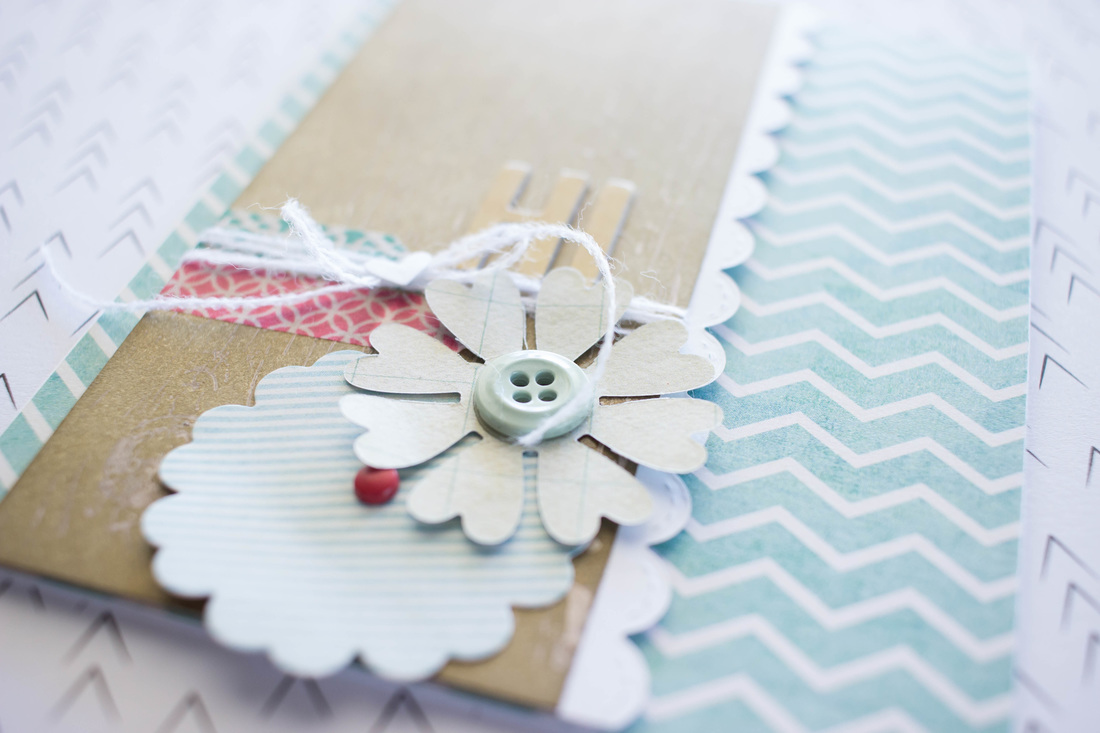
After the woodgrain panel was finished, I picked out some fun background paper and some other bits and embellishments to coordinate. The chipboard letters are actually from Target's dollar section, the flowers are die cut with my Sizzix, and I probably couldn't even tell you where I picked up the washi tape. Anyway, I added a scalloped border to the side of the woodgrain panel and then adhered it all down on a piece of fun foam to give it some dimension. I love how all the patterns and papers coordinate to create this fun card that can be sent for almost any occasion! Here's some fun products I used!
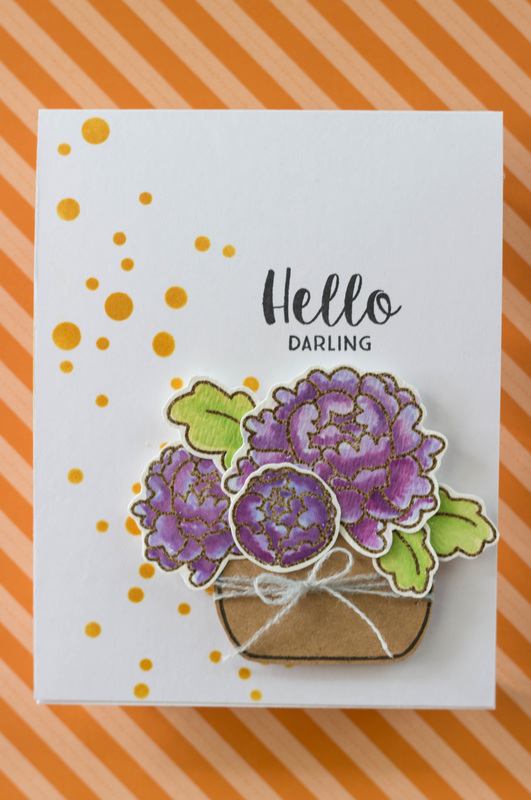 I am currently loving on this stamp set by Avery Elle. The peonies are so much fun to watercolor! I started by stamping and embossing the peonies onto watercolor paper, and then used Distress Ink to color them in. I then cut the vase from kraft cardstock. I did have a patterned paper for the vase, but decided it looked a bit too busy, and I really wanted the flowers to stand out. I then used Heidi Swapp's Confetti stencil to add some orange dots to the background. Stamped the sentiment in black, adhered the flowers with foam adhesive, and called it a day! I love when I can make pretty cards quickly, since my little guy doesn't take long naps these days! 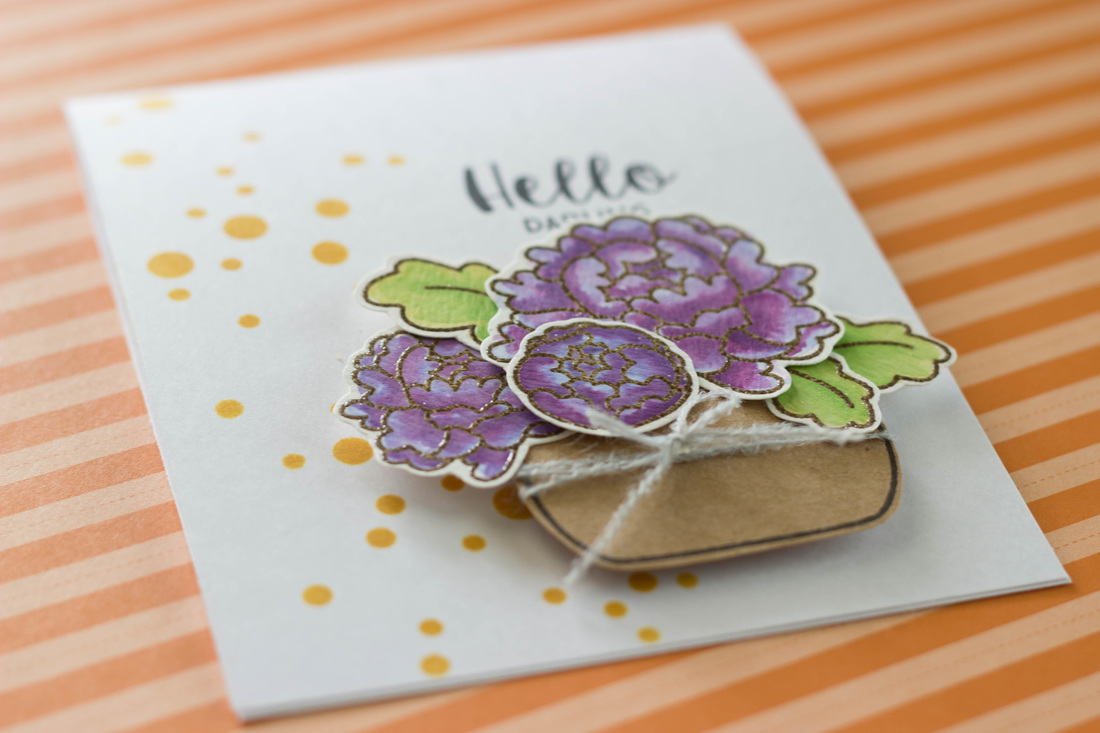 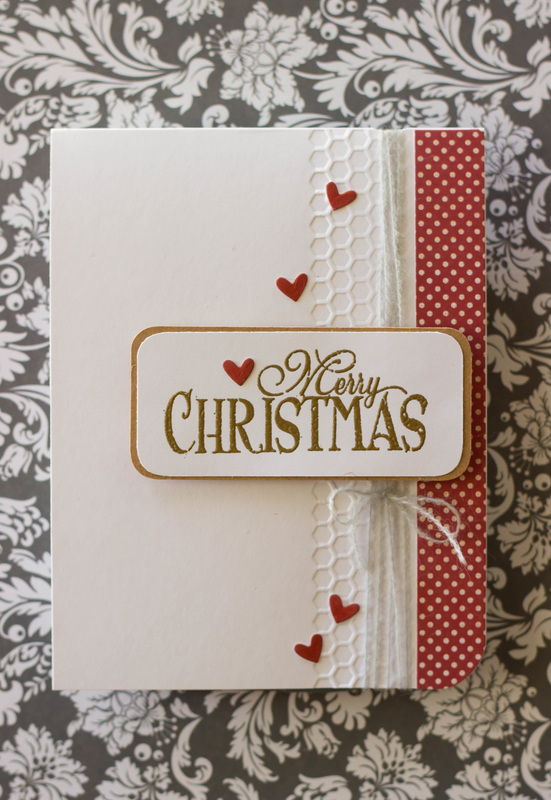 I have a very simple card to share with you today. Sometimes you just don't have a lot of time to whip something together, but that doesn't mean it can't look nice! I always try to get a head start on my Christmas cards because I definitely am not the kind of person who likes being in a rush last minute. For this card I just took a white card base, and adhered some red polka dot paper on one side. Then, I rounded that bottom right corner. I thought it needed a little bit more, but didn't want it to be too overdone, so I just ran it through my Sizzix with a small honeycomb embossing folder. Then, I added some string for a little more texture. The sentiment is stamped and embossed in gold, and matted on some kraft cardstock. The edges of that is rounded, as well. I then adhered the sentiment over the string with some foam adhesive. For a finishing touch and to tie the red together, I added some Sizzix cut hearts that I colored with some Distress Ink. Again, its simple, but it would be an easy one to make multiples of! 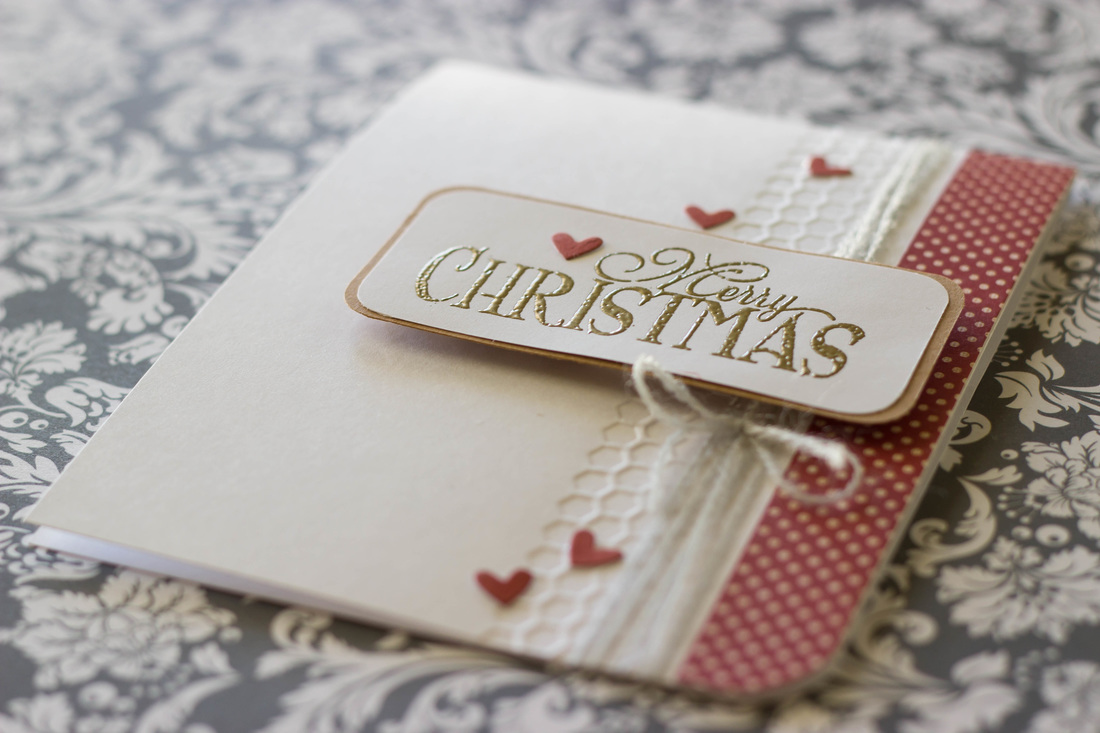 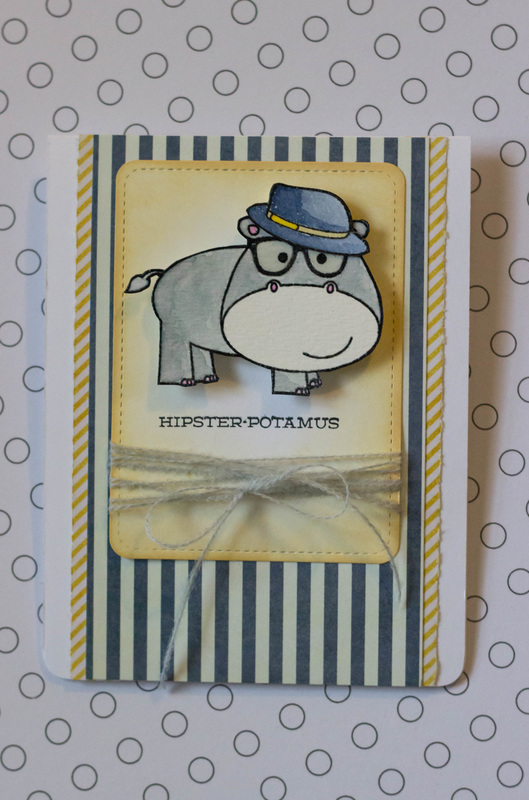 I'm not quite sure if its pure coincidence or if was meant to be, but it just so happens that World Card Making Day and my birthday are both today!! Just too perfect, if you ask me. Anyway, I had so much fun making this card with the stamp set my husband got me for my birthday. If you have seen any of my recent cards you can probably tell Im kinda into puns lately. They just make me laugh. I started by stamping the hippo in distress ink and then embossed it with clear embossing powder over the top. It gives it a shiny finish and also doesn't run with the other colors while Im painting in the image. I used a brush and some more Distress Inks to color in the rest of the hippo. You can probably tell Im still working on my shading skills. Definitely needs improvement but I still have fun with it! I added some Glossy Accents to the hippos glasses and set him aside to dry while I worked on the card base. I found some cute striped paper, and added some yellow stripes to the side. I then cut a stitched note card with my Sizzix and shaded it in with some Distress Ink to match the yellow on the sides. I adhered the hippo, added some string, and stamped the sentiment. Finally, I chomped the bottom corners and it was finished! Definitely simple, but I think it turned out so cute! Happy Card Making Day!!! Im linking this project up with: Simon Says Stamp!! Simon Says Stamp Wednesday Challenge! 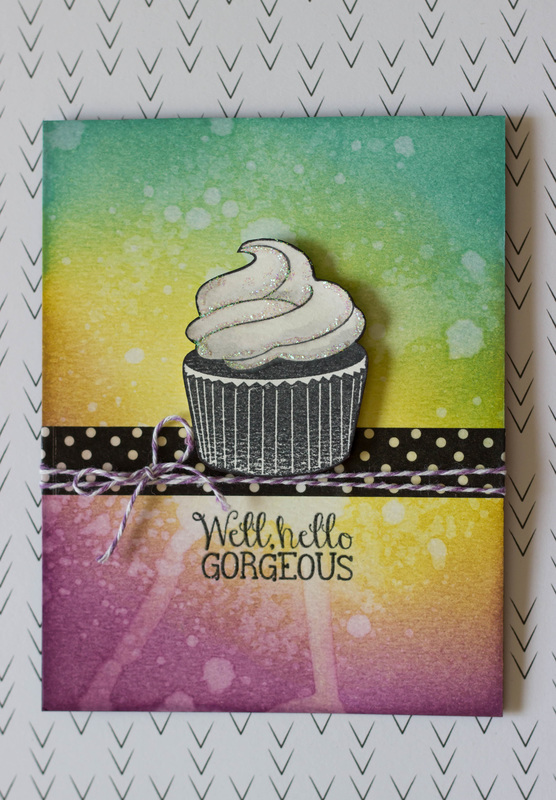 I'm sure I've said it before, but I'll say it again... I love my Distress Inks!! I used them for the background of this card. Started with the darker colors at the ends and then blended them together with a lighter color in the middle. Then, to add some texture and interest, I splattered some water on it.
I stamped the cupcake in black, and kept the colors very bland. I figured since the background was so bright and colorful, the contrast with a more muted cupcake would be nice. The rest of the card is very simple, as well. Just some polka dot washi tape and a little purple baker's twine. I stamped and embossed the sentiment and added a little bit of stickled to finish it off. Im linking this card up with: Simon Says Stamp's Monday Challenge! 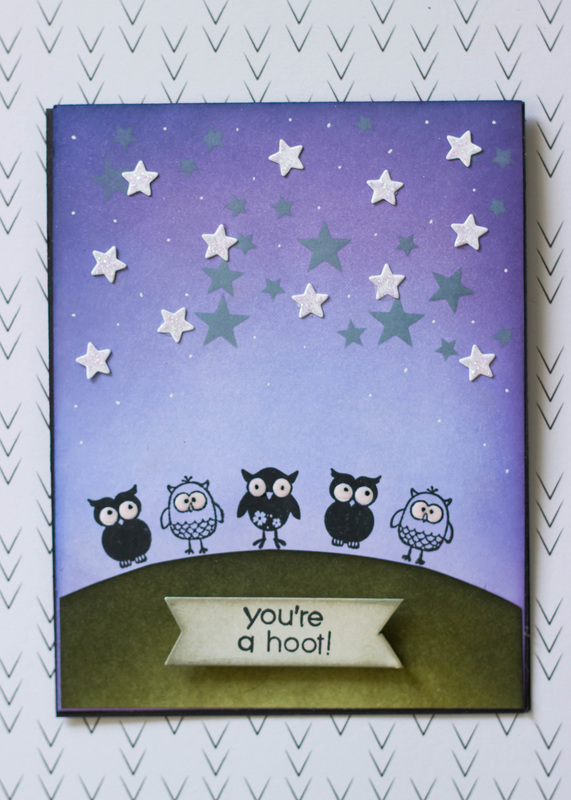 I had a lot of fun putting this card together. I've been practicing with my Distress Inks a lot lately, and trying to improve my blending. I thought I'd try to create a starry night sky. I blended a few shades of purples together, starting with the lightest shade at the bottom and working my way up, ending with the darkest shade at the top. Then, on top of the night sky, I stenciled in some dark stars with Heidi Swapp's Confetti Stencil. Then, I cut a curved piece of cardstock for the grassy hill, and used some darker greens to ink that up as well. I stamped the little owls in black on top of the grass. With my Sizzix I cut out some little white stars and adhered them up in the sky as well, finishing them off with some stickles. I used my white gel pen to add some dots in the sky, as well as coloring in the owls' eyes just to make them pop. Finally, I added some Glossy Accents to the owls' eyes, and popped the sentiment up with some foam squares. I love how all the different elements came together to make a totally different style of card than I'm used to making!! Im linking this card up with: Simon Says Stamp's Wednesday Challenge Simon Says Stamp's Work It Wednesday 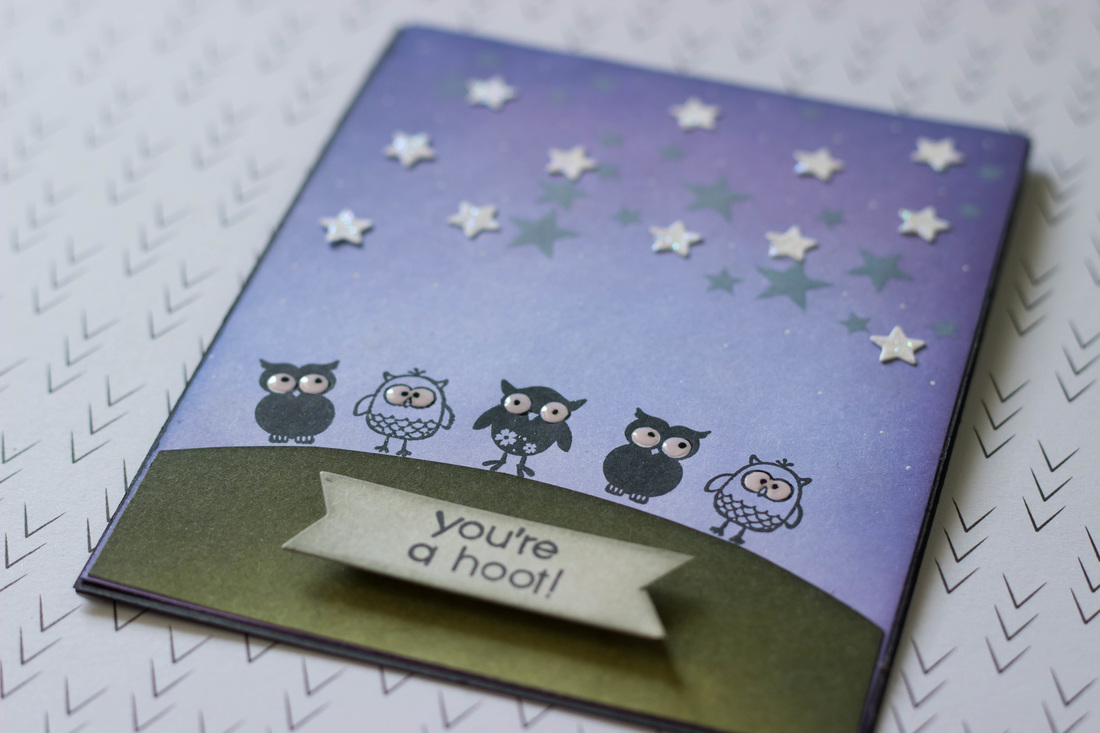 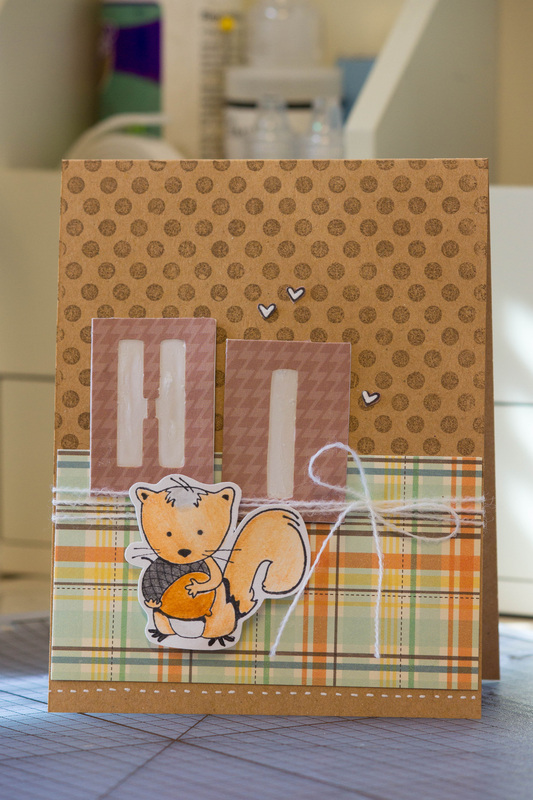 So I realize I've been away from the blogging scene for way too long. With our recent move my attention has been away from my cards. I did manage to check out this week's Monday Challenge blog at Simon Says Stamp, though. They want to see all our fall creations. If you know me, you know I love fall!
I stamped our little squirrel friend and then colored him in with watercolor pencils. Then, as he was drying, I stamped the polka dot background on some kraft cardstock. Searching through my scrap pile I found a plaid printed paper that matched perfectly with the overall theme. The letters for "HI" are cutouts that I filled with glossy accents. Unfortunately, I dropped them on their face before they were completely dry, so they got a little smudged. :( Anyway, I assembled everything and added a string bow (of course!) and several small white hearts. Happy Fall, Y'all! |

Pin it!

AuthorSo glad you found me! This blog is my little space where I can share bits about my life and my latest crafting projects (mostly handmade cards). My goal is to share, inspire, and to be a positive presence in the creative community. 

Find me on Instagram!Archives
January 2018
Categories
All
Link Love
 

|


 RSS Feed
